
Here’s a fun project that has TONS of potential. I was originally inspired by Jeanette’s post about these Lollipop Covers several months ago. We made these last week with my Stamp Club. Several asked for the dimensions so here’s a simple How-To Tutorial for y’all! 🙂
Let’s meet the Cast of Characters:

-
Thank You Stamp Set D1361
-
Cocoa Textured Cardstock X5747
-
Everlasting Level 2 Paper Packet X7085B
-
Cocoa Stamp Pad Z2114
-
Colonial White Ribbon Rounds Z1126
-
Foam Texture Tool Z1090
-
Sanding Kit Z1294
-
Hole Punch
-
Lollipop (flat kind…i.e. not for Tootsie Roll Pops)
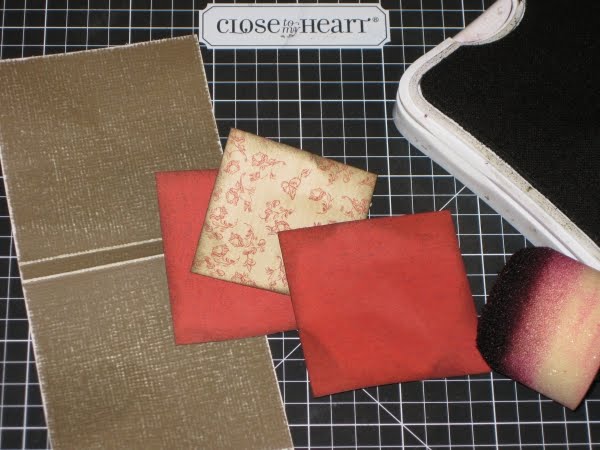
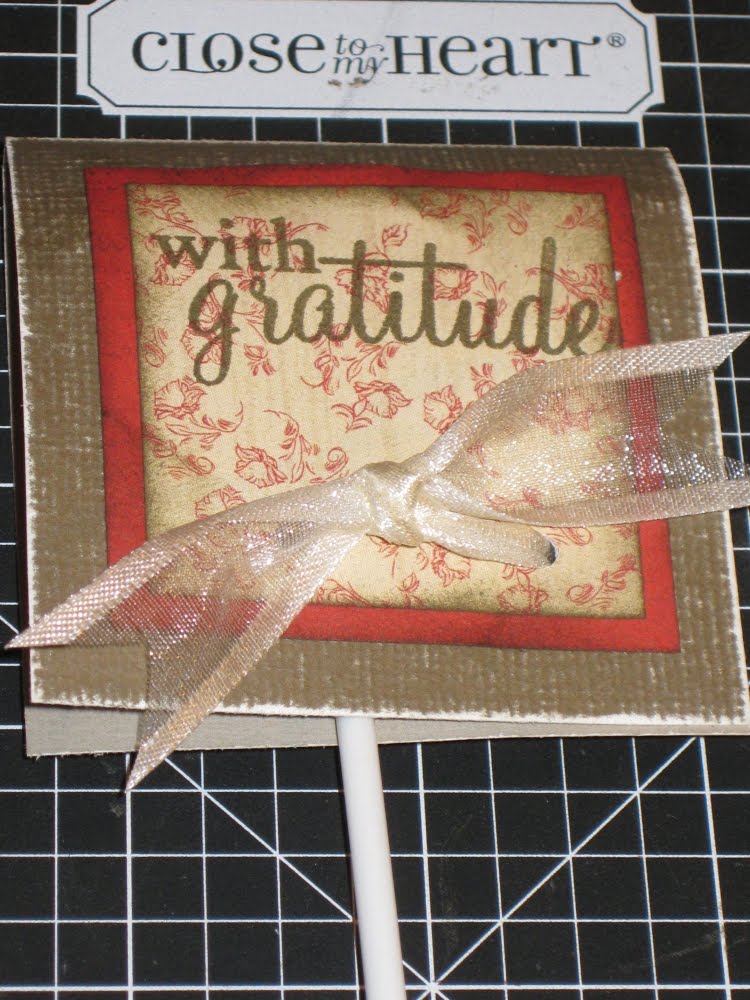
STEP 1: Cut your materials. Cut your Cocoa Textured CS to 2-1/2″ x 5-1/4″ (score at 2-1/2″ from each end as pictured below). Cut two (2) 2″ squares of the Distressed Cranberry B&T Paper from the Everlasting Collection. Cut one (1) 1-3/4″ square of the Cranberry Floral B&T Paper from same Collection. Cut an 8″ piece of Satin Trimmed Colonial White Organdy Ribbon.

STEP 2: Prepare your materials. Using Sanding Block, sand Cocoa Textured CS to expose the white core and better enhance the texture to the CS. Then apply Cocoa ink to all three (3) B&T Papers with Foam Texture Tool.
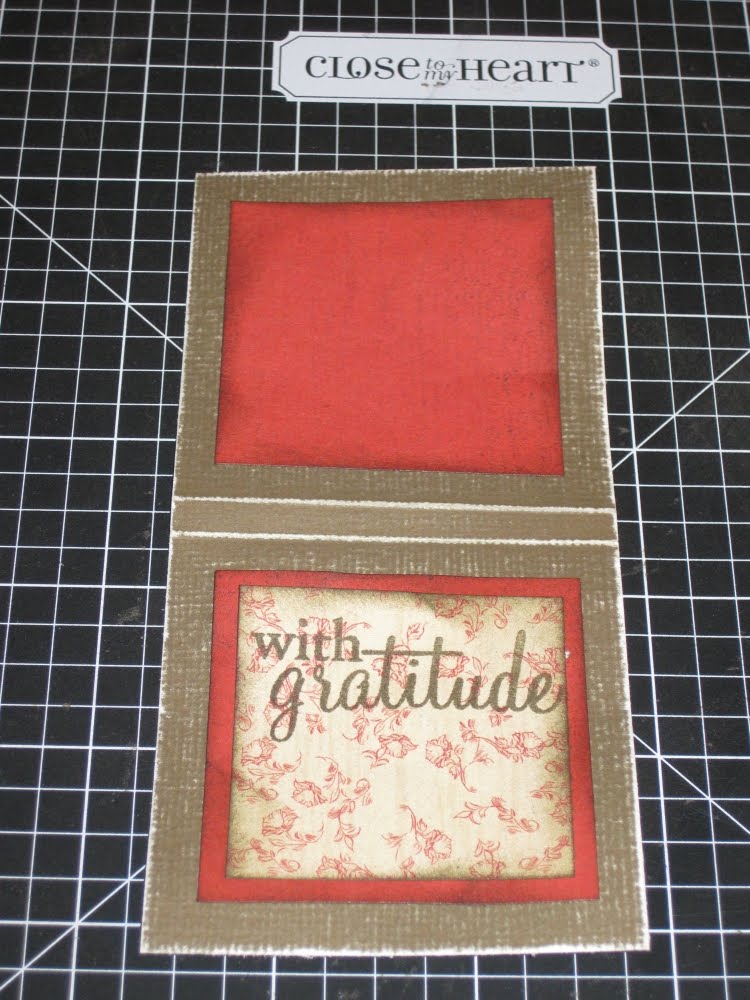
STEP 3: Putting it together. Using Cocoa ink and “with Gratitude” sentiment, stamp image on upper portion of Cranberry Floral B&T Paper. Then adhere to the center of one of the Distressed Cranberry B&T. Adhere this combo to the center of the front panel of your Cocoa Textured CS and then the other Distressed Cranberry B&T centered to the back panel.
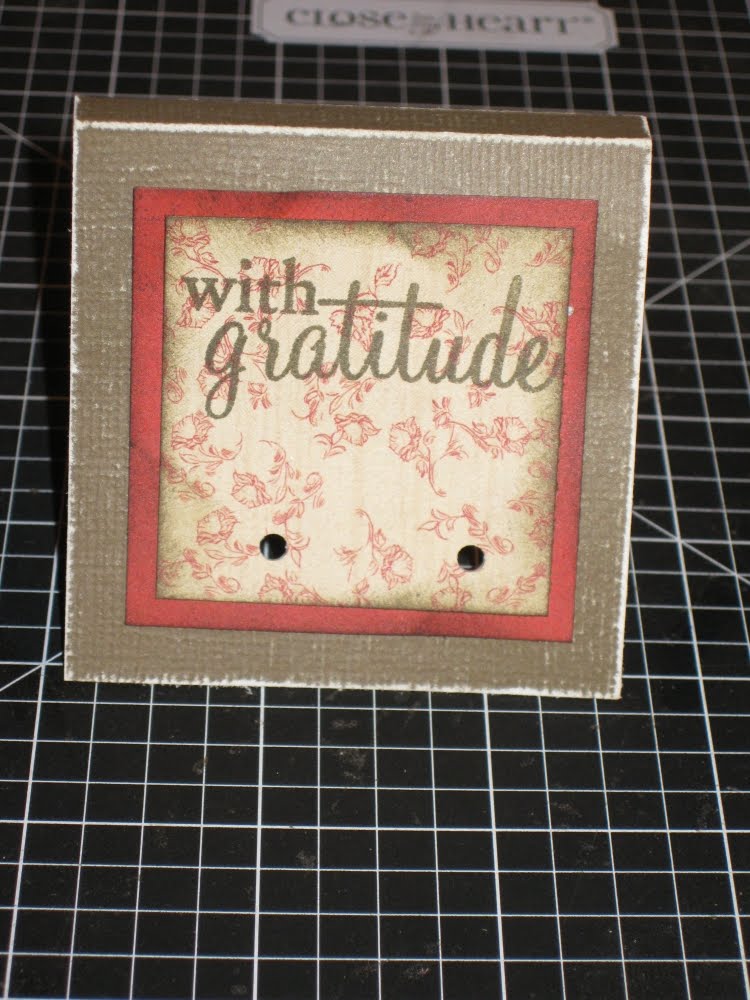
STEP 4: Final preparations. Holding the Lollipop Cover so that the two ends are flush, punch two (2) holes along the base of the Cranberry Floral B&T. (This will create 4 holes–two in the front and two in the back.)
Thread ribbon through 3 of the 4 holes (leaving one of the front holes open).
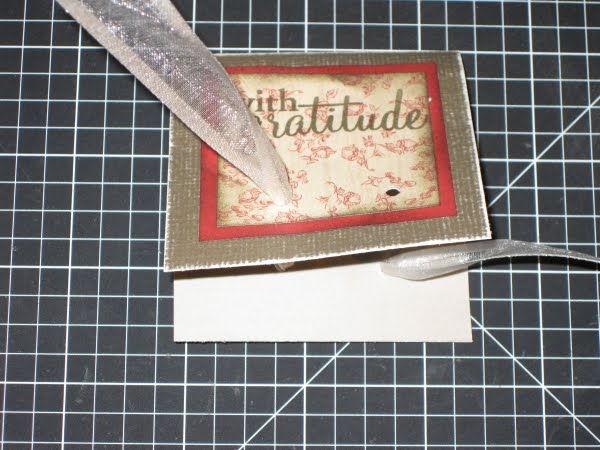
Slide Lollipop into Cover. Then string ribbon through final hole and tie in a knot. Trim ribbon as desired.
On the back of the Lollipop you could write “to & from” or if you wished to use it for Thanksgiving, you could use that for the person’s name and use it as a place setting.
Think Christmas, Valentine’s Day, Easter, Fourth of July, Halloween…and on and on. Enjoy!