
Achieve Successful Results with the Eyelet Blooms Die
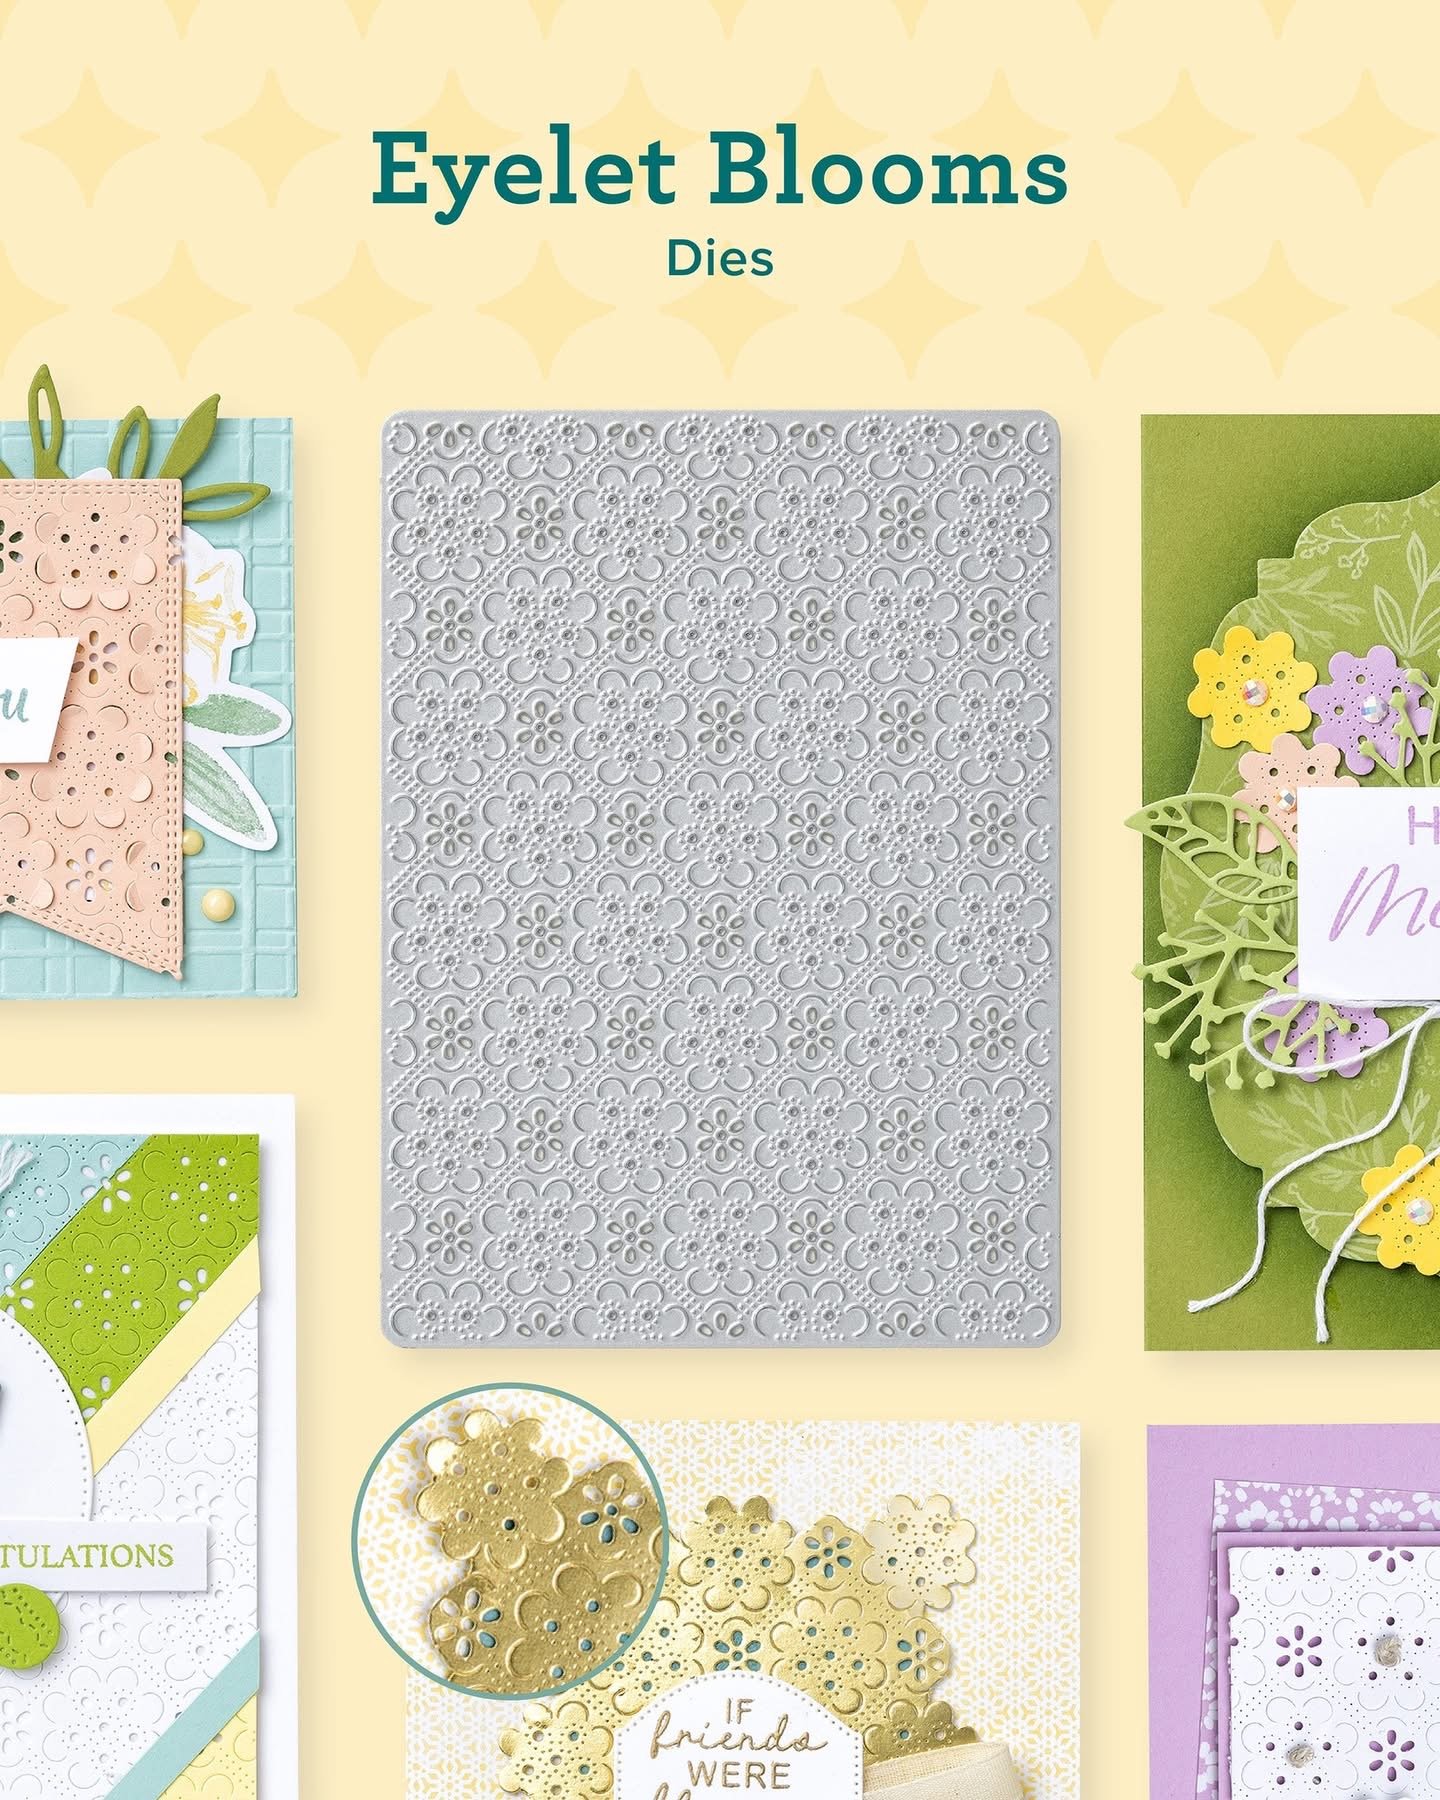
Today I have tips to share with you to help you achieve successful results with the Eyelet Blooms Die. Part of the charm of this month’s Product of the Month is the intricate detail. But that also can present some challenges if you don’t know how to approach it. Dies with delicate designs should be cut a little different than standard die shapes.
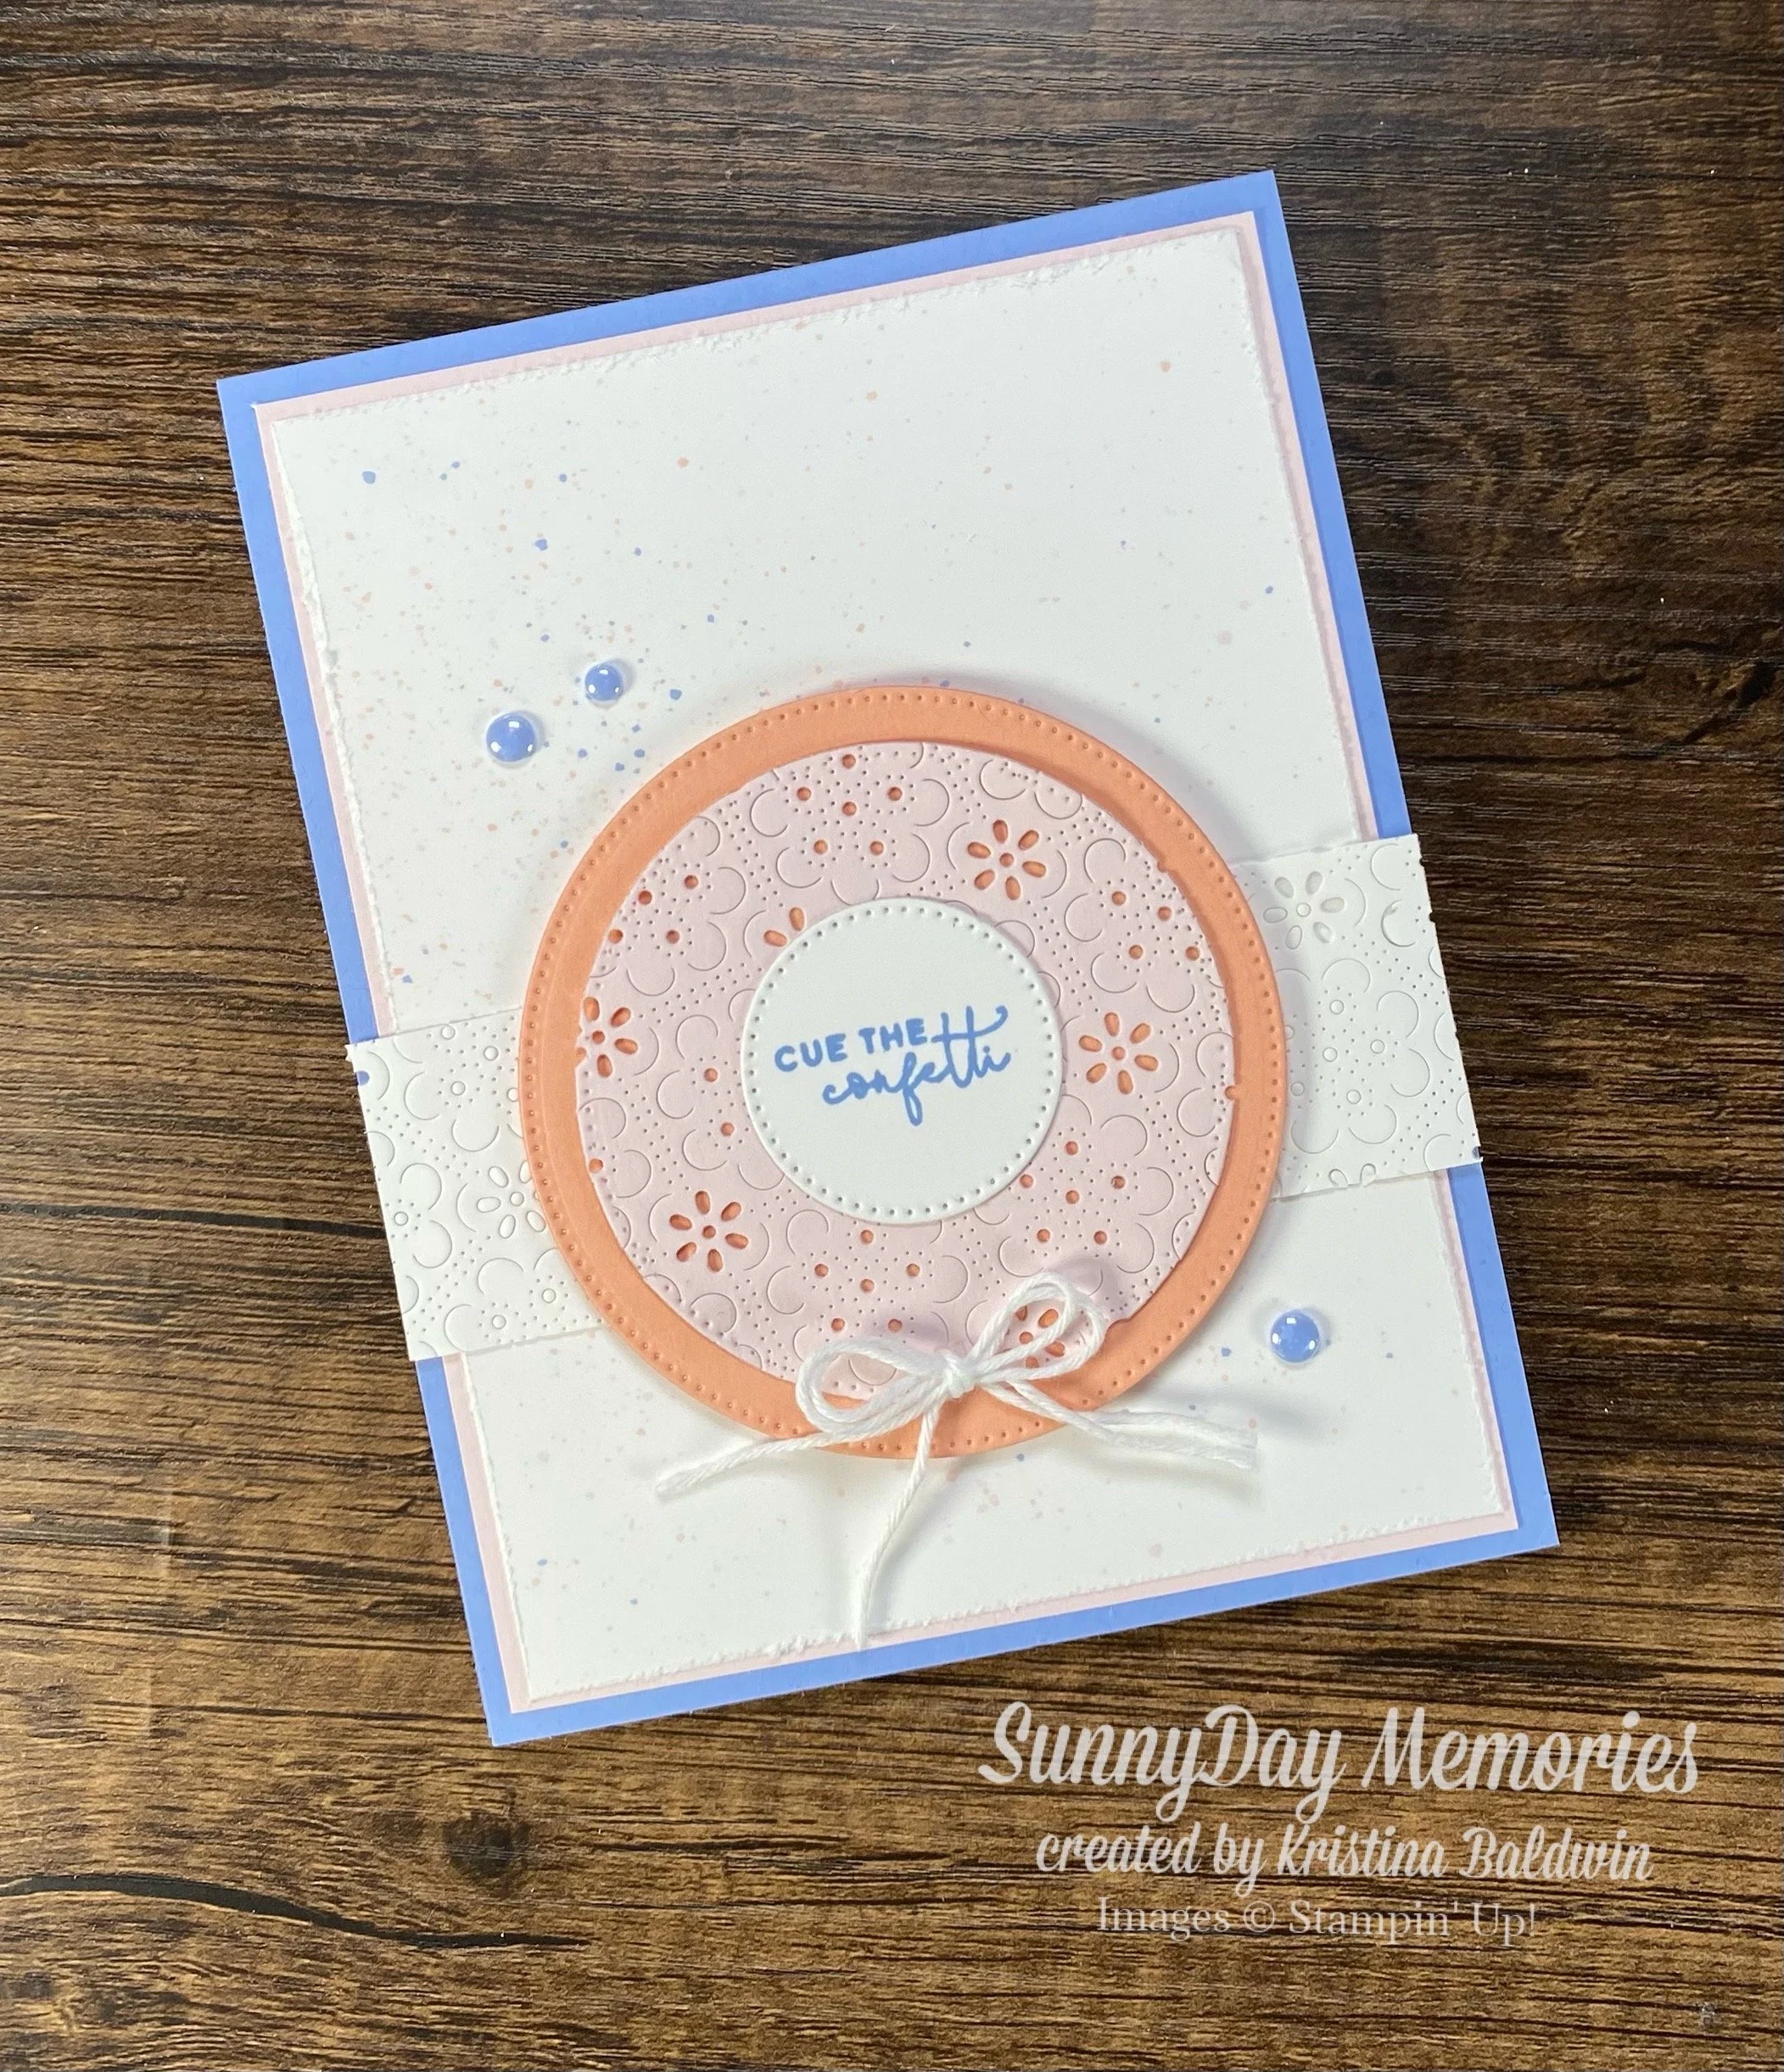
This is the first project I created when I received my Eyelet Blooms Die. I only wanted to include small accent pieces of it rather than a whole background panel.
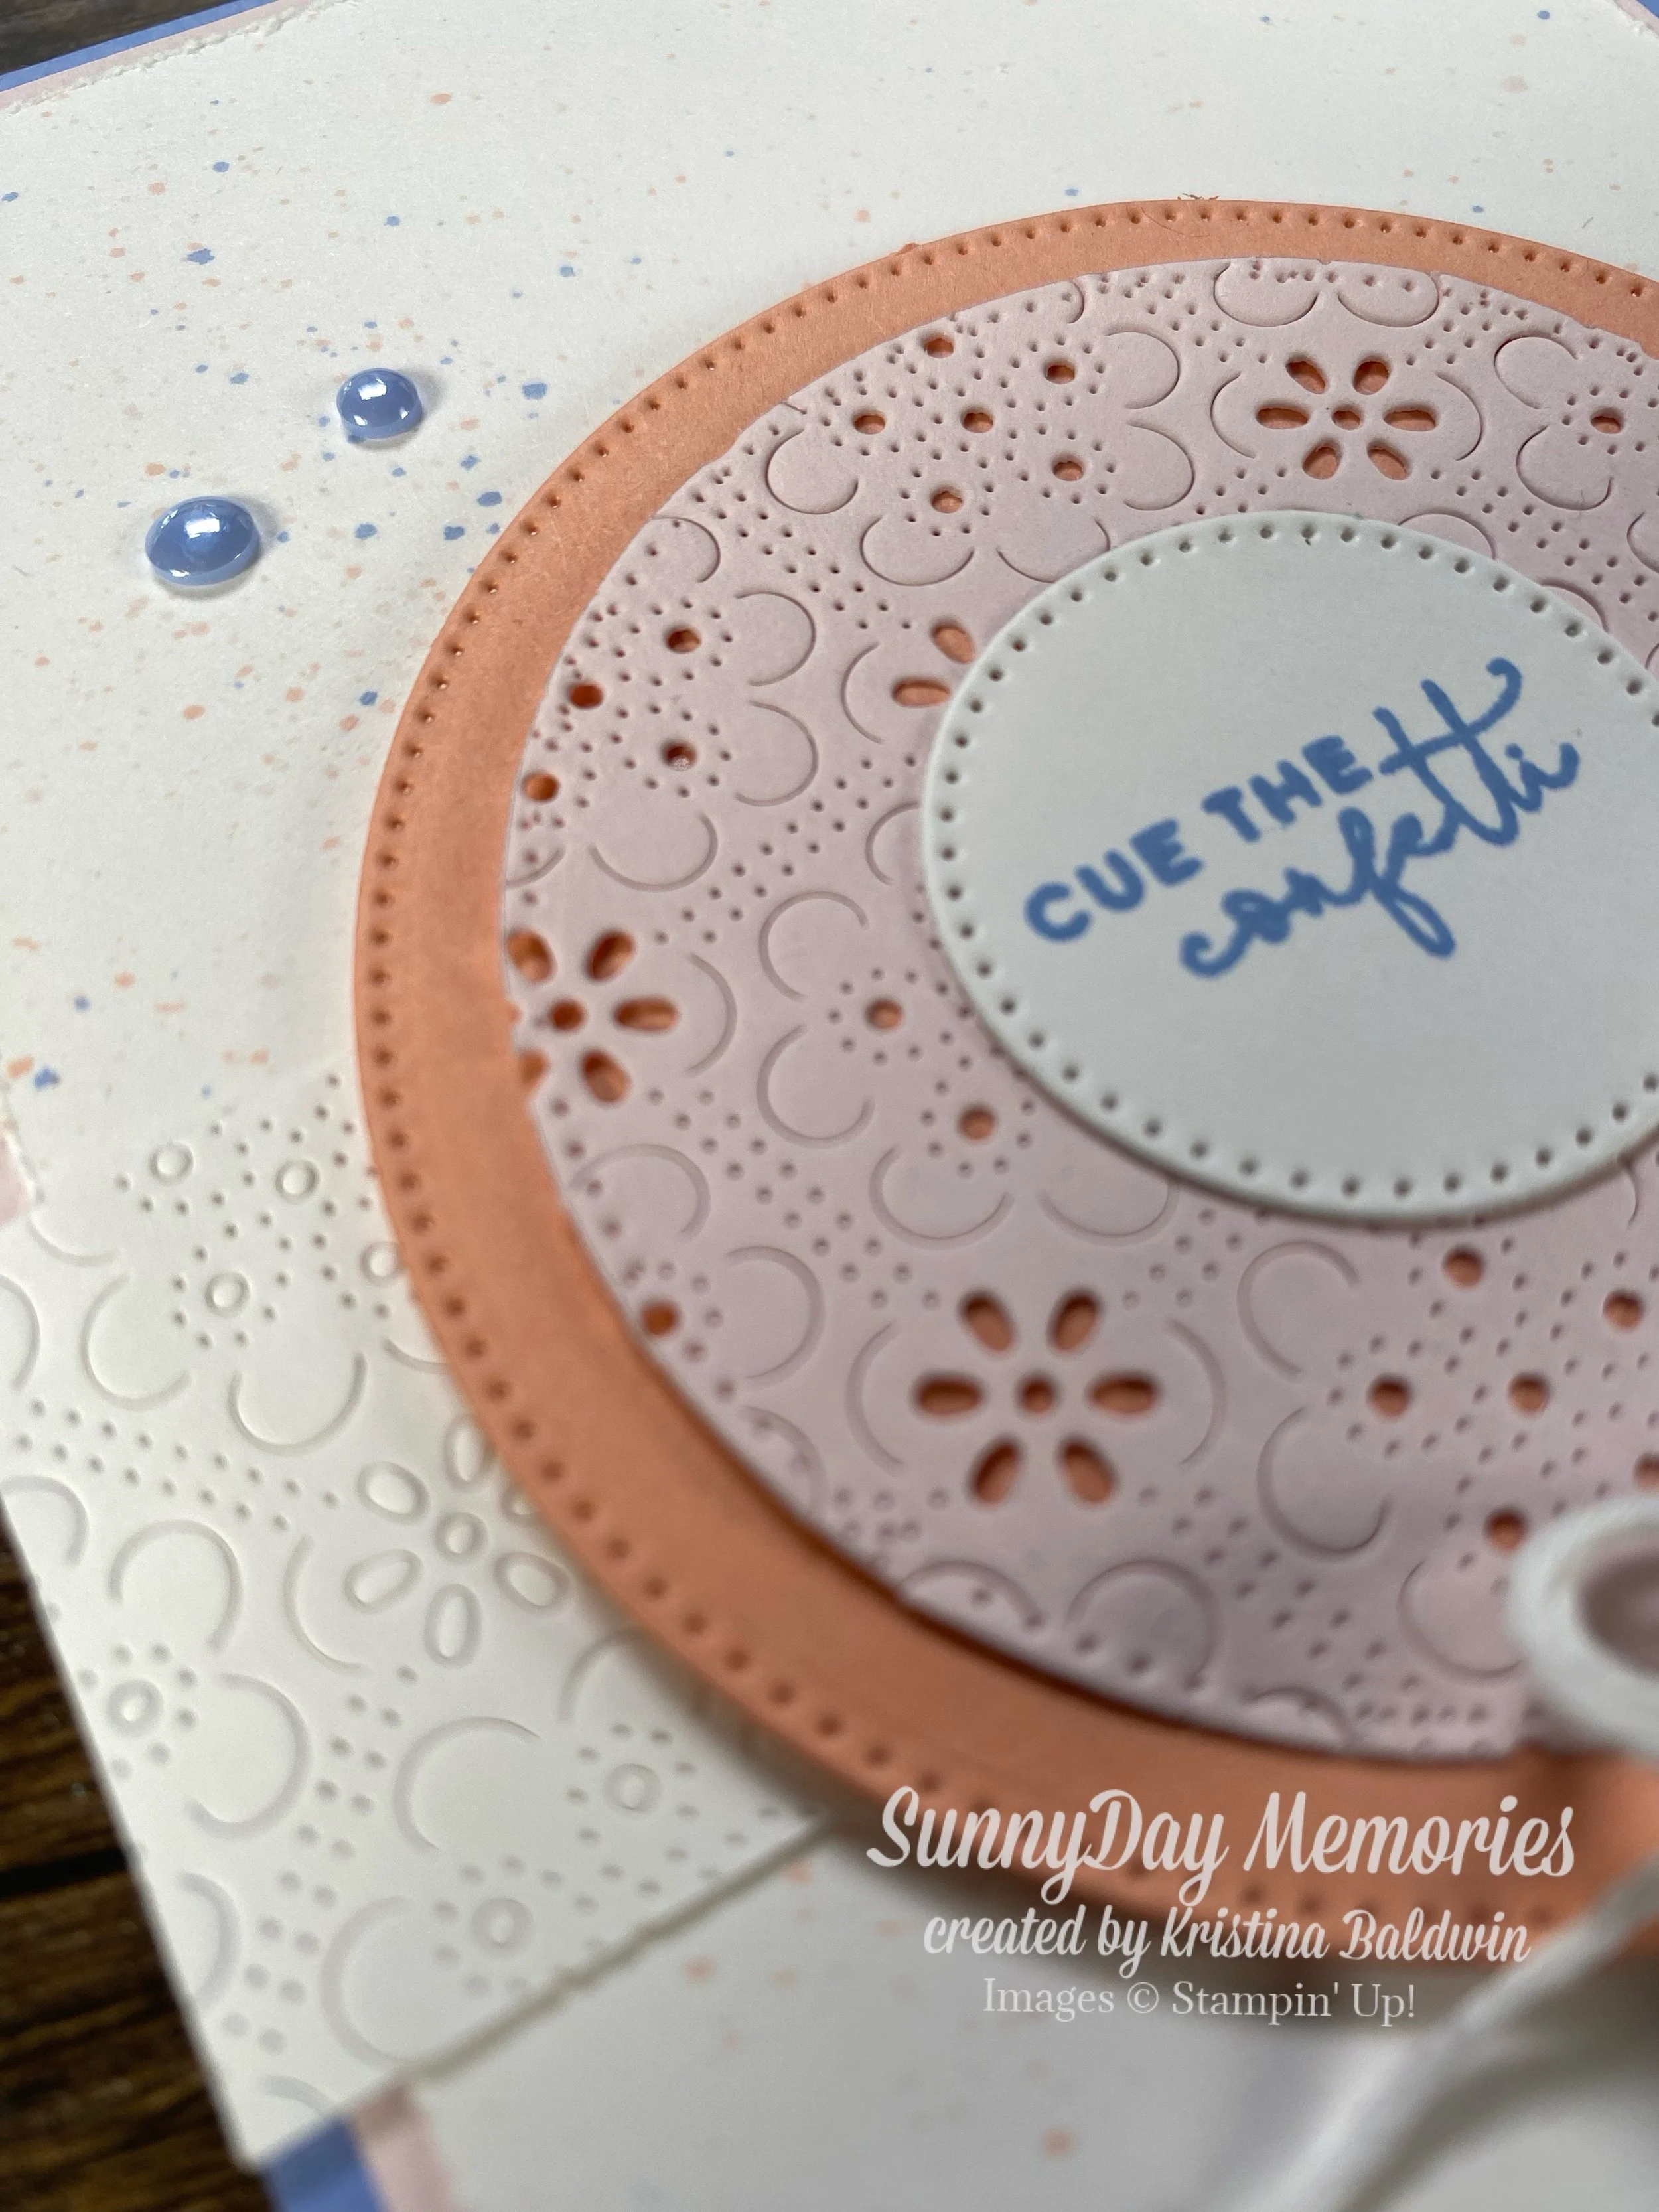
I wanted to show off 2 different ways that you can use this die. First, with all the little bits popped out showing off the beautiful eyelet shapes. I die-cut a larger piece with the NEW Barely Blush In Color and then cut out a circle using the Stylish Shapes Dies. At this point I hadn’t done a lot of testing on best practices so I spent A LOT of time poking out all those little bits with my Take Your Pick Tool!
Secondly, I wanted to show this die-cut without all the bits popped out. The Basic White strip was cut from a larger piece that I had die-cut.
After creating this first card, I decided I wanted to do a little experimenting. Here’s what I learned:
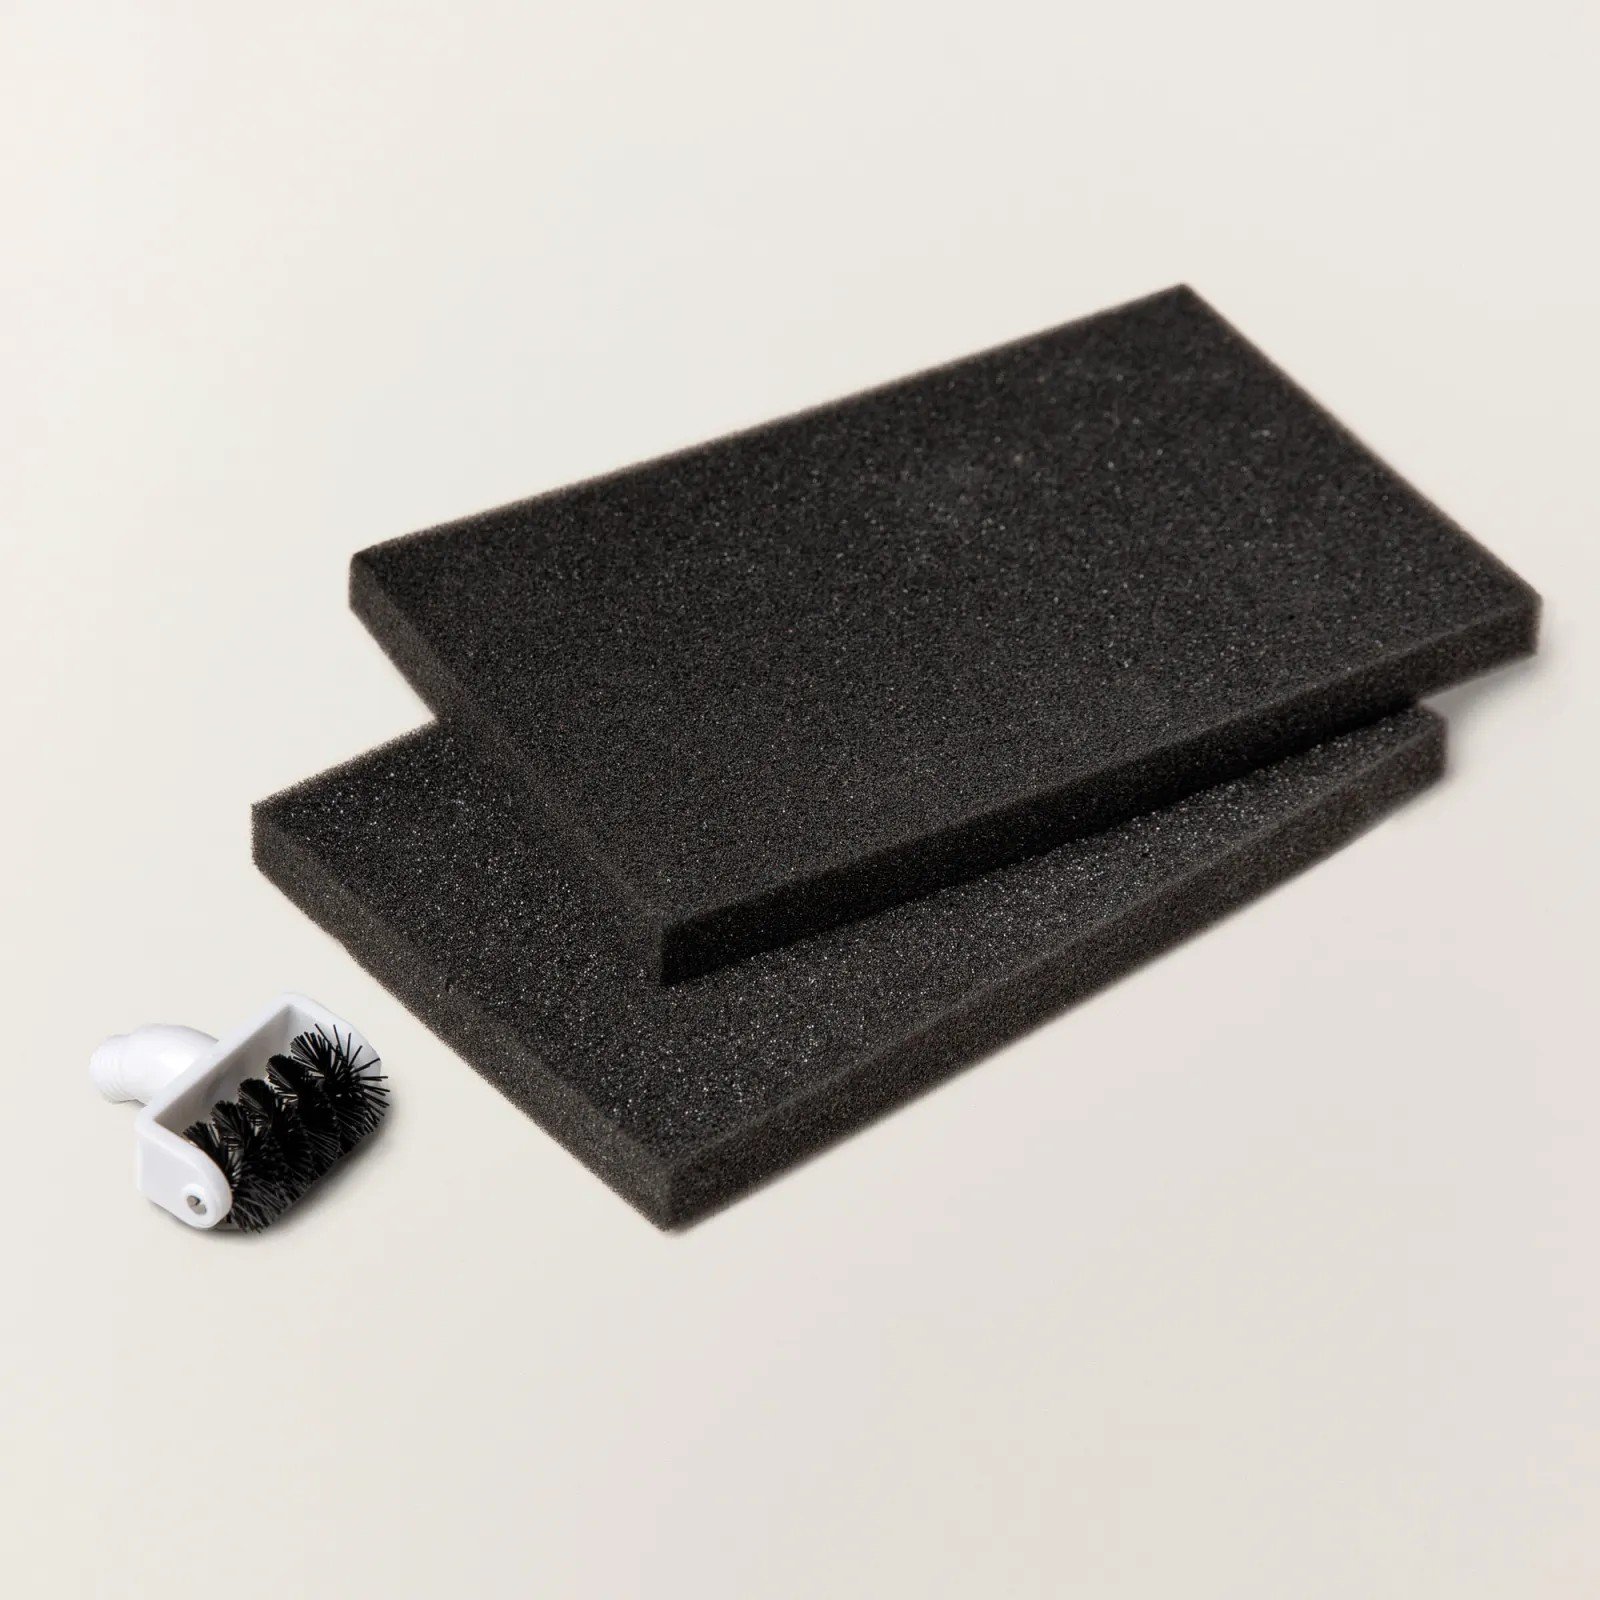
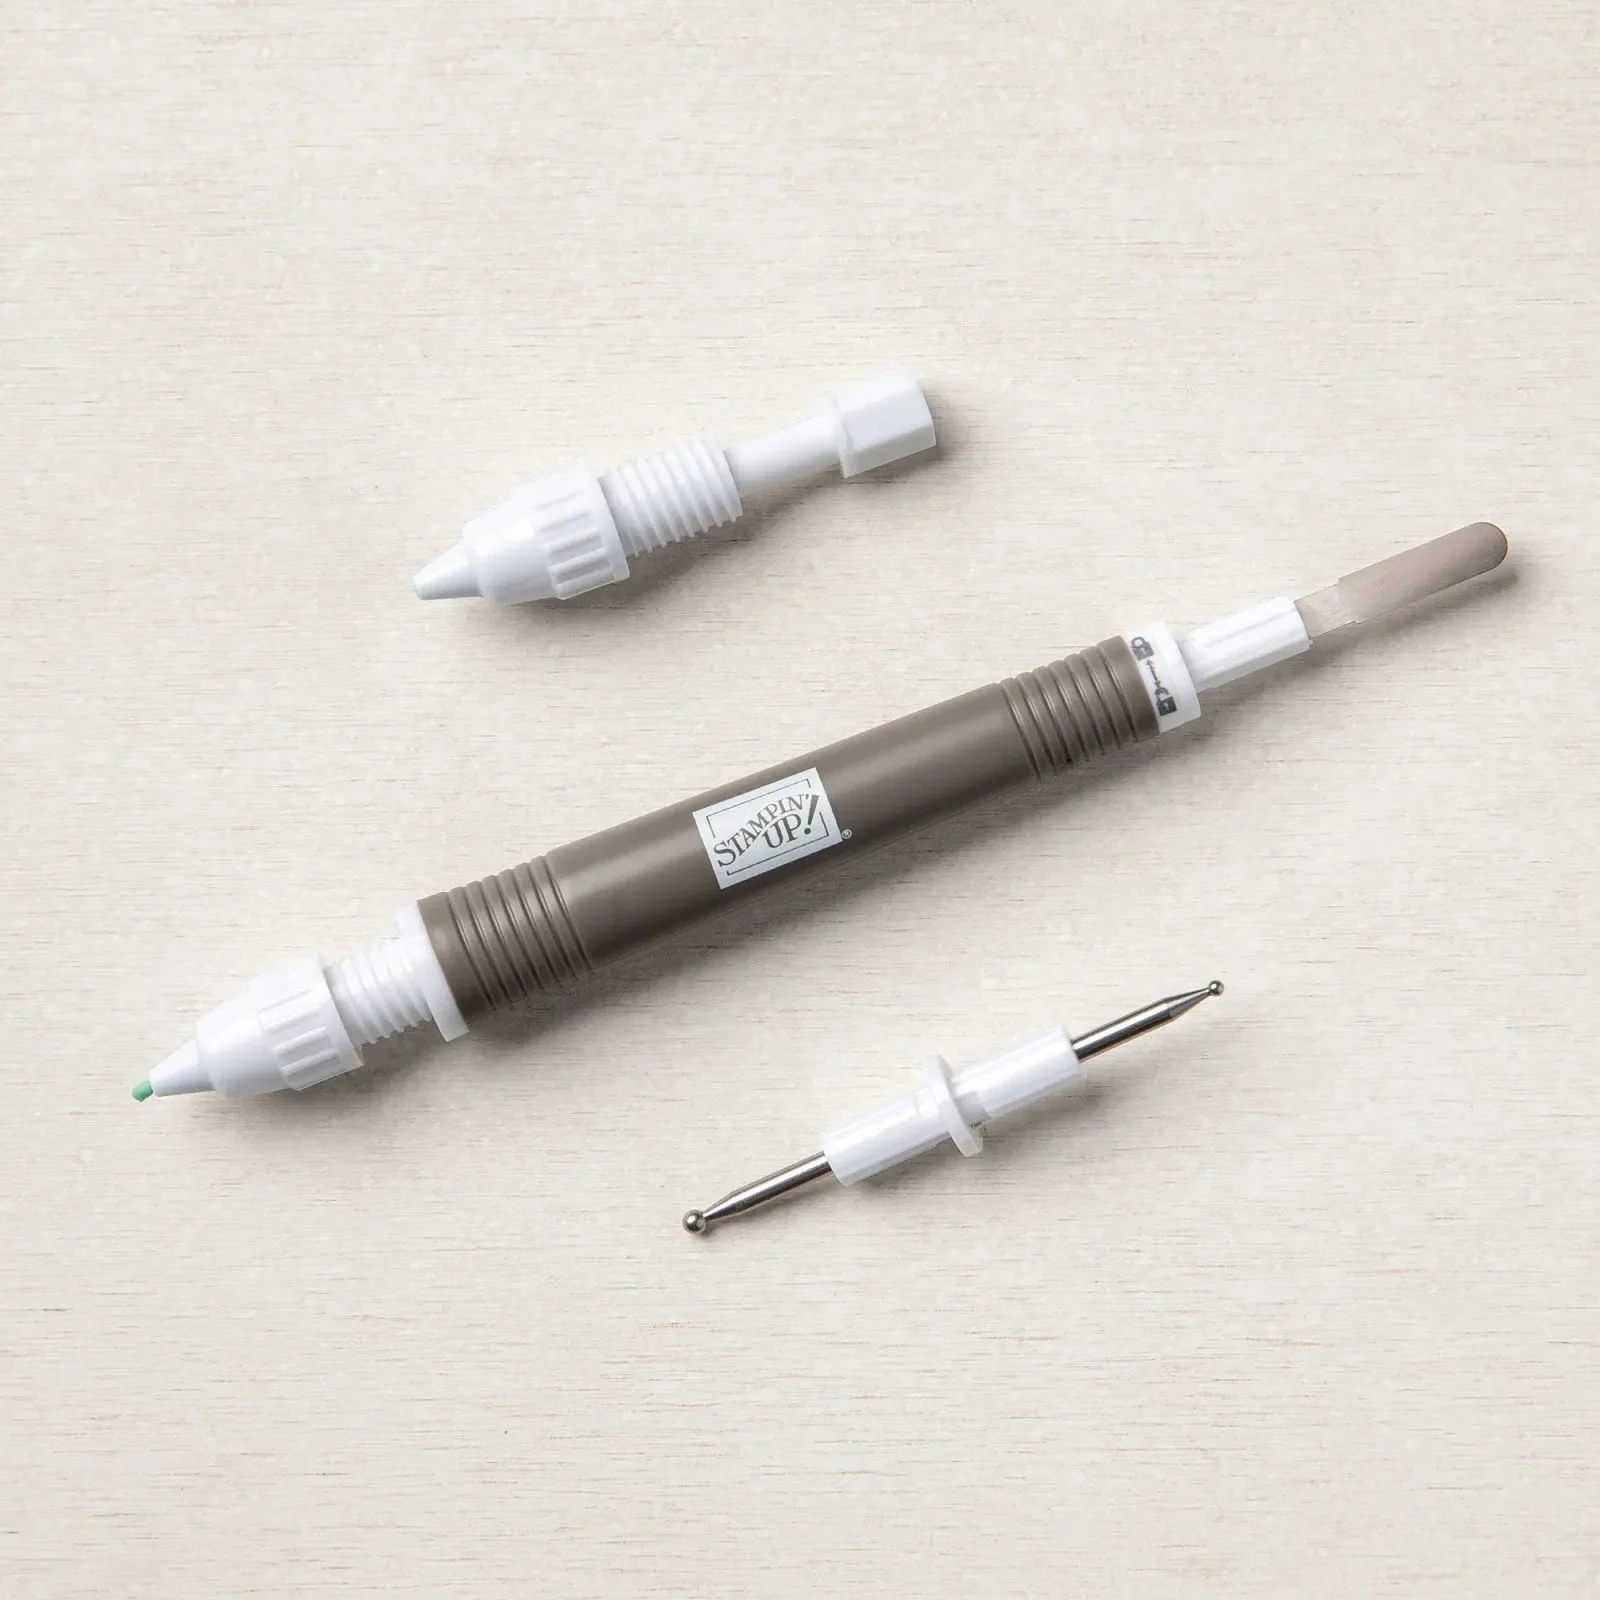
If you prefer the look of the open eyelet shapes, you’ll want to have the Take Your Pick Die Brush Tip. This attaches to the Take Your Pick Tool—so if you don’t already have one of them, you’ll want that, too! This combined with an empty kit box will be your best friend! This will help you push out those bits SO easily and not have a bunch of little bits all over your crafting space.
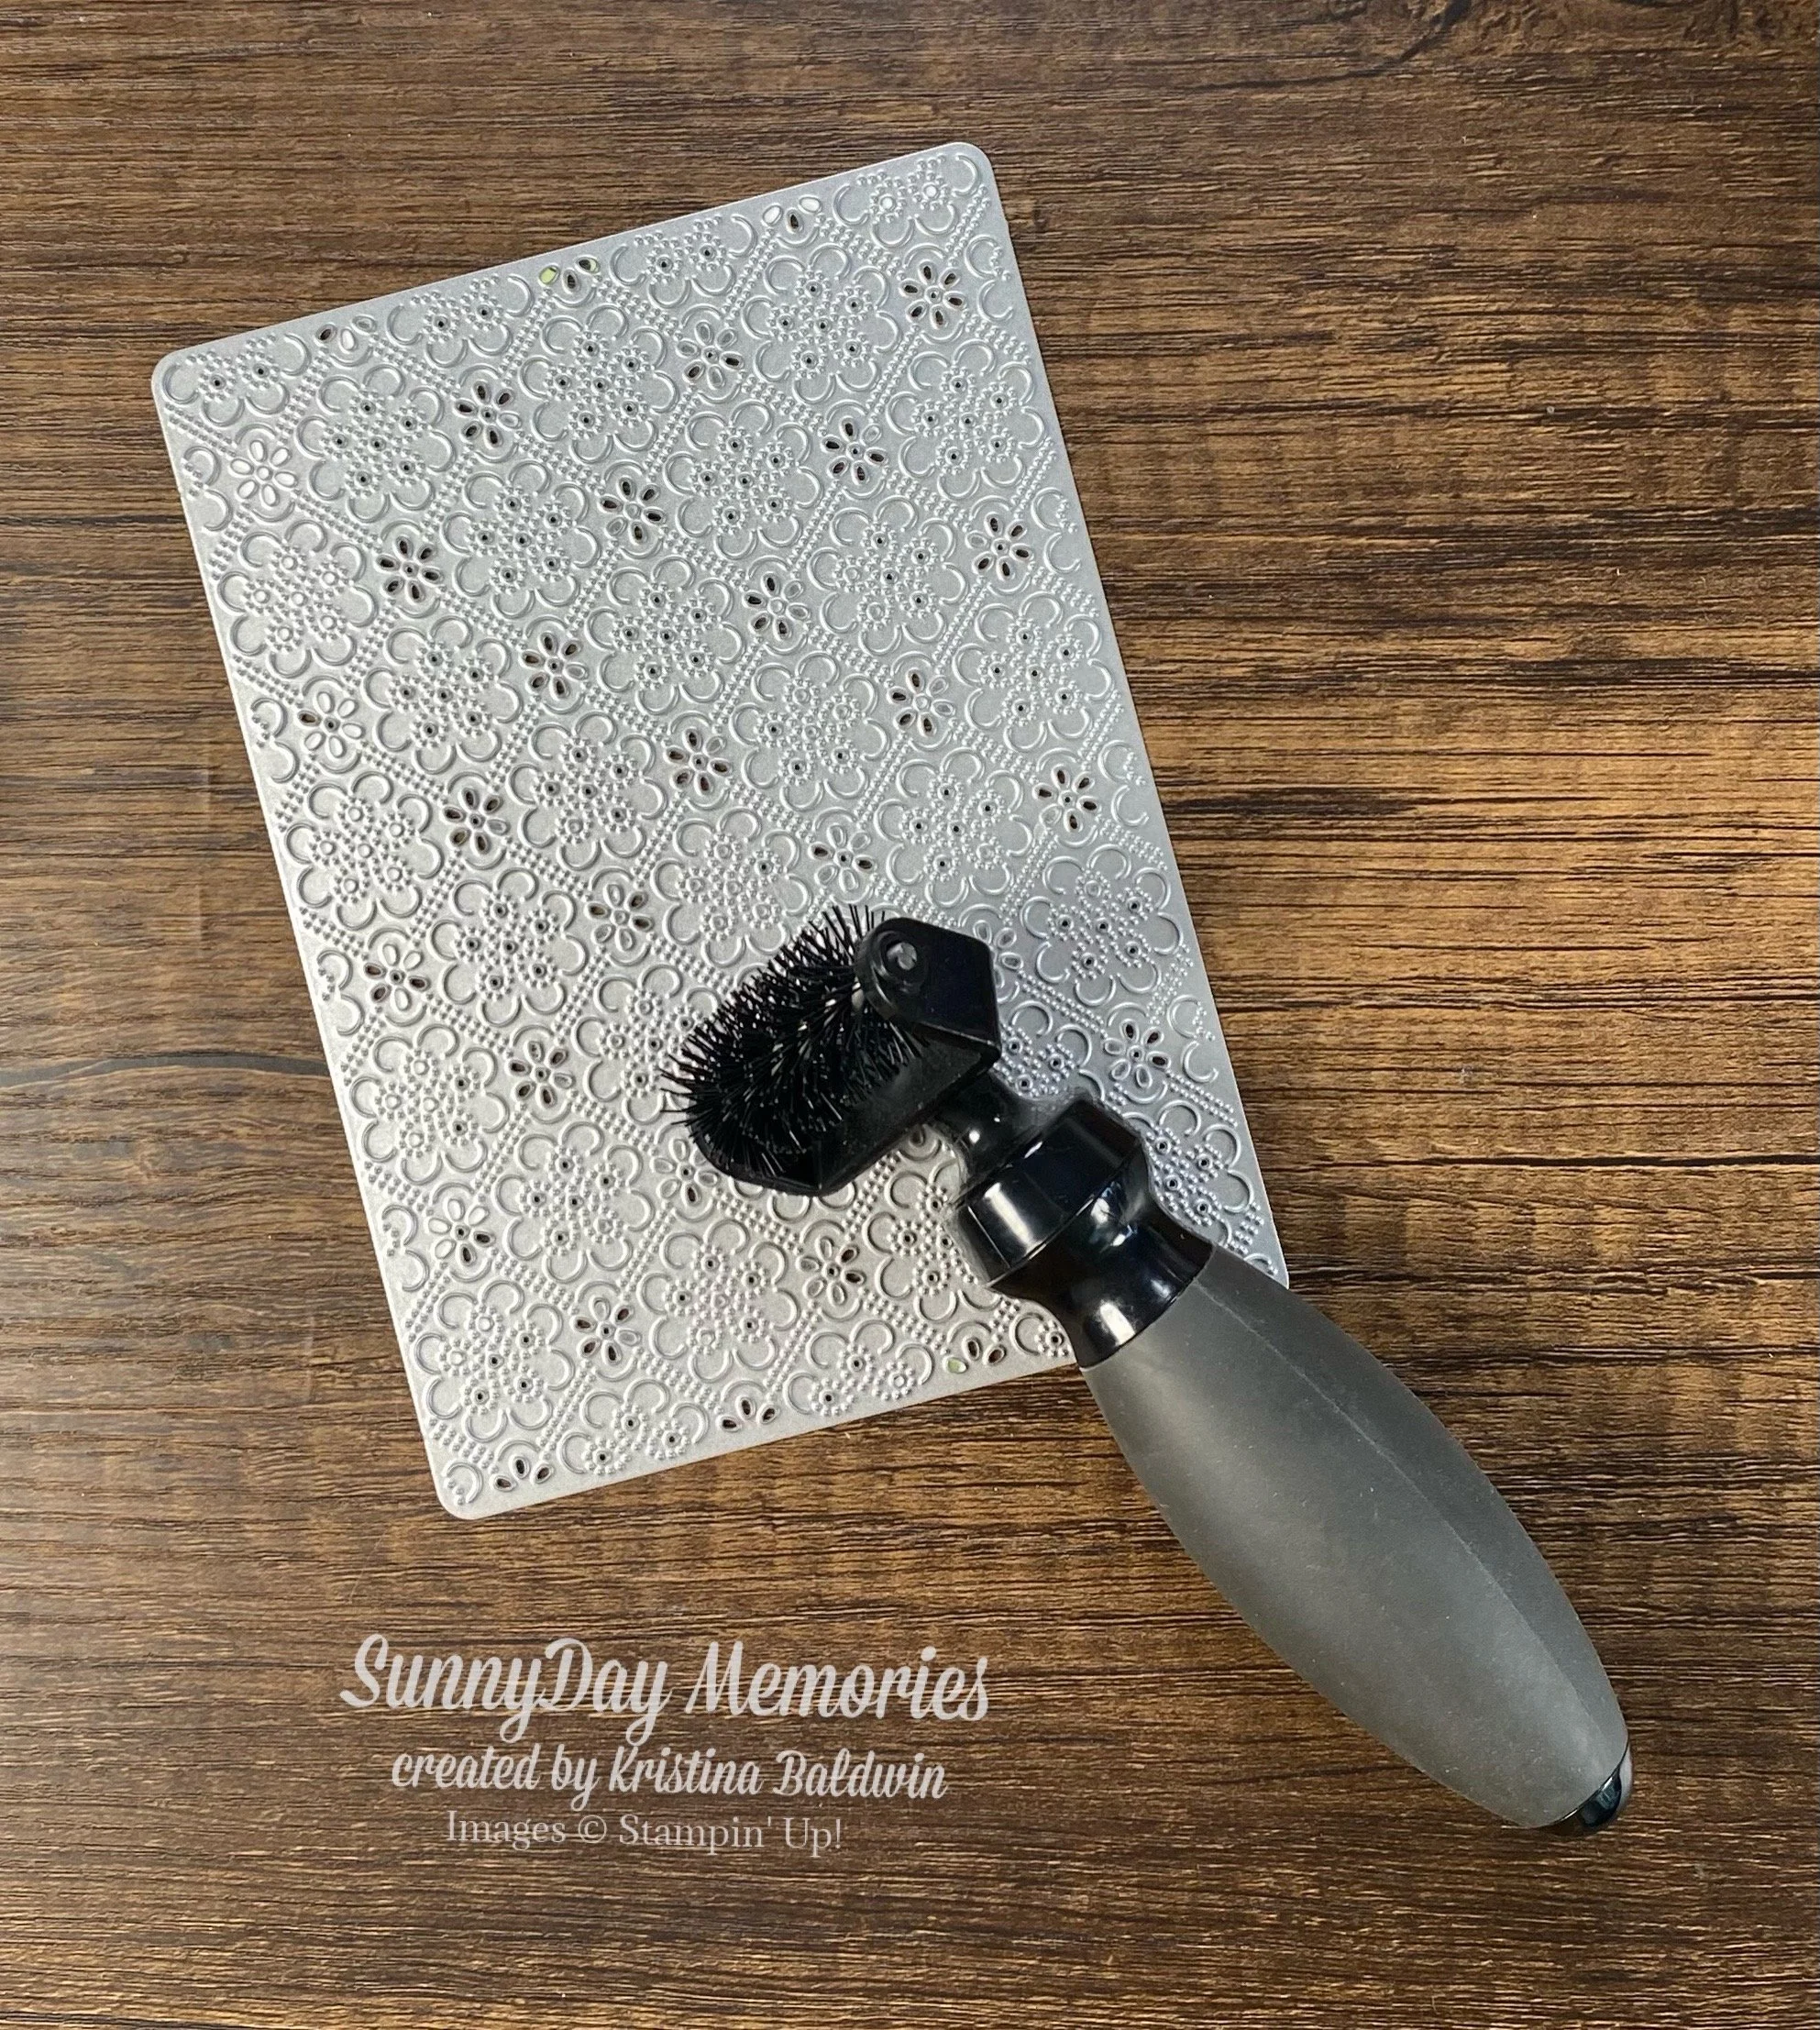
And if you’re like me, you may have an older die brush that looks like this one that you can use. Same concept, just a little different design.
You’ll also find great success if you use an extra shim—i.e. dryer sheet, wax paper or parchment paper. I tried out all 3 of these options to see what worked best.
First, I tried a dryer sheet. It helped make the paper release nicely from the die. It also made a nice impression. I only ran it through once so it didn’t release all the bits and pieces though. More on that shortly.
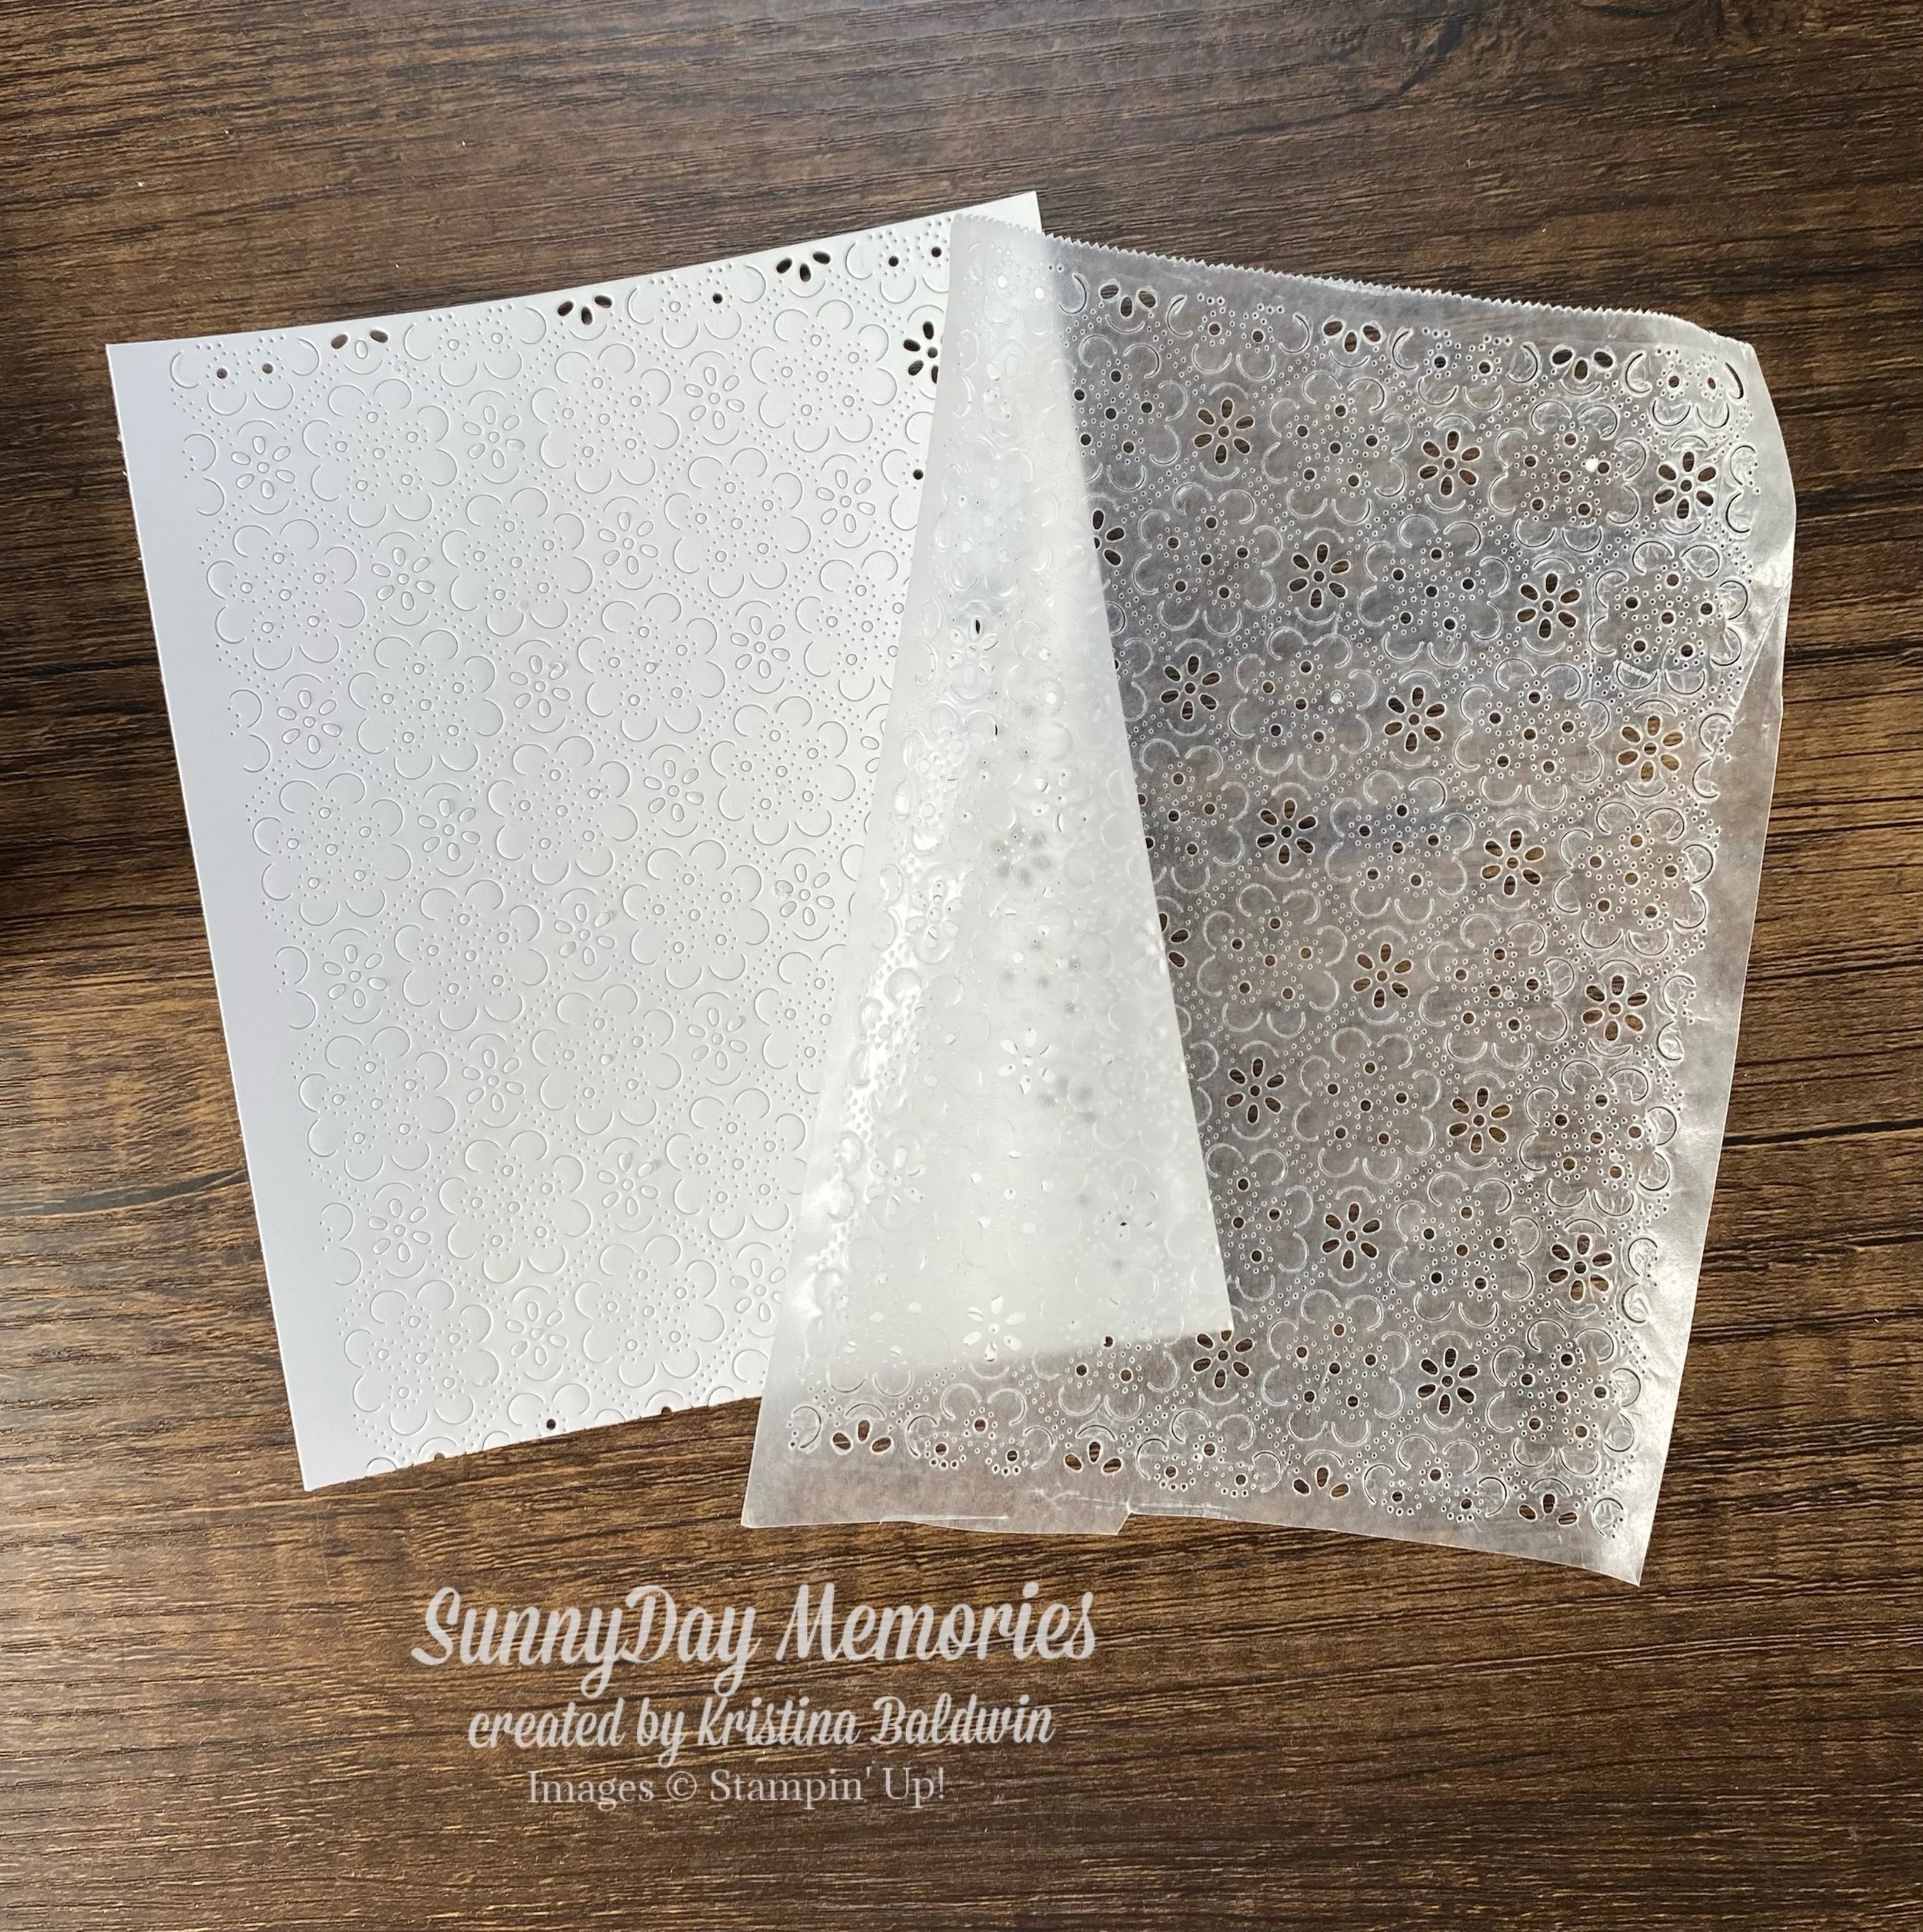
Next I tried using wax paper. I liked this option a little better than the dryer sheet. It also helped the paper release really easily from the die. It gave a nice impression but still didn’t release all the little bits since I only ran it through once. But it did give me a nice wax paper version that might work nicely on a card!
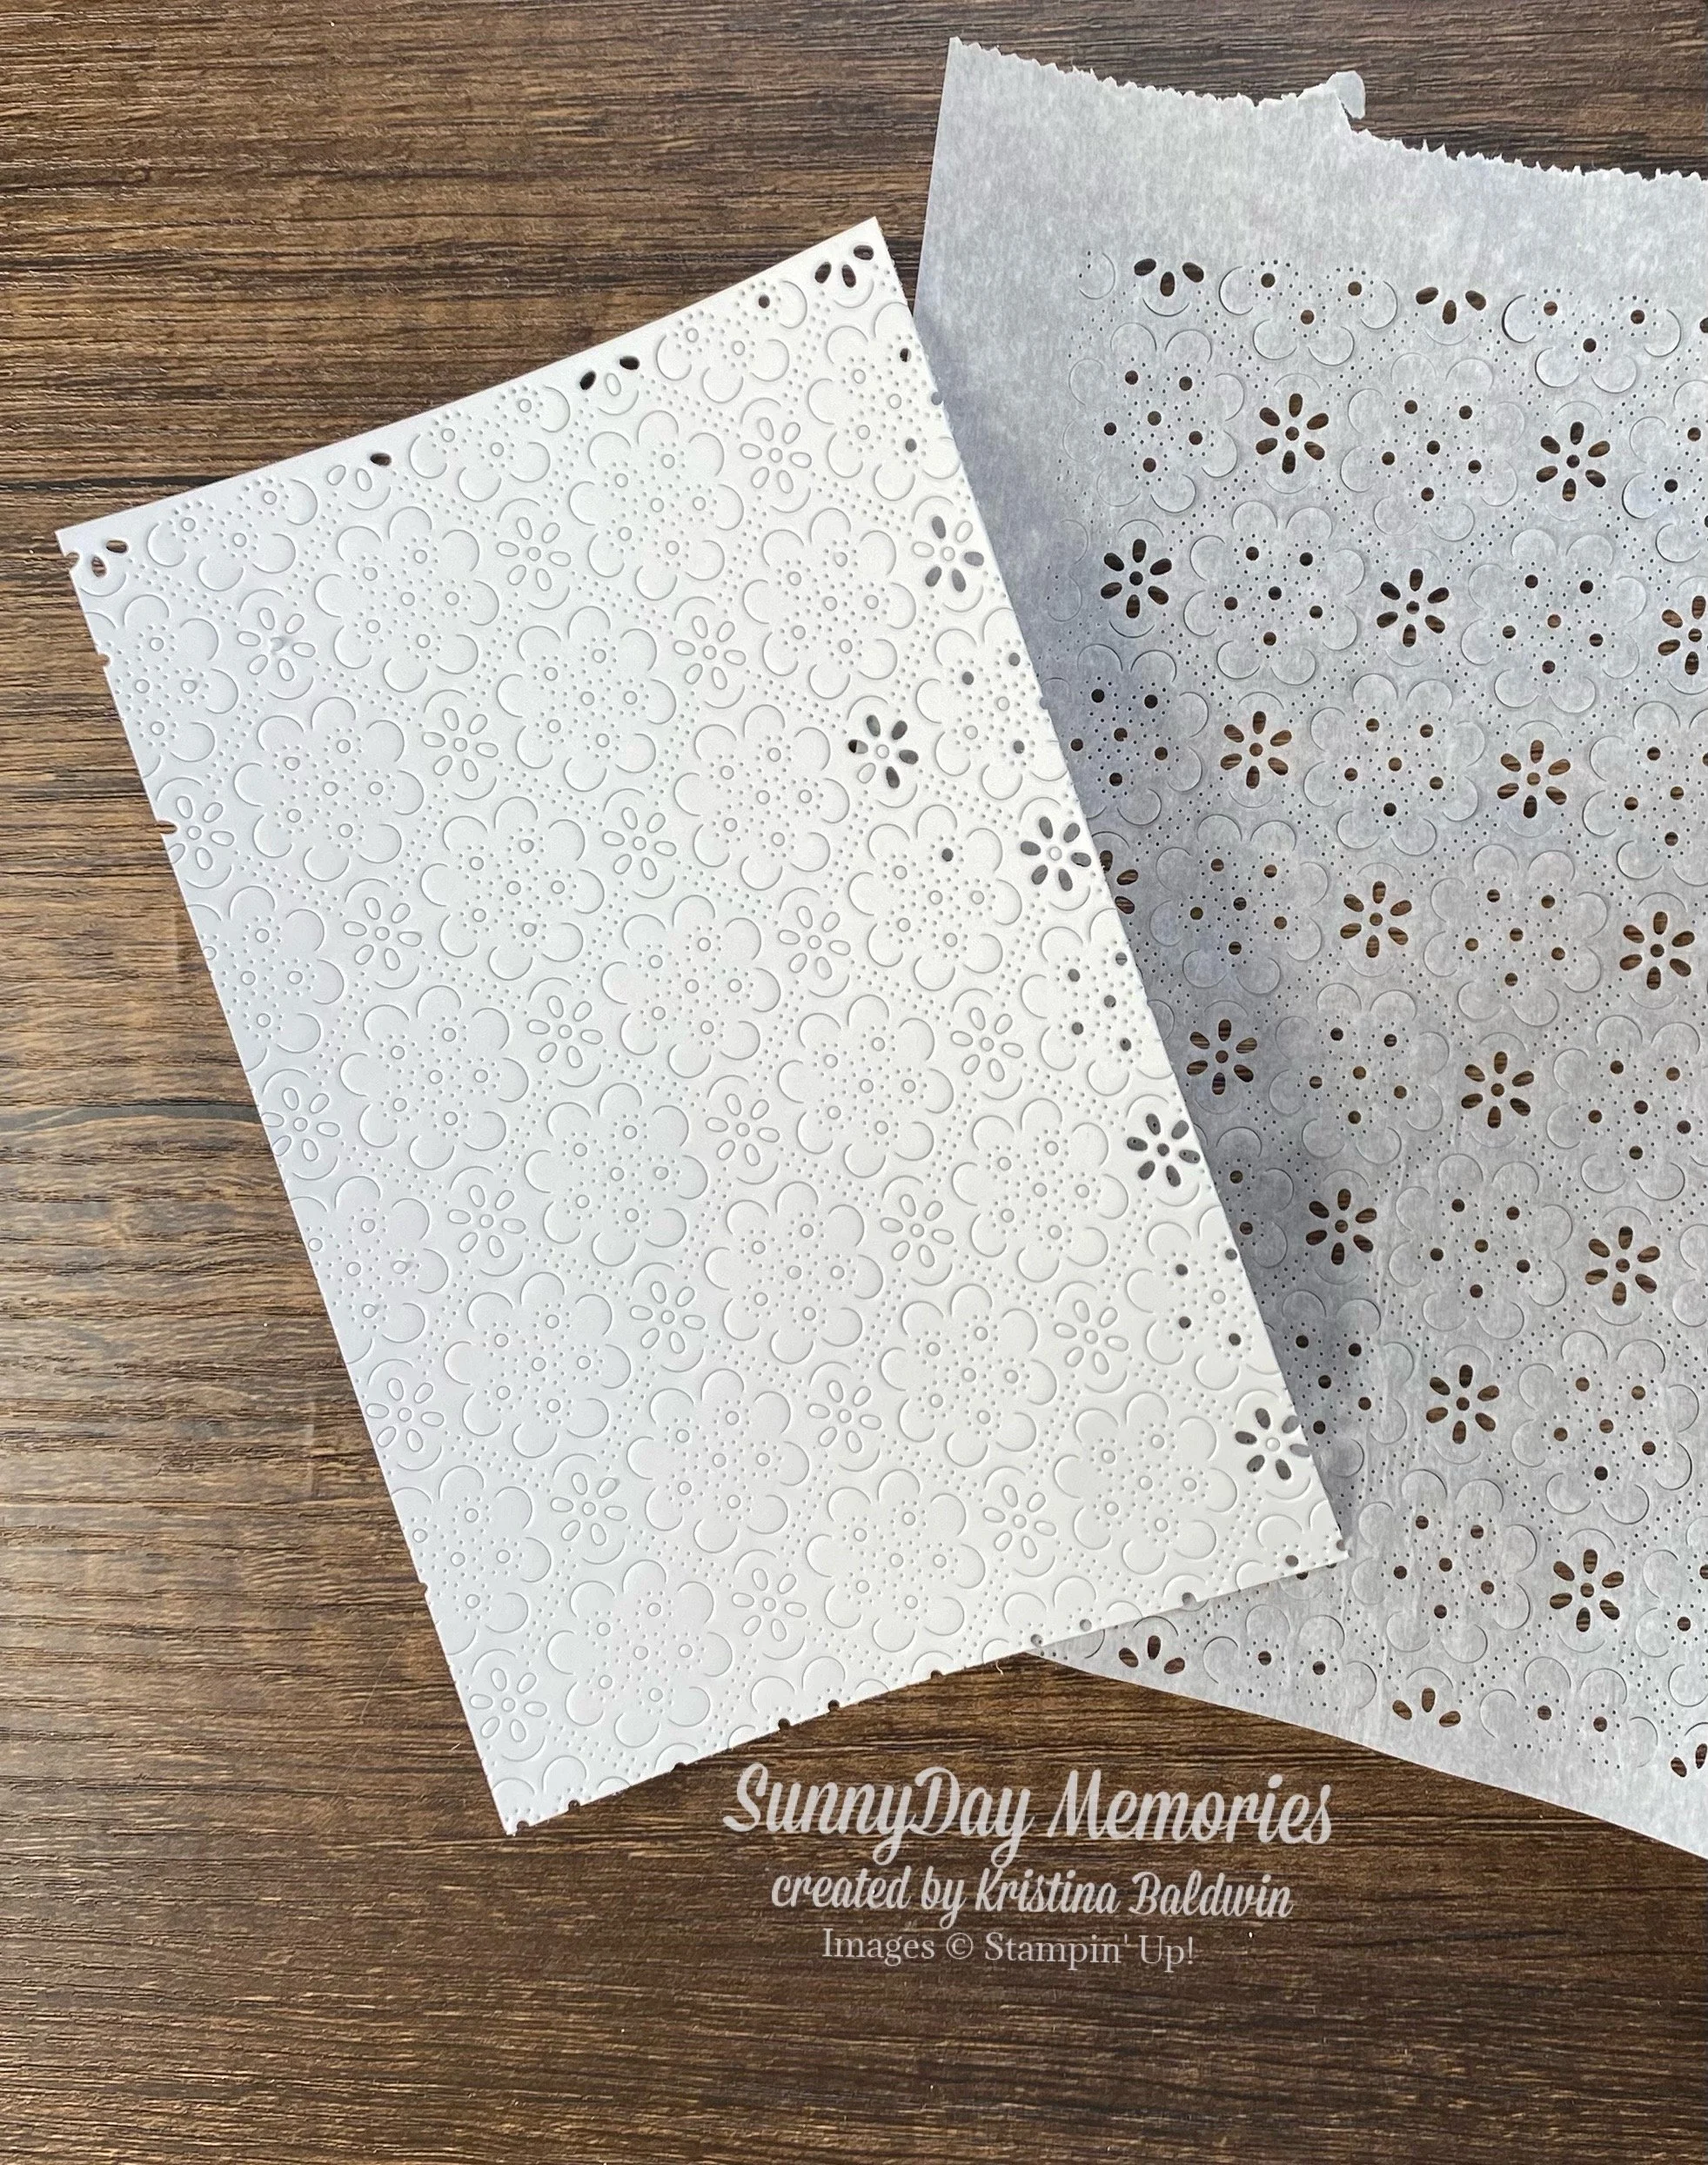
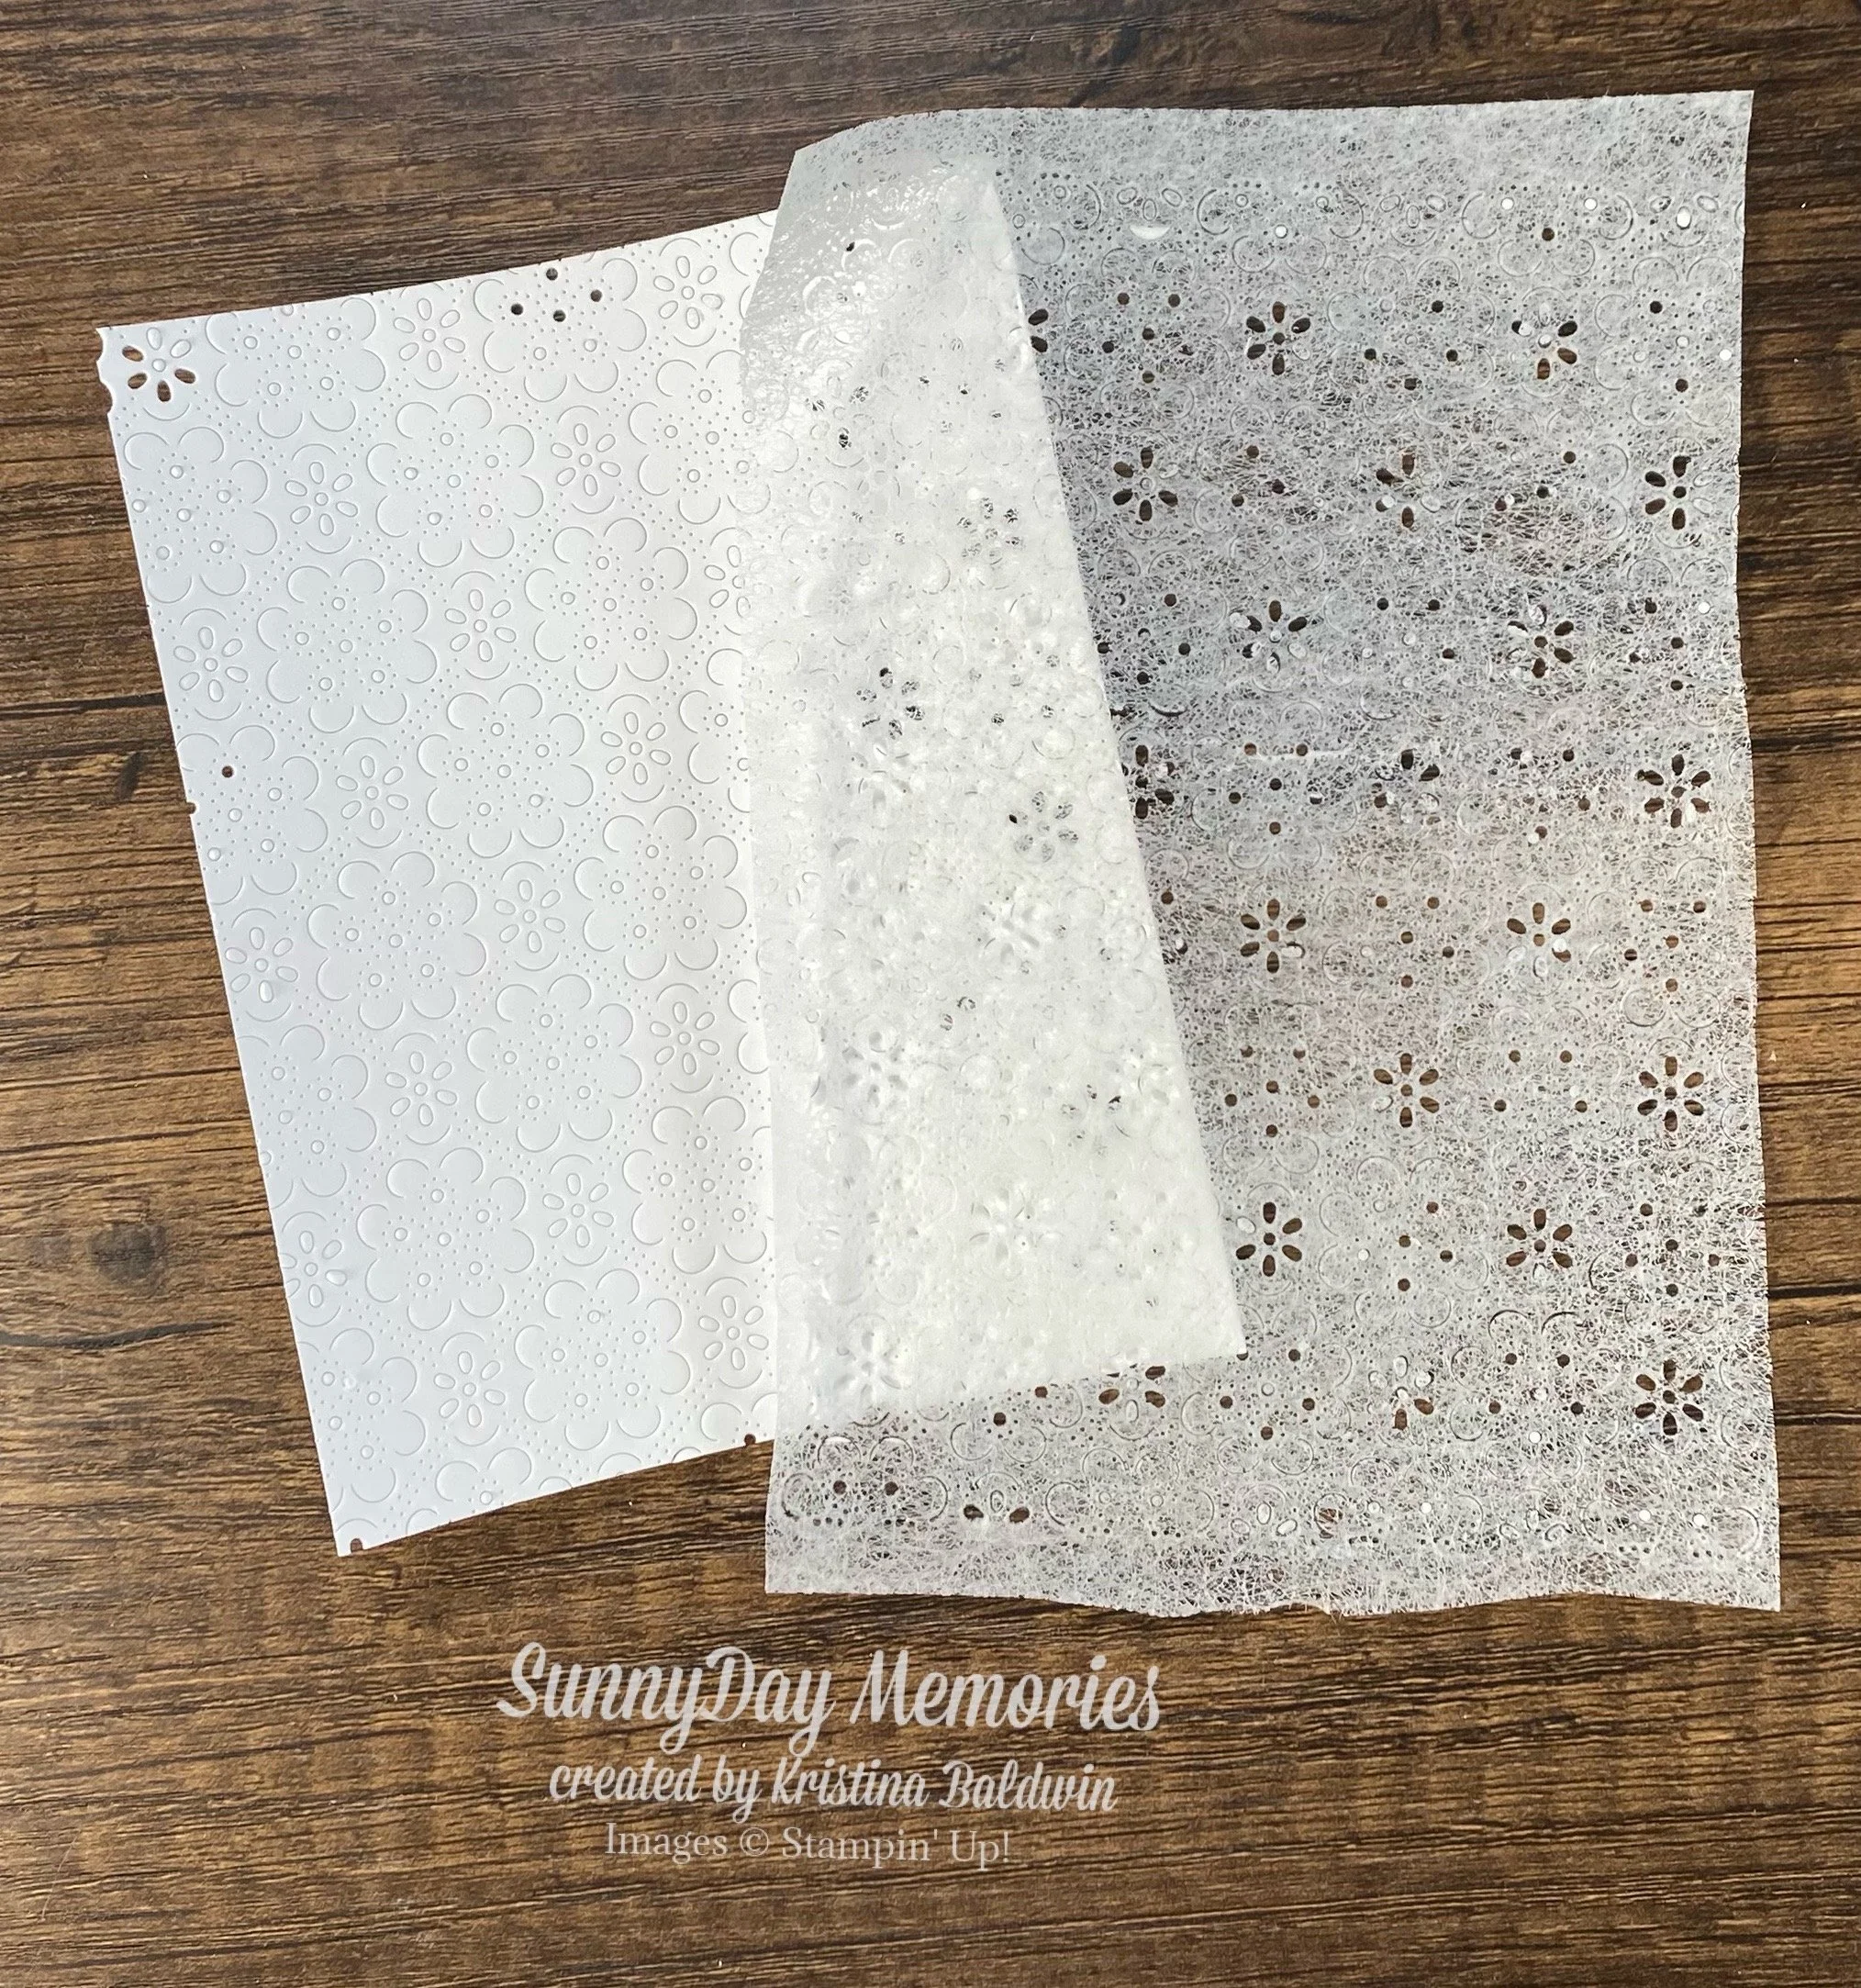
Finally I used the die with parchment paper. This was my favorite option. As you can see in the photo it gives the best impression. The cardstock released easily from the die. And I saved the parchment paper to try and use on a project because it is perfect! As I write this it makes me wonder if just using a 2nd cardstock piece would give good results, too. I didn’t try it but that might be my next experiment!
As you may have noticed in all my samples, the little bits and pieces all remain in my cardstock after running it through my die-cutting machine. Here’s the trick—if you like this look, only run it through one time. If, however, you want to see all the eyelet shapes, you’ll want to run it through 2 times. And for the best results—because I tried it both ways—you’ll want to run it through one time where the die is face down and one time where it is face up. I can’t explain why this gives you a better cut, but it does!
Now that you have these extra tips from my experimentation, you are better positioned to achieve successful results with the Eyelet Blooms Die!