
Create with a 4 x 4 Piece of Patterned Paper
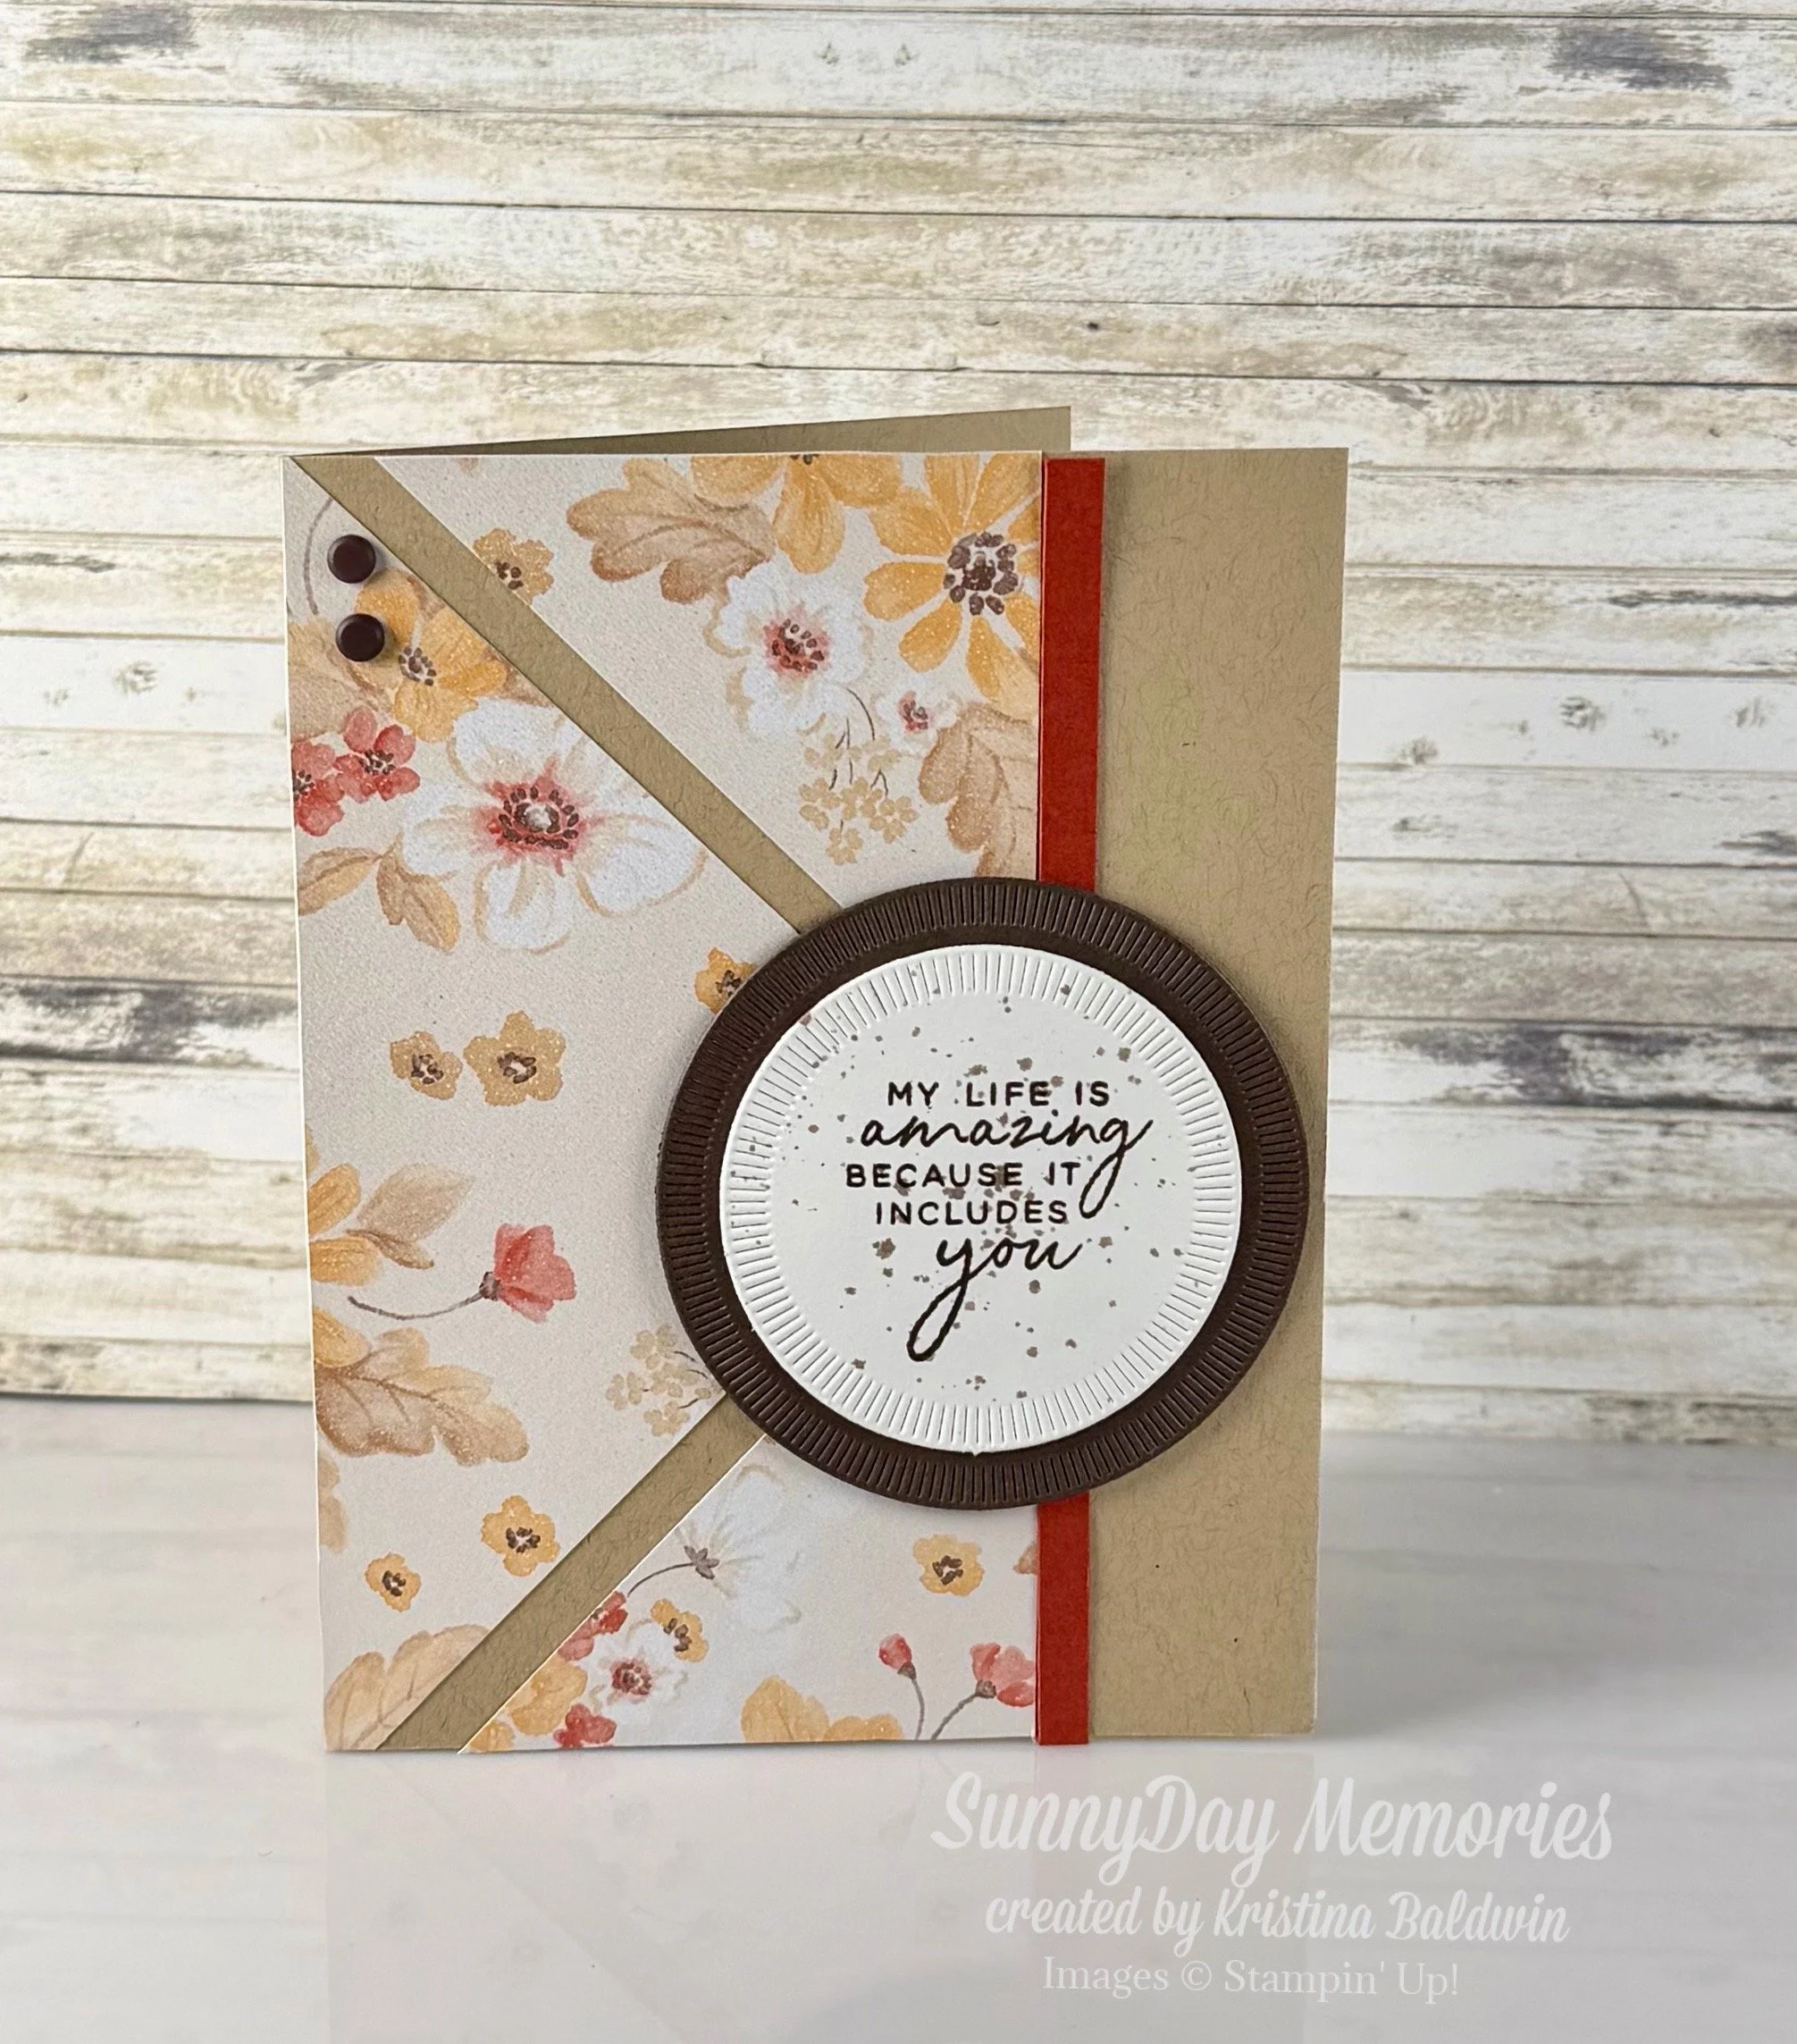
Look what you can create with a 4 × 4 piece of patterned paper! This design helps you get every little bit of use of your papers. Hardly any waste! Ever wonder how to get the most out of your favorite paper packs without leaving behind tiny, unusable scraps? My card shows you how. It features a clever technique that’s so simple to do even though it looks like it would involve tricky diagonal cuts. Ready to learn how?
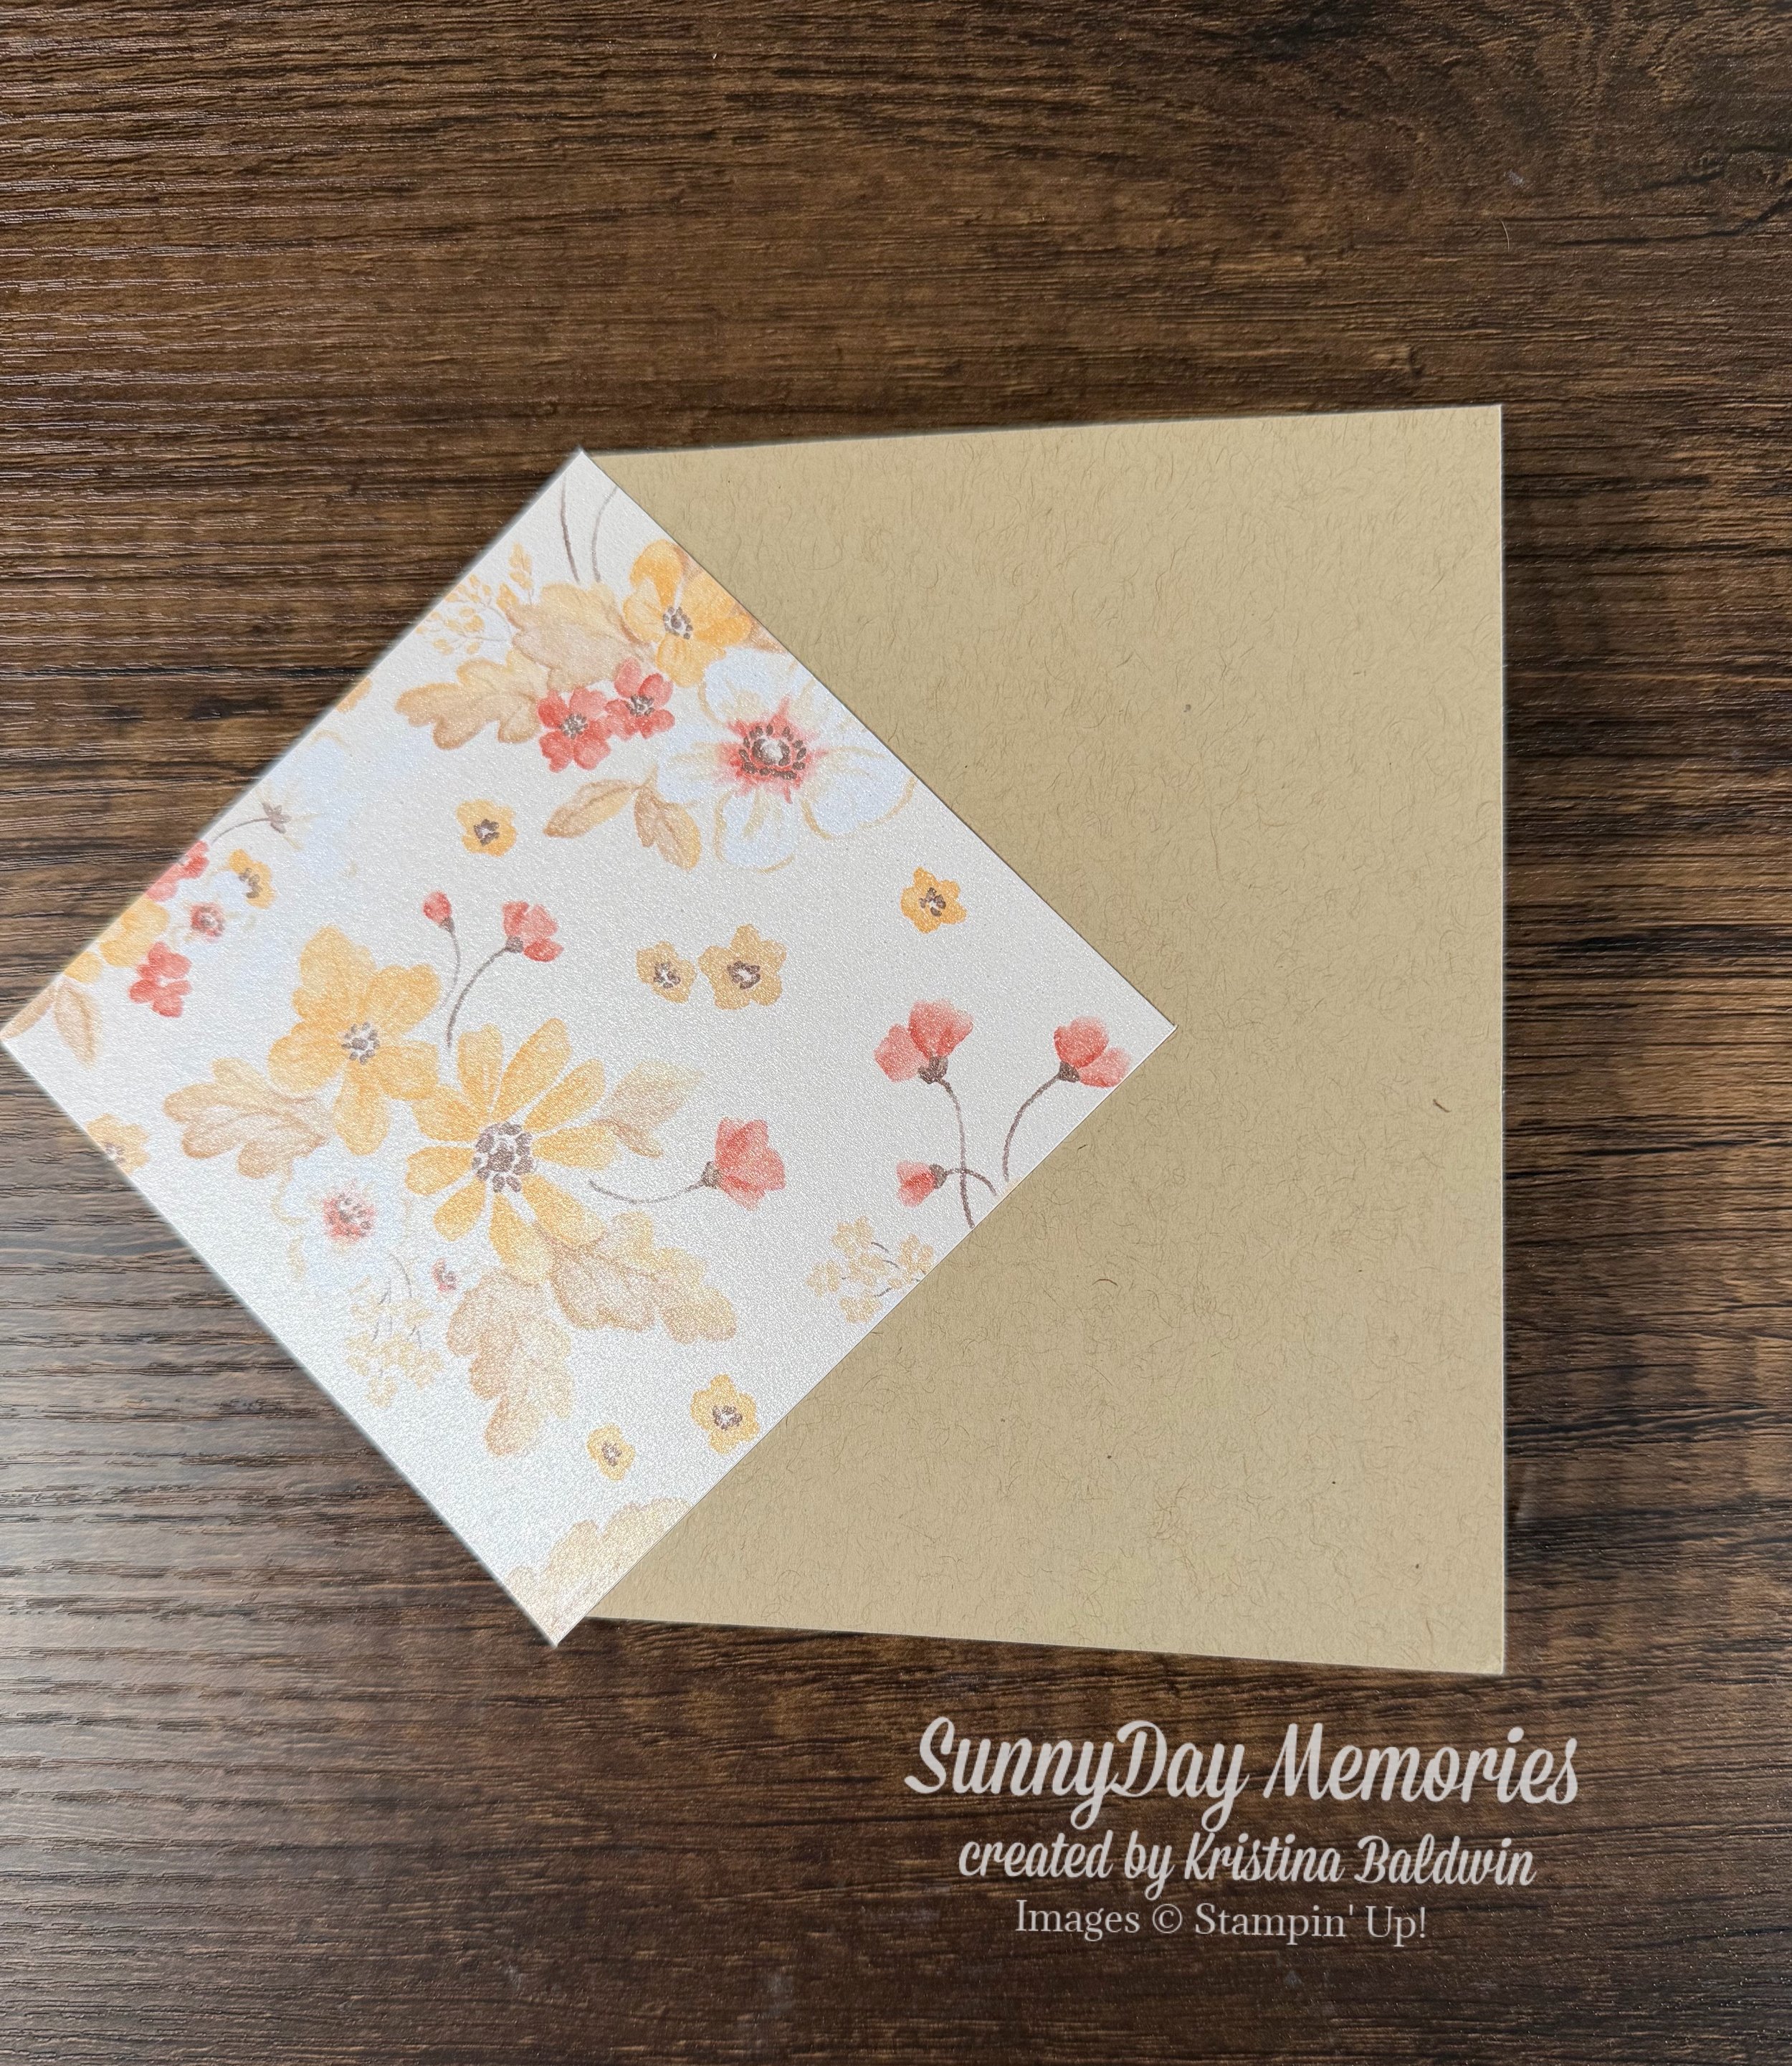
First, start with a standard A2 card base (4-1/4” x 5-1/2”). I’m using Crumb Cake Cardstock. Then take a 4” x 4” piece of non-directional patterned paper. I’m using this month’s Product of the Month, Glow of Harvest. Place the patterned paper in a diamond orientation so that the 2 tips hit the top and bottom edge of the card base along the score line. Adhere it.
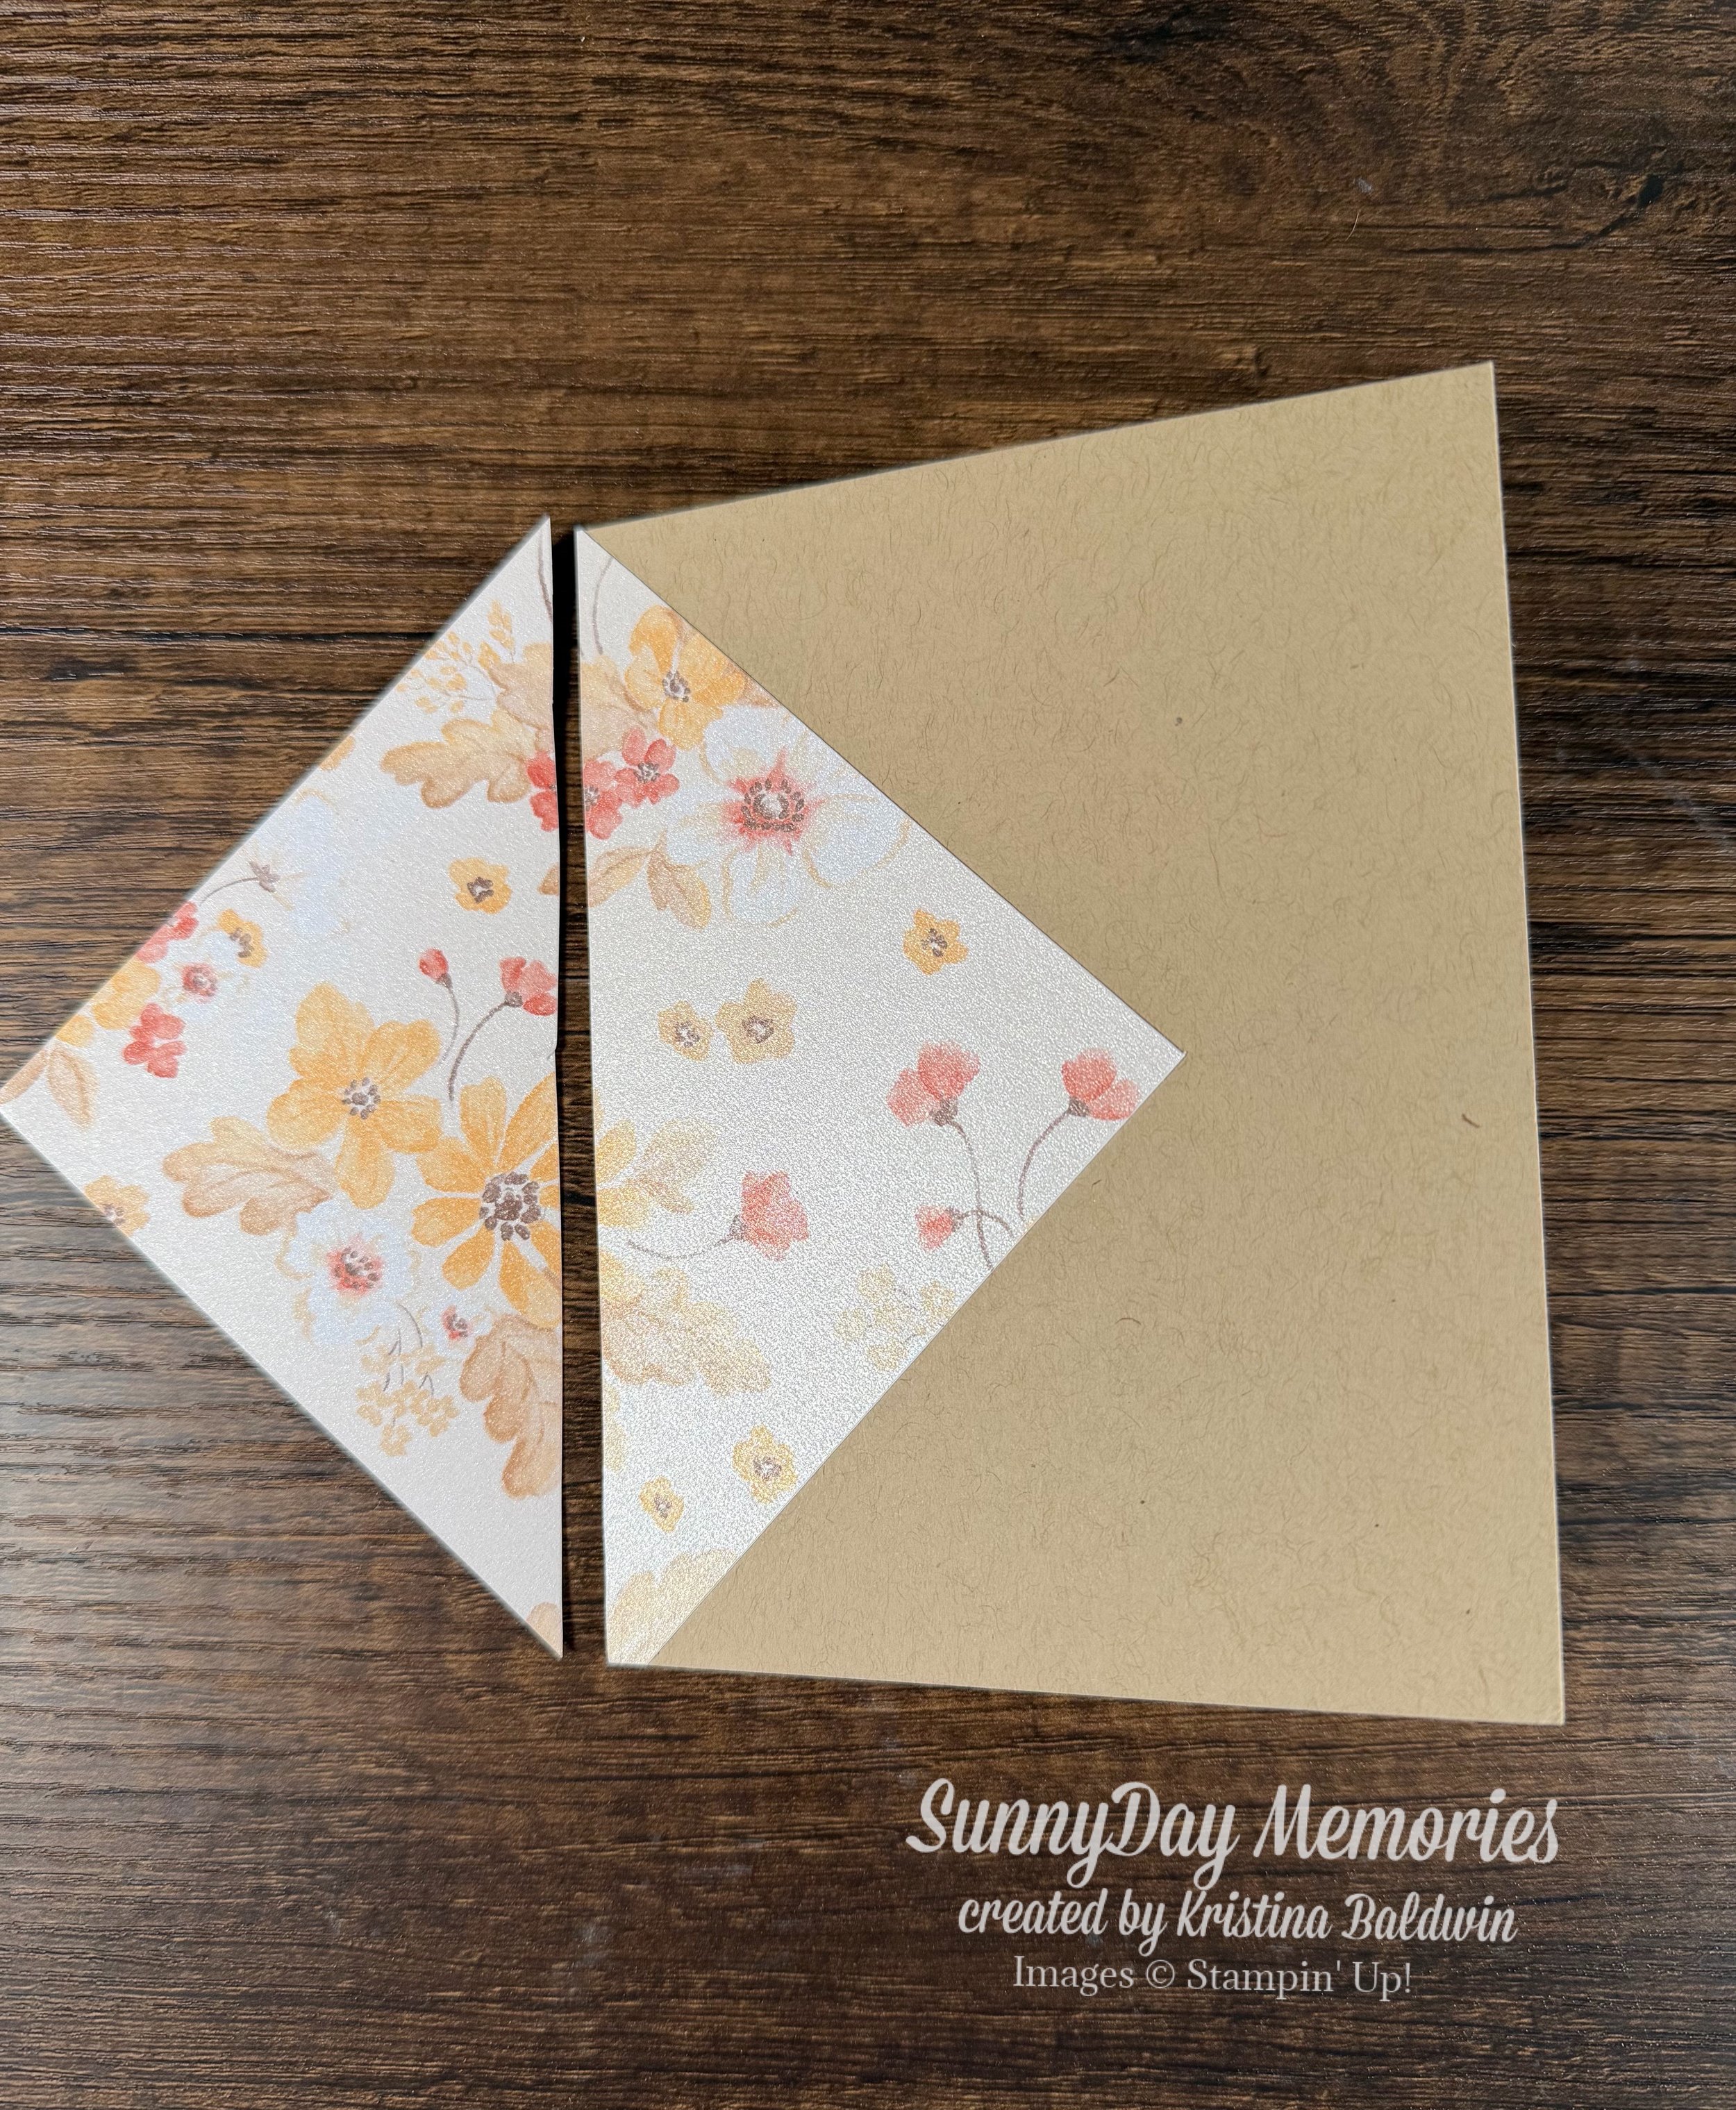
Trim away the excess.
Next adhere the remaining piece of patterned paper that was trimmed away so that its tip meets the tip of the 1st piece. You’ll also want to leave a small gap between the 2 pieces of paper.
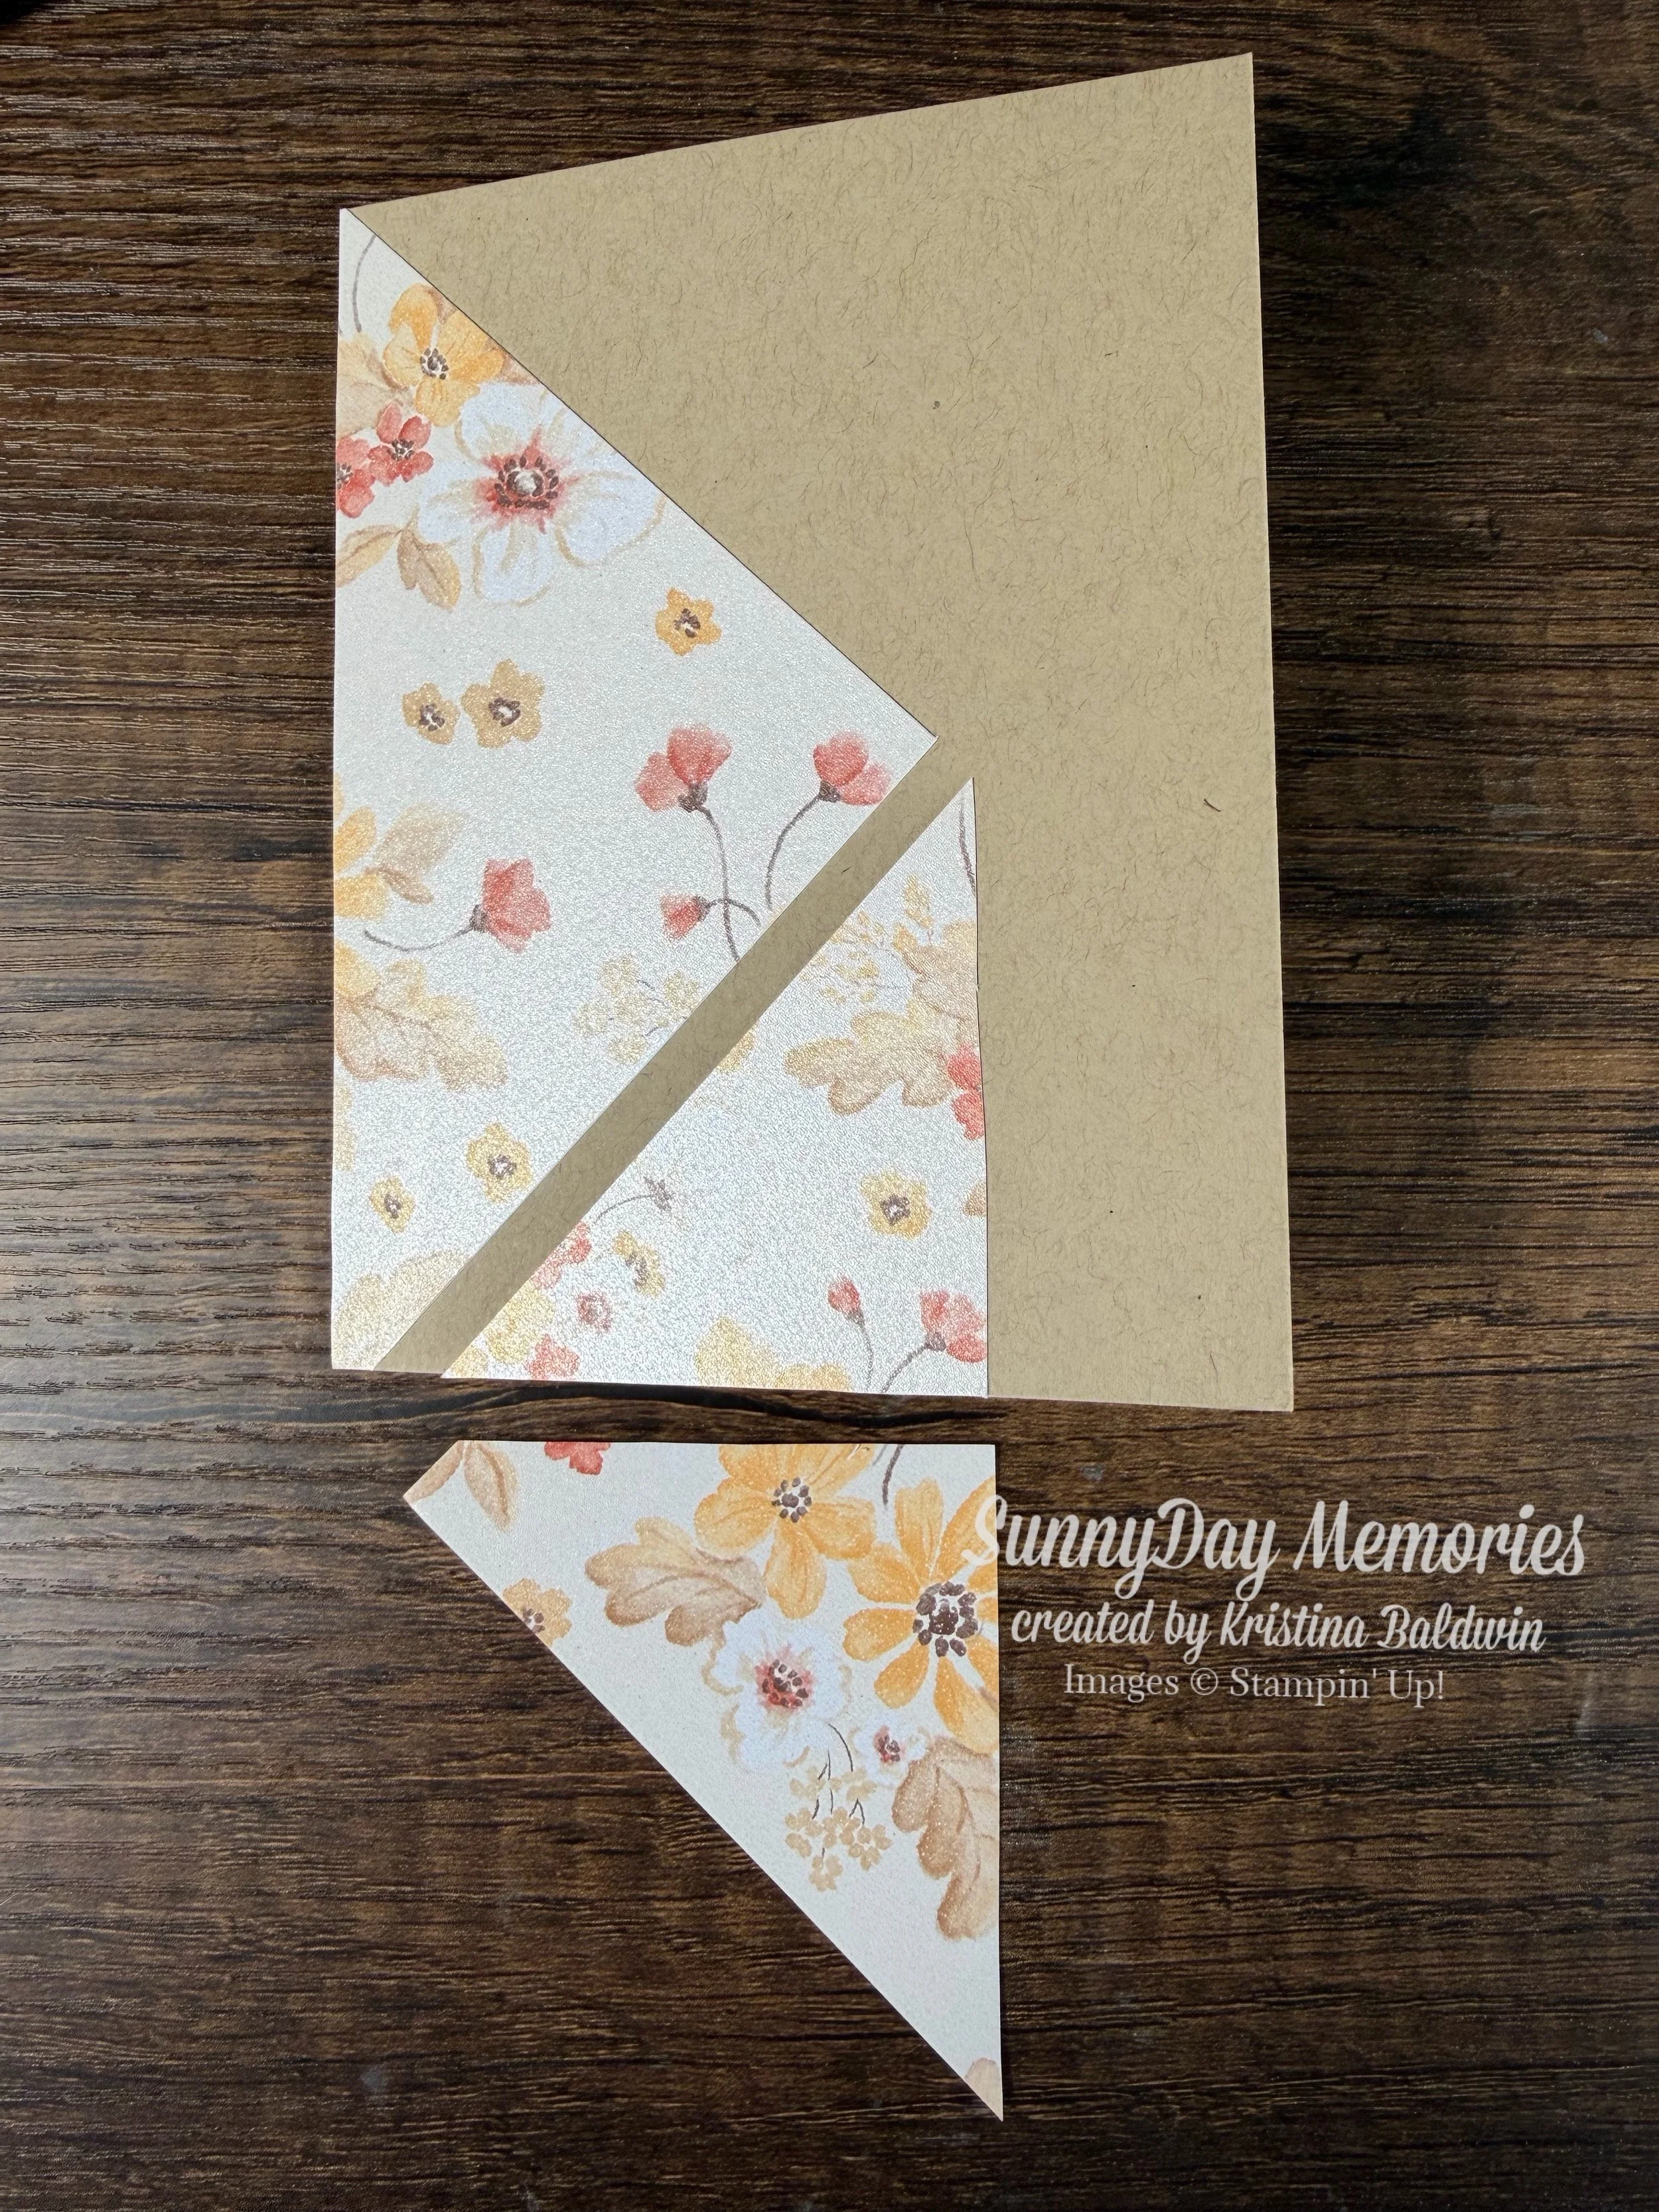
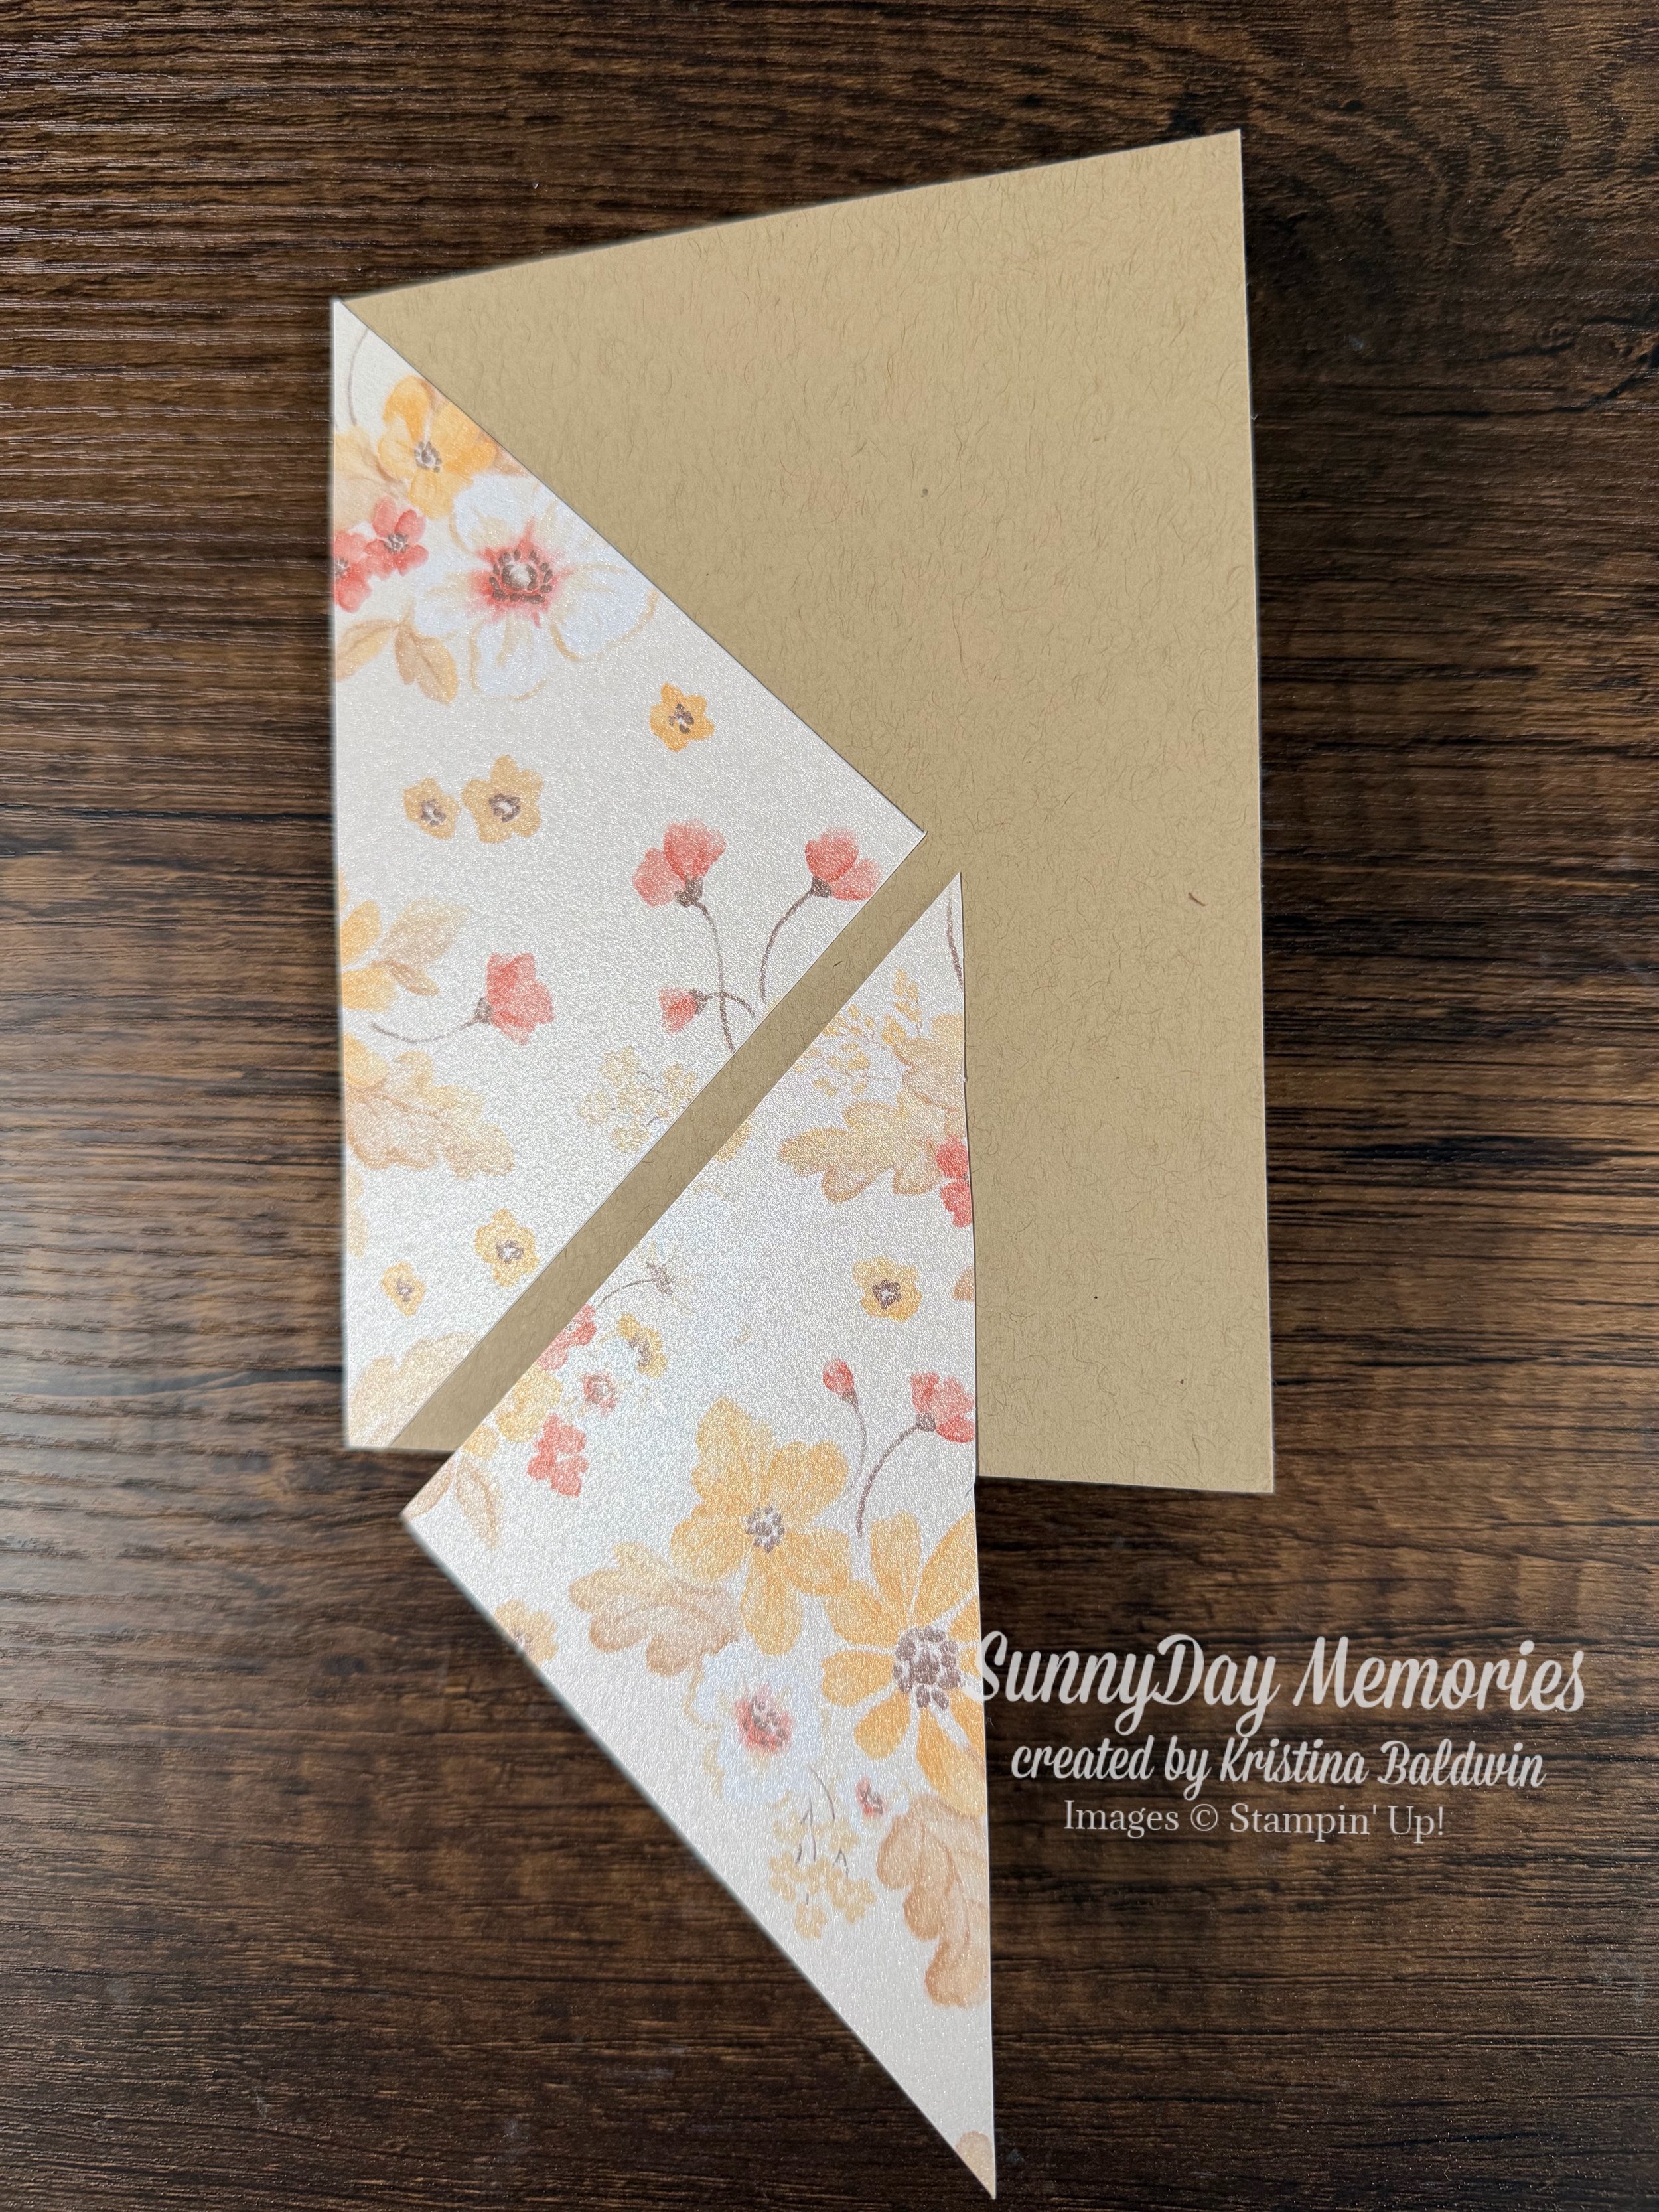
Trim away the excess.
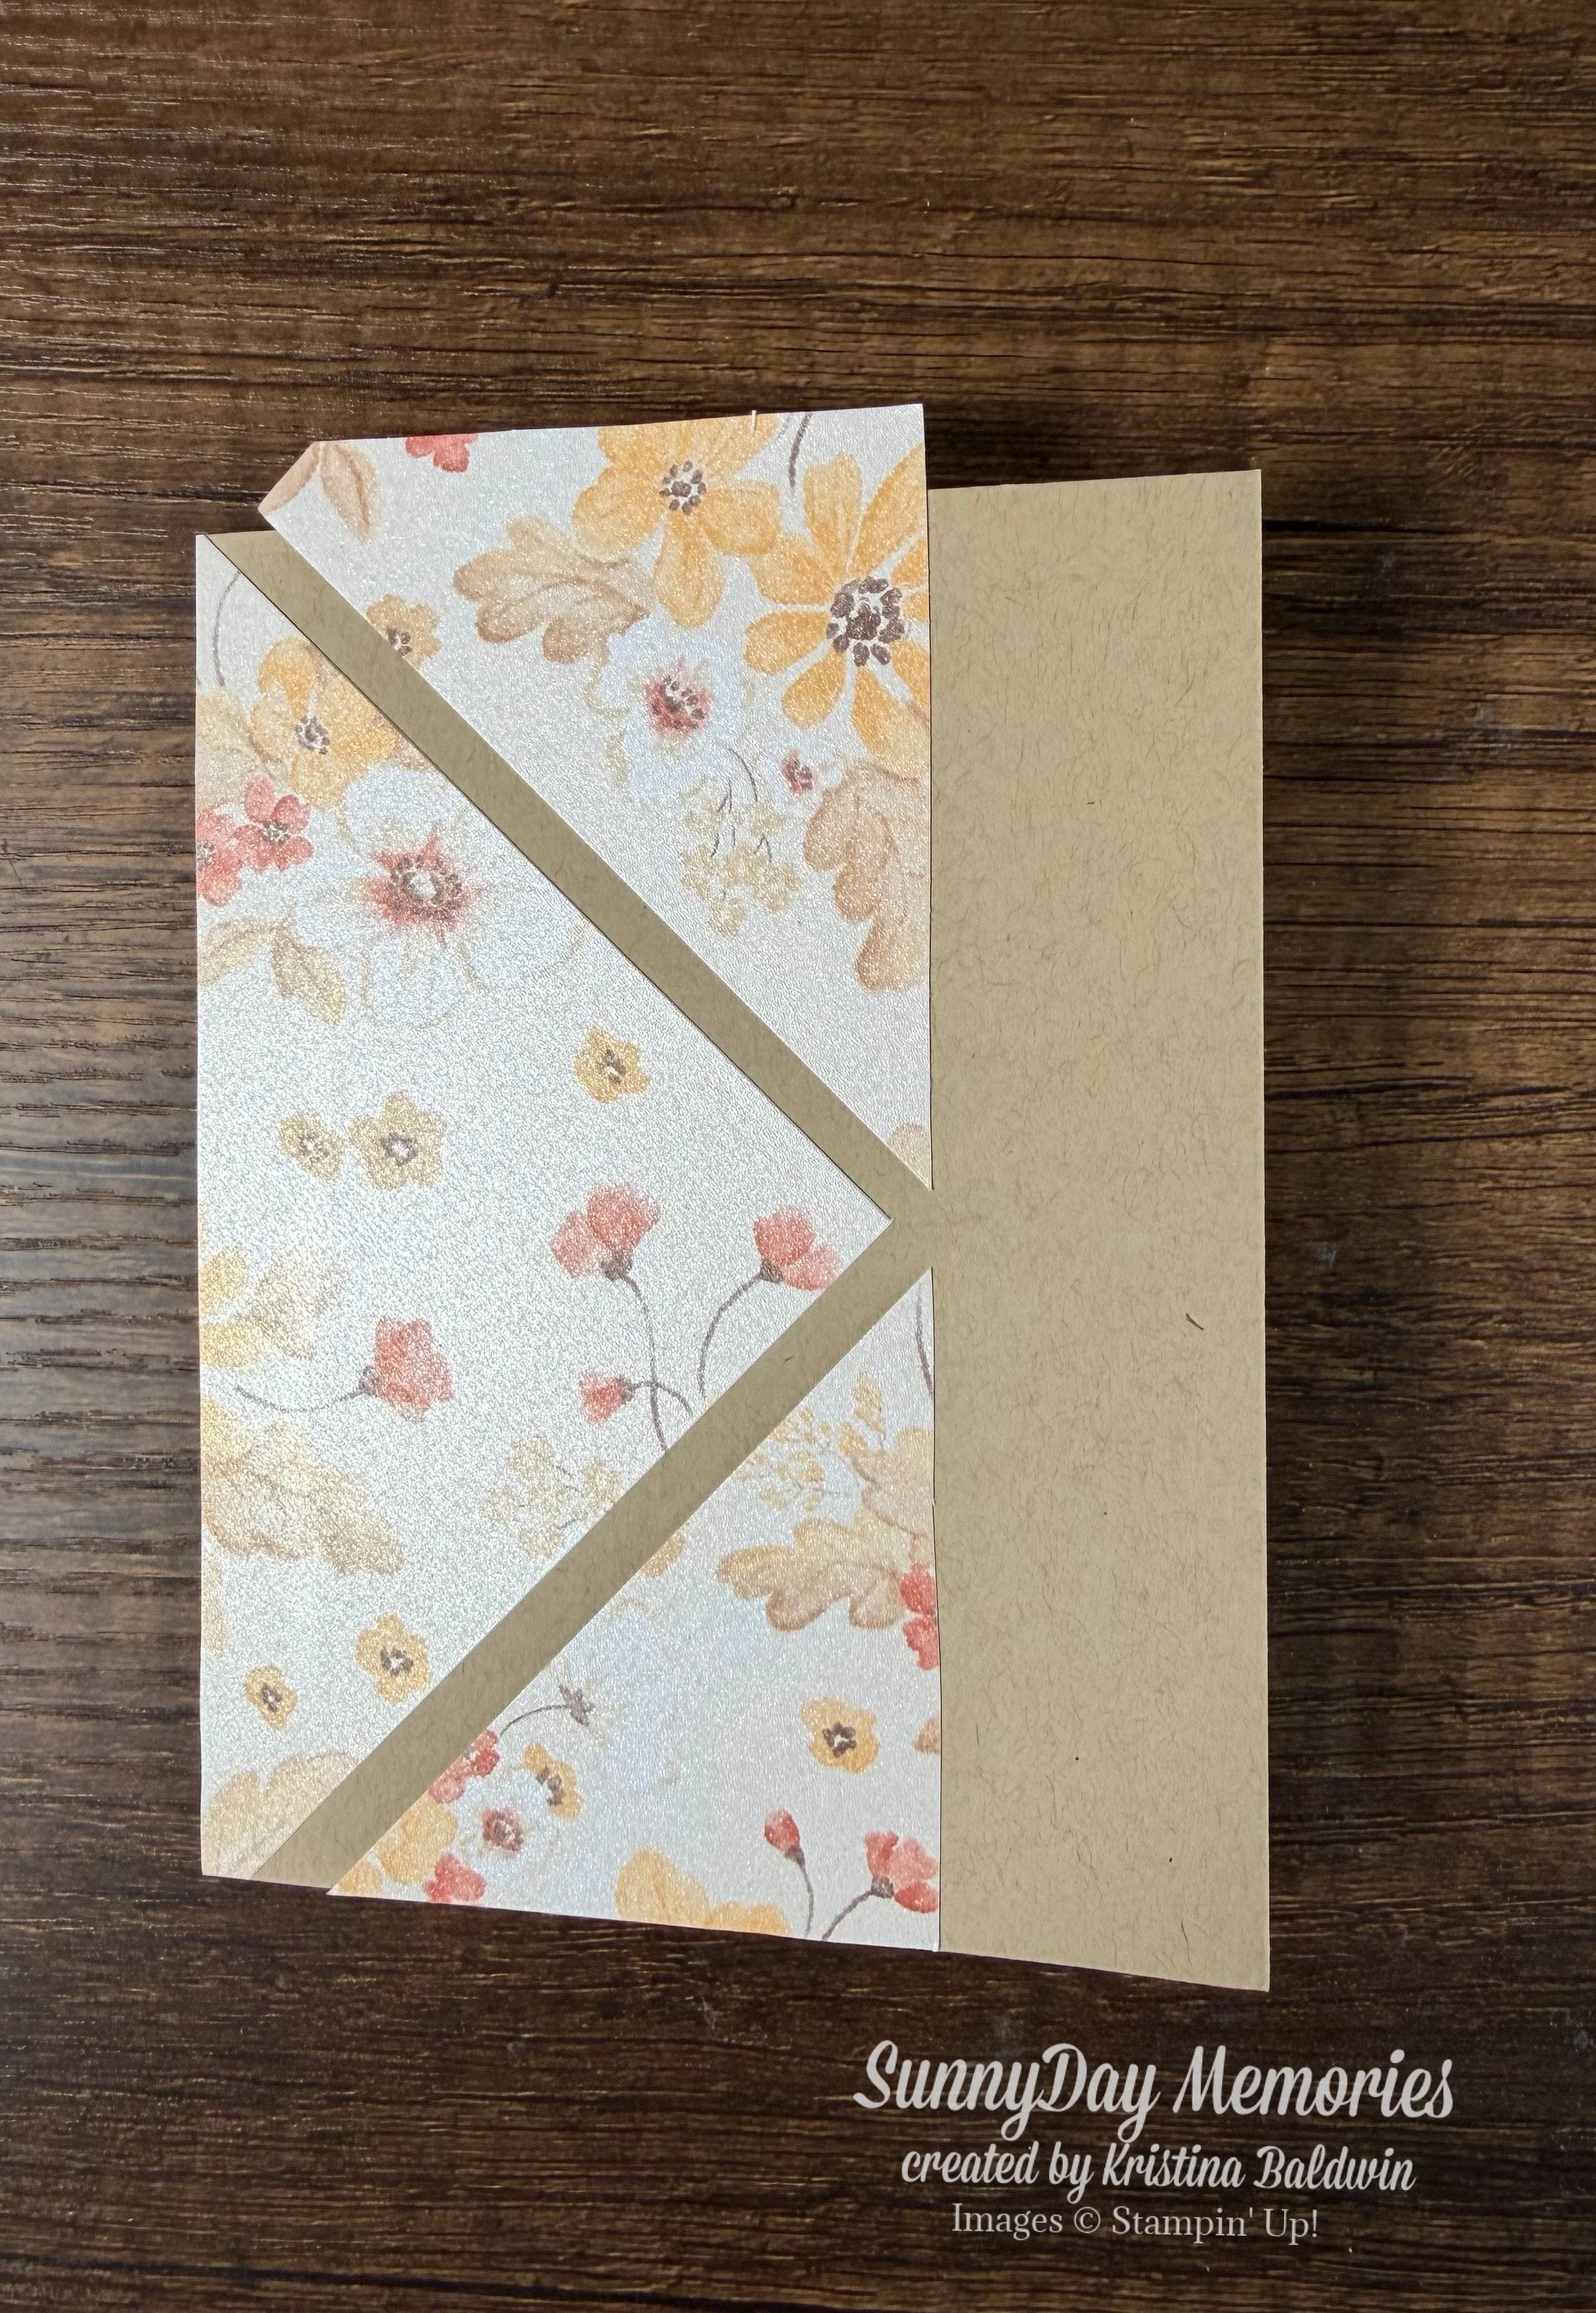
Adhere the remaining piece of patterned paper to the top of the card, again making sure the tips meet together and an equal gap is left between the 2 patterned pieces.
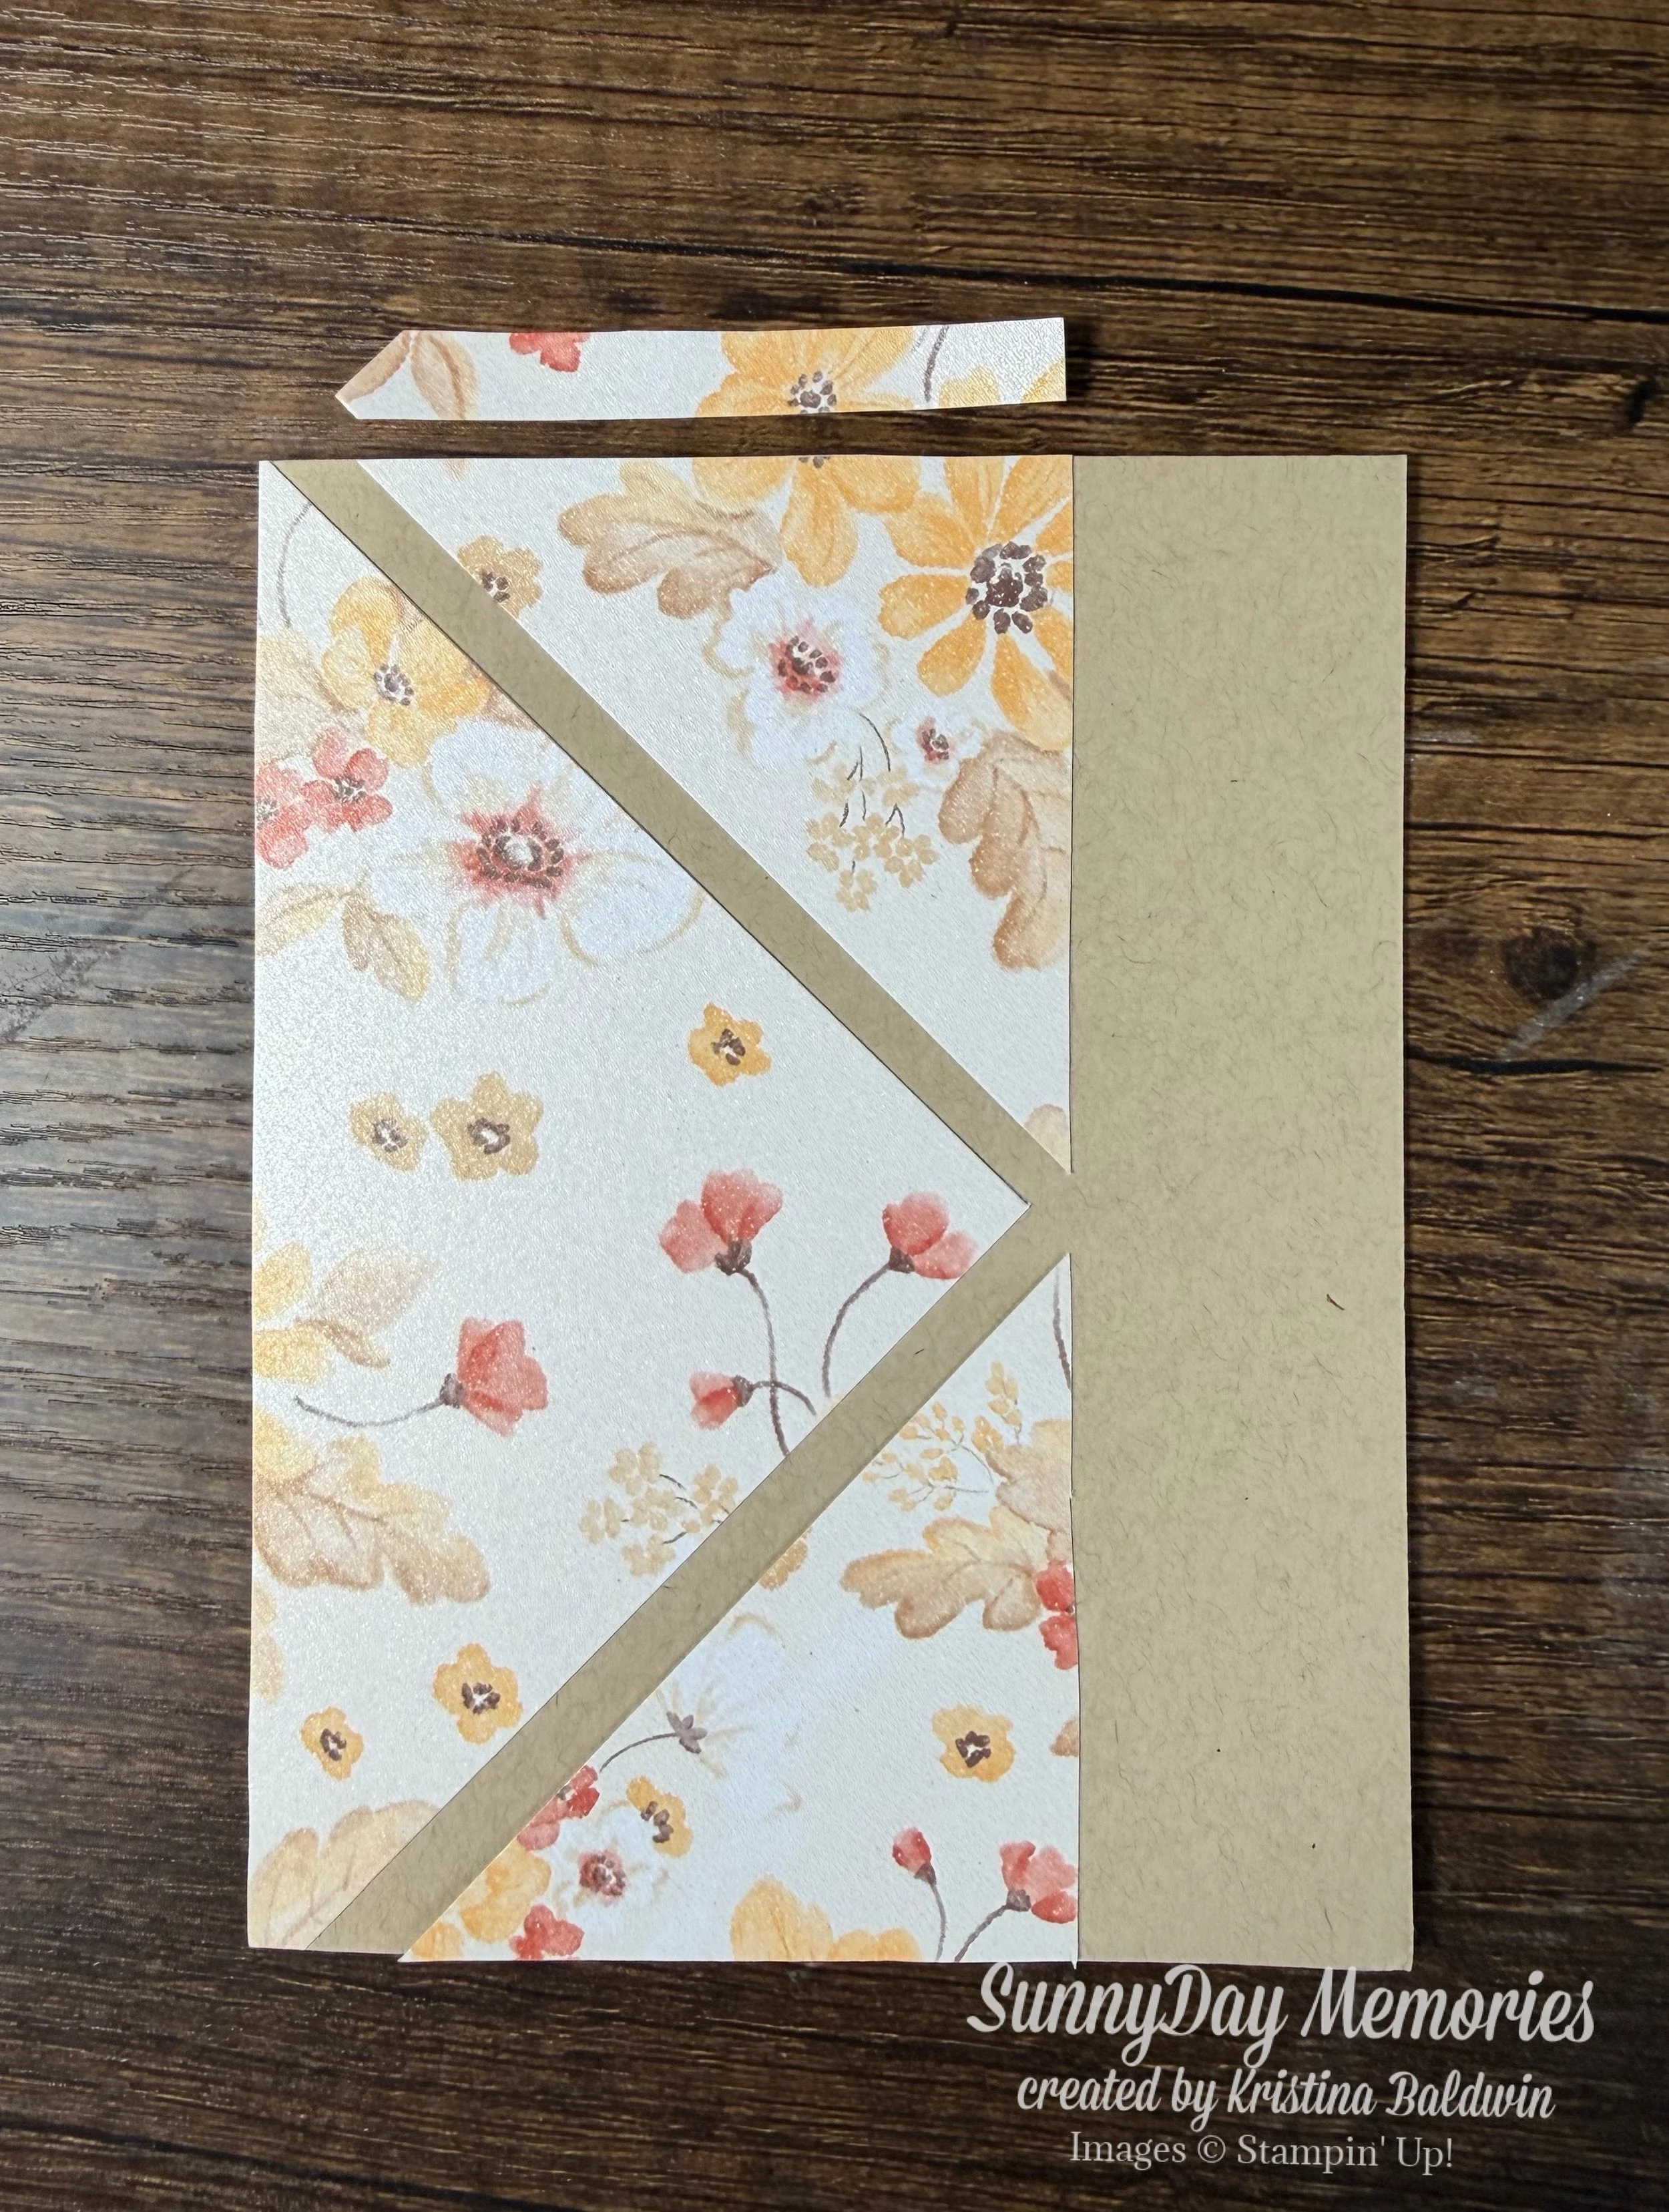
Trim away the excess. Very little waste, right? Now you just go ahead and finish it off as desired. You can add some stamping, some embellishments, whatever you wish. The end result is a stunning card that was created with a 4” x 4” piece of patterned paper.