
Dimensional Ink Technique
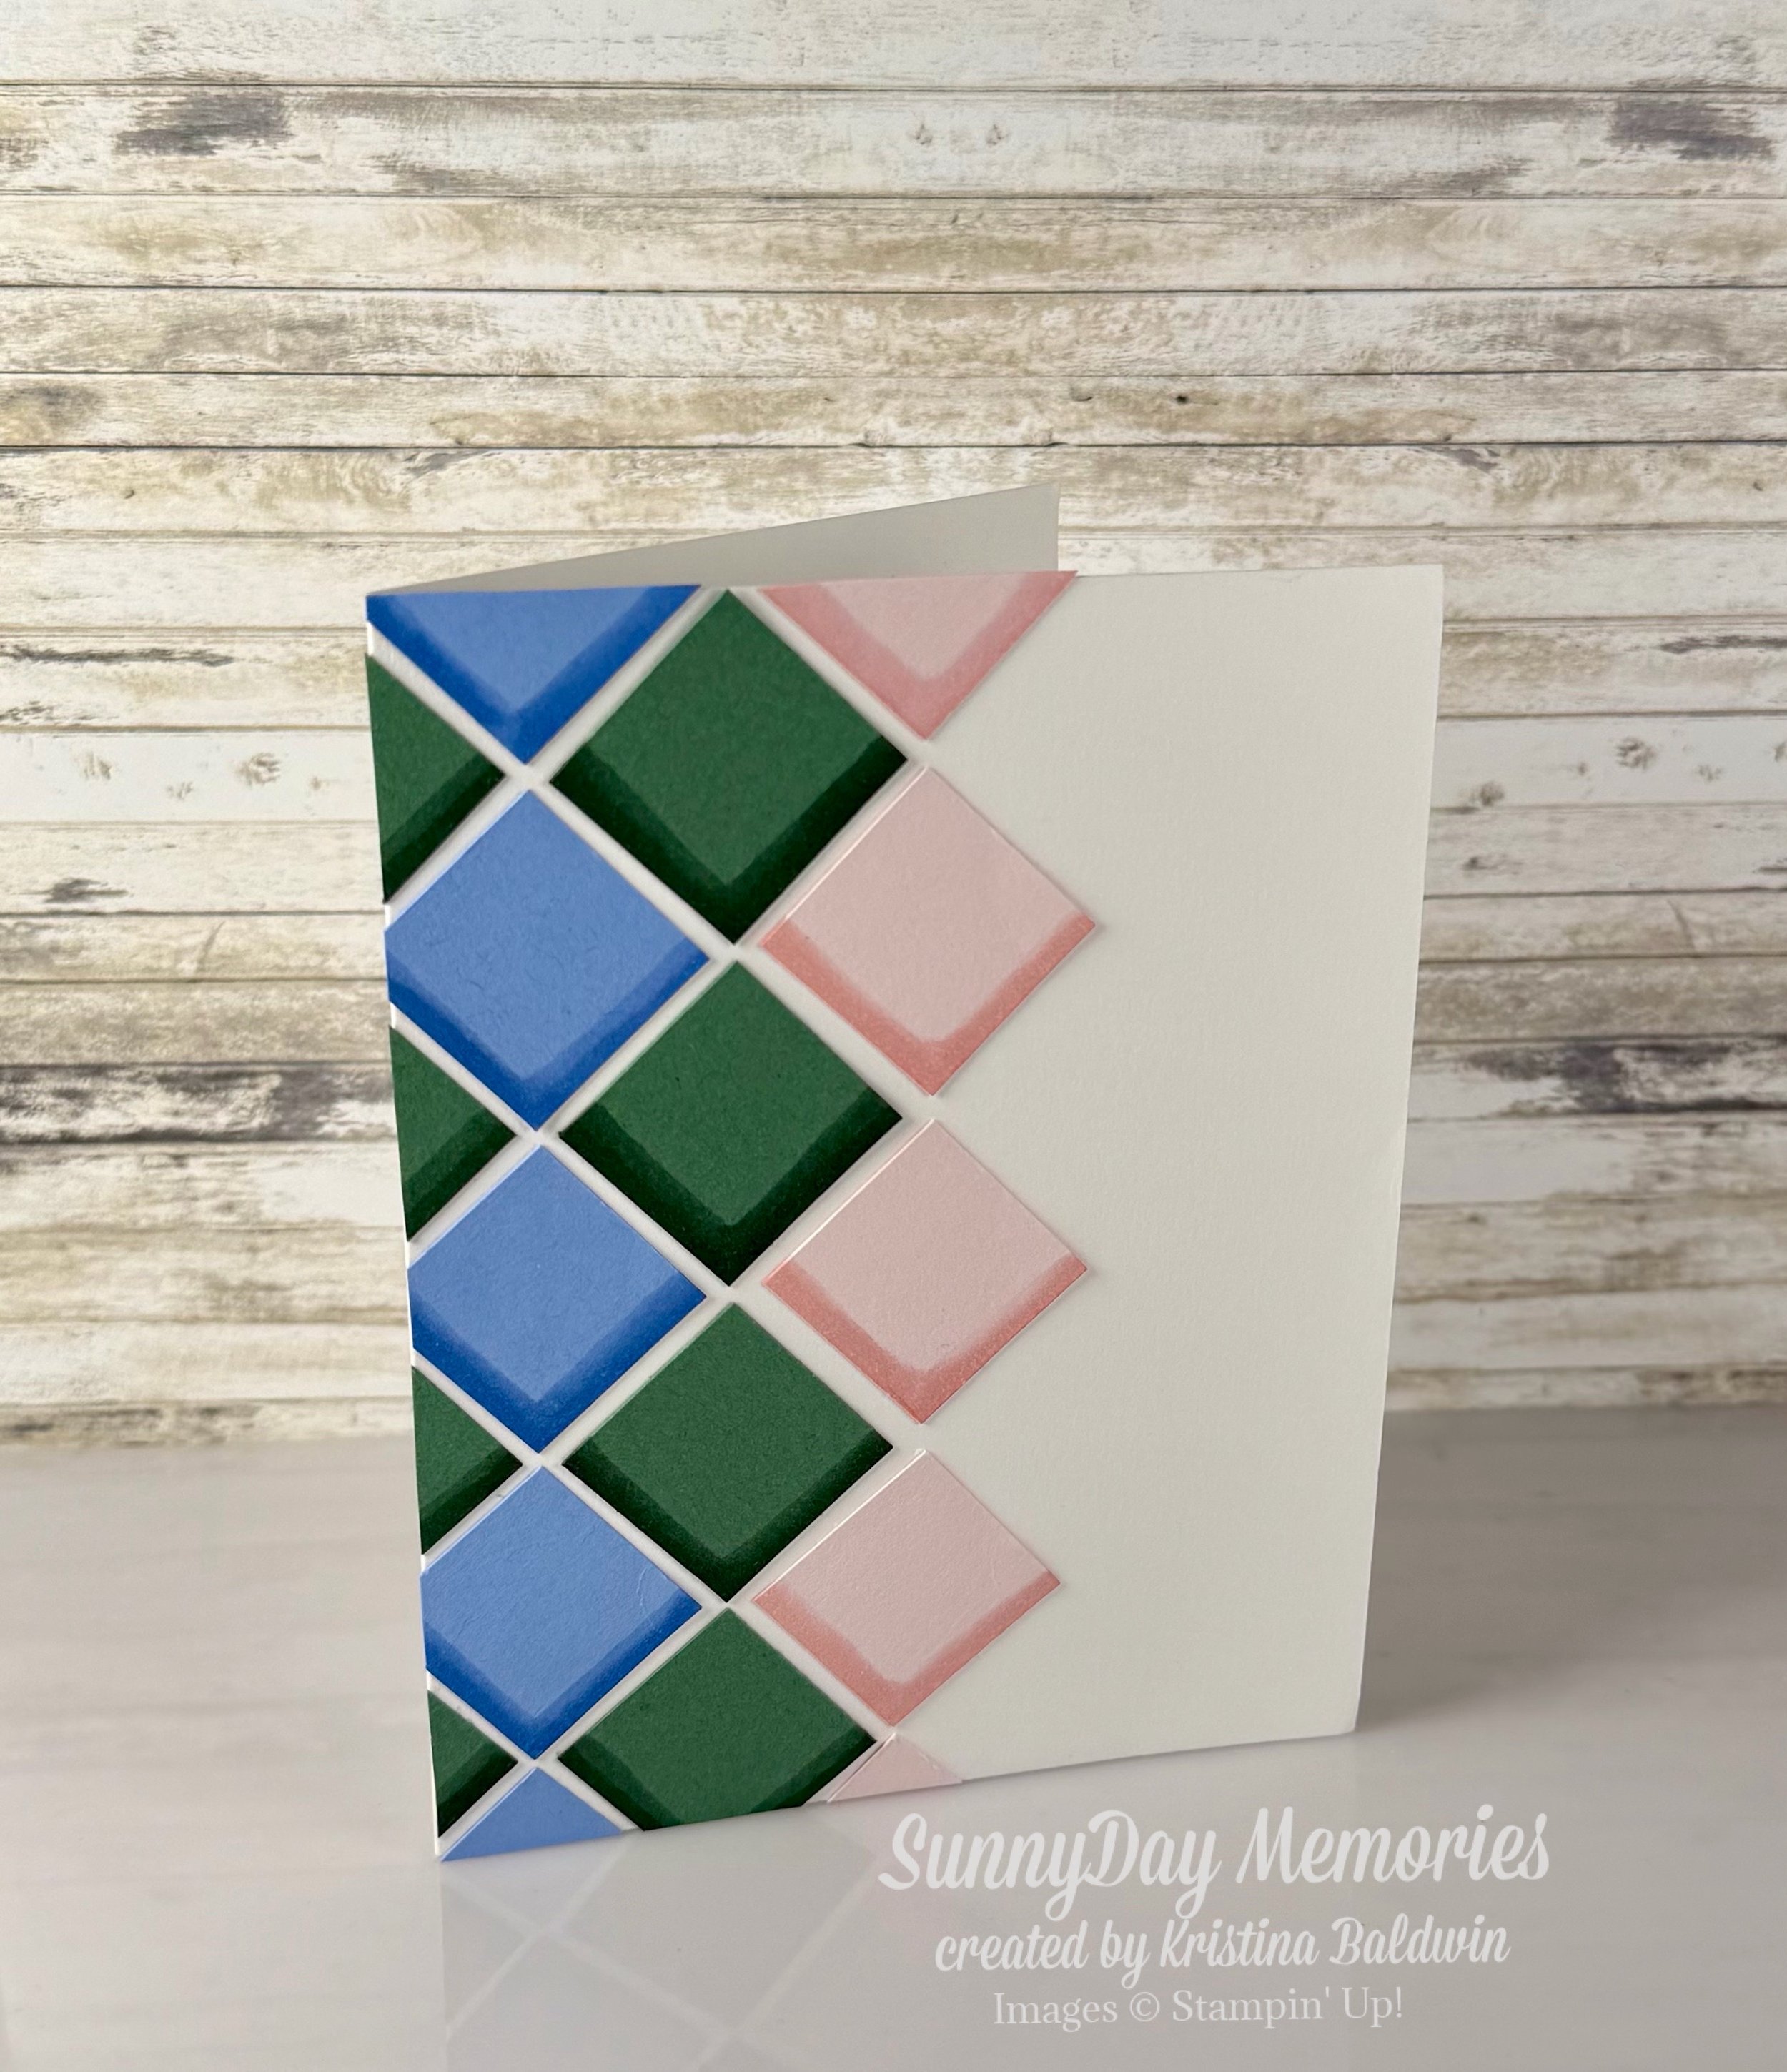
Last month we did a team challenge where we were to use ink without stamping. It was a way to expand our skills and think outside the box. This is the card that I created. I’m calling it Dimensional Ink Technique. It’s so simple to do and I personally think it looks pretty darn cool once complete! Let me show you how to achieve this look.
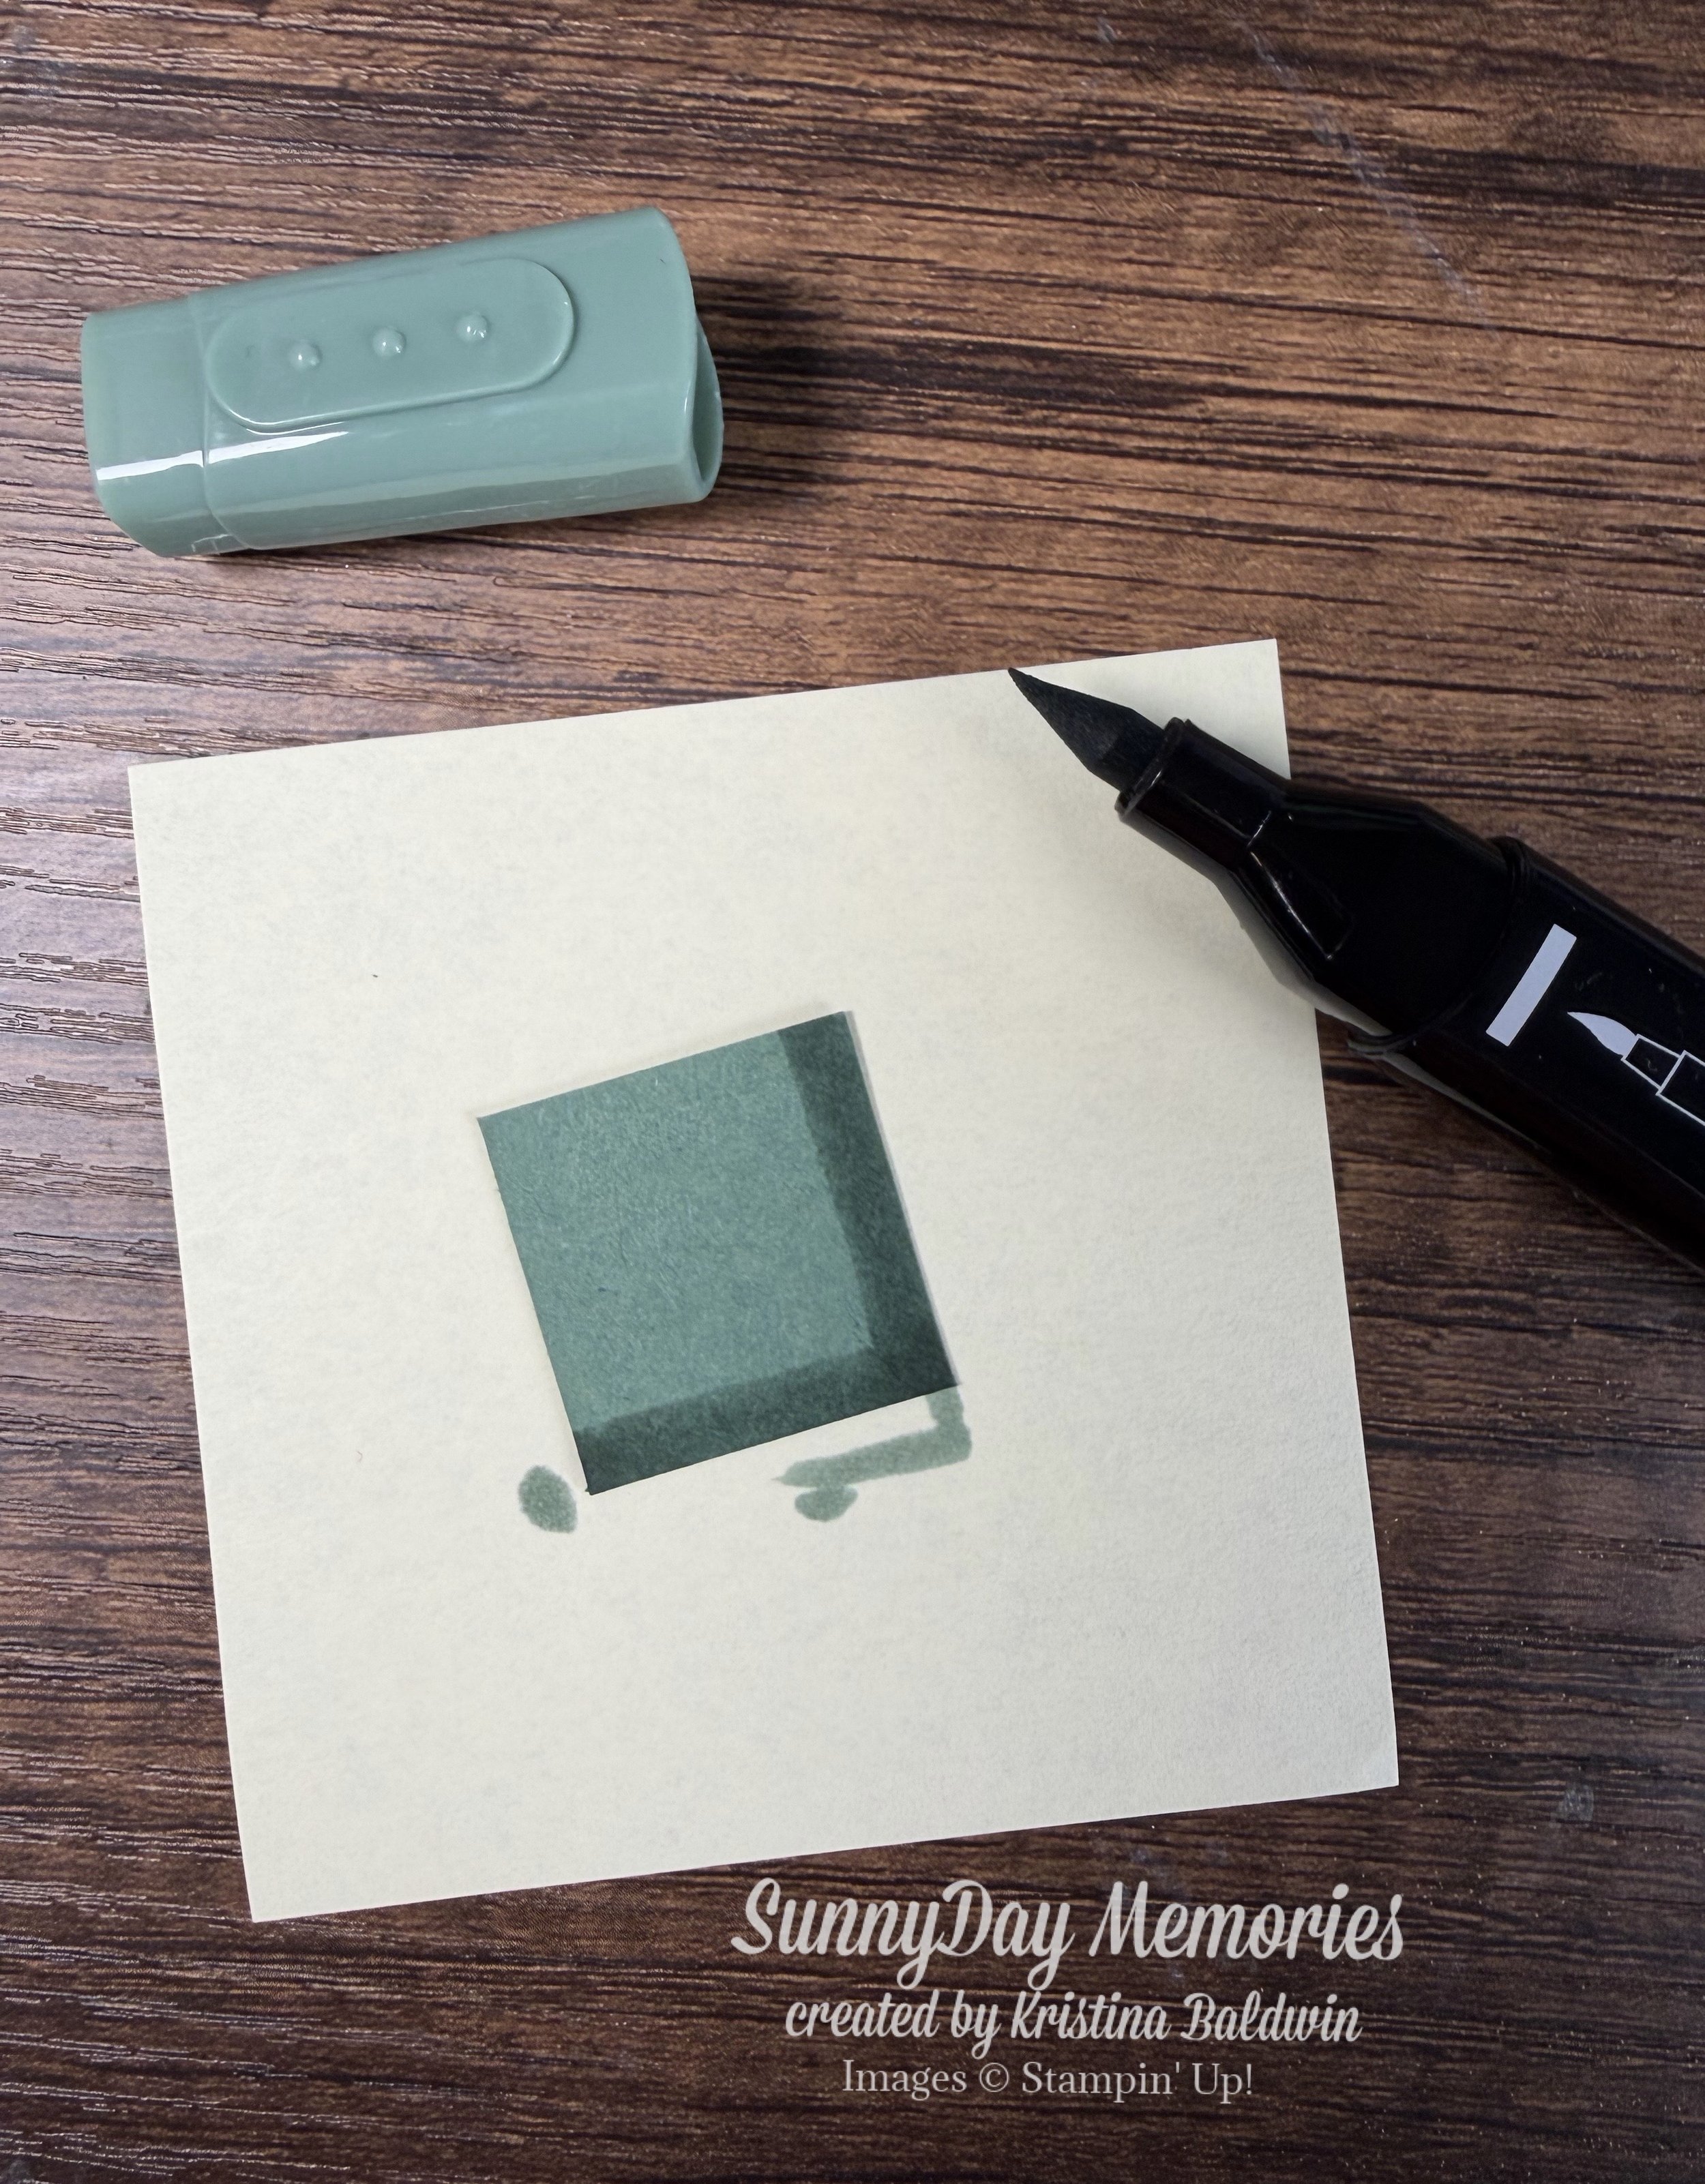
STEP 1:
Cut several squares of cardstock—all the same size. I don’t still have my card but I believe I cut mine to 1-1/4” x 1-1/4”. Any small size square will work though. Then using the same color of Stampin’ Blends Markers as the cardstock, start with the LIGHT shade and color a wide swatch along 2 edges of the square.
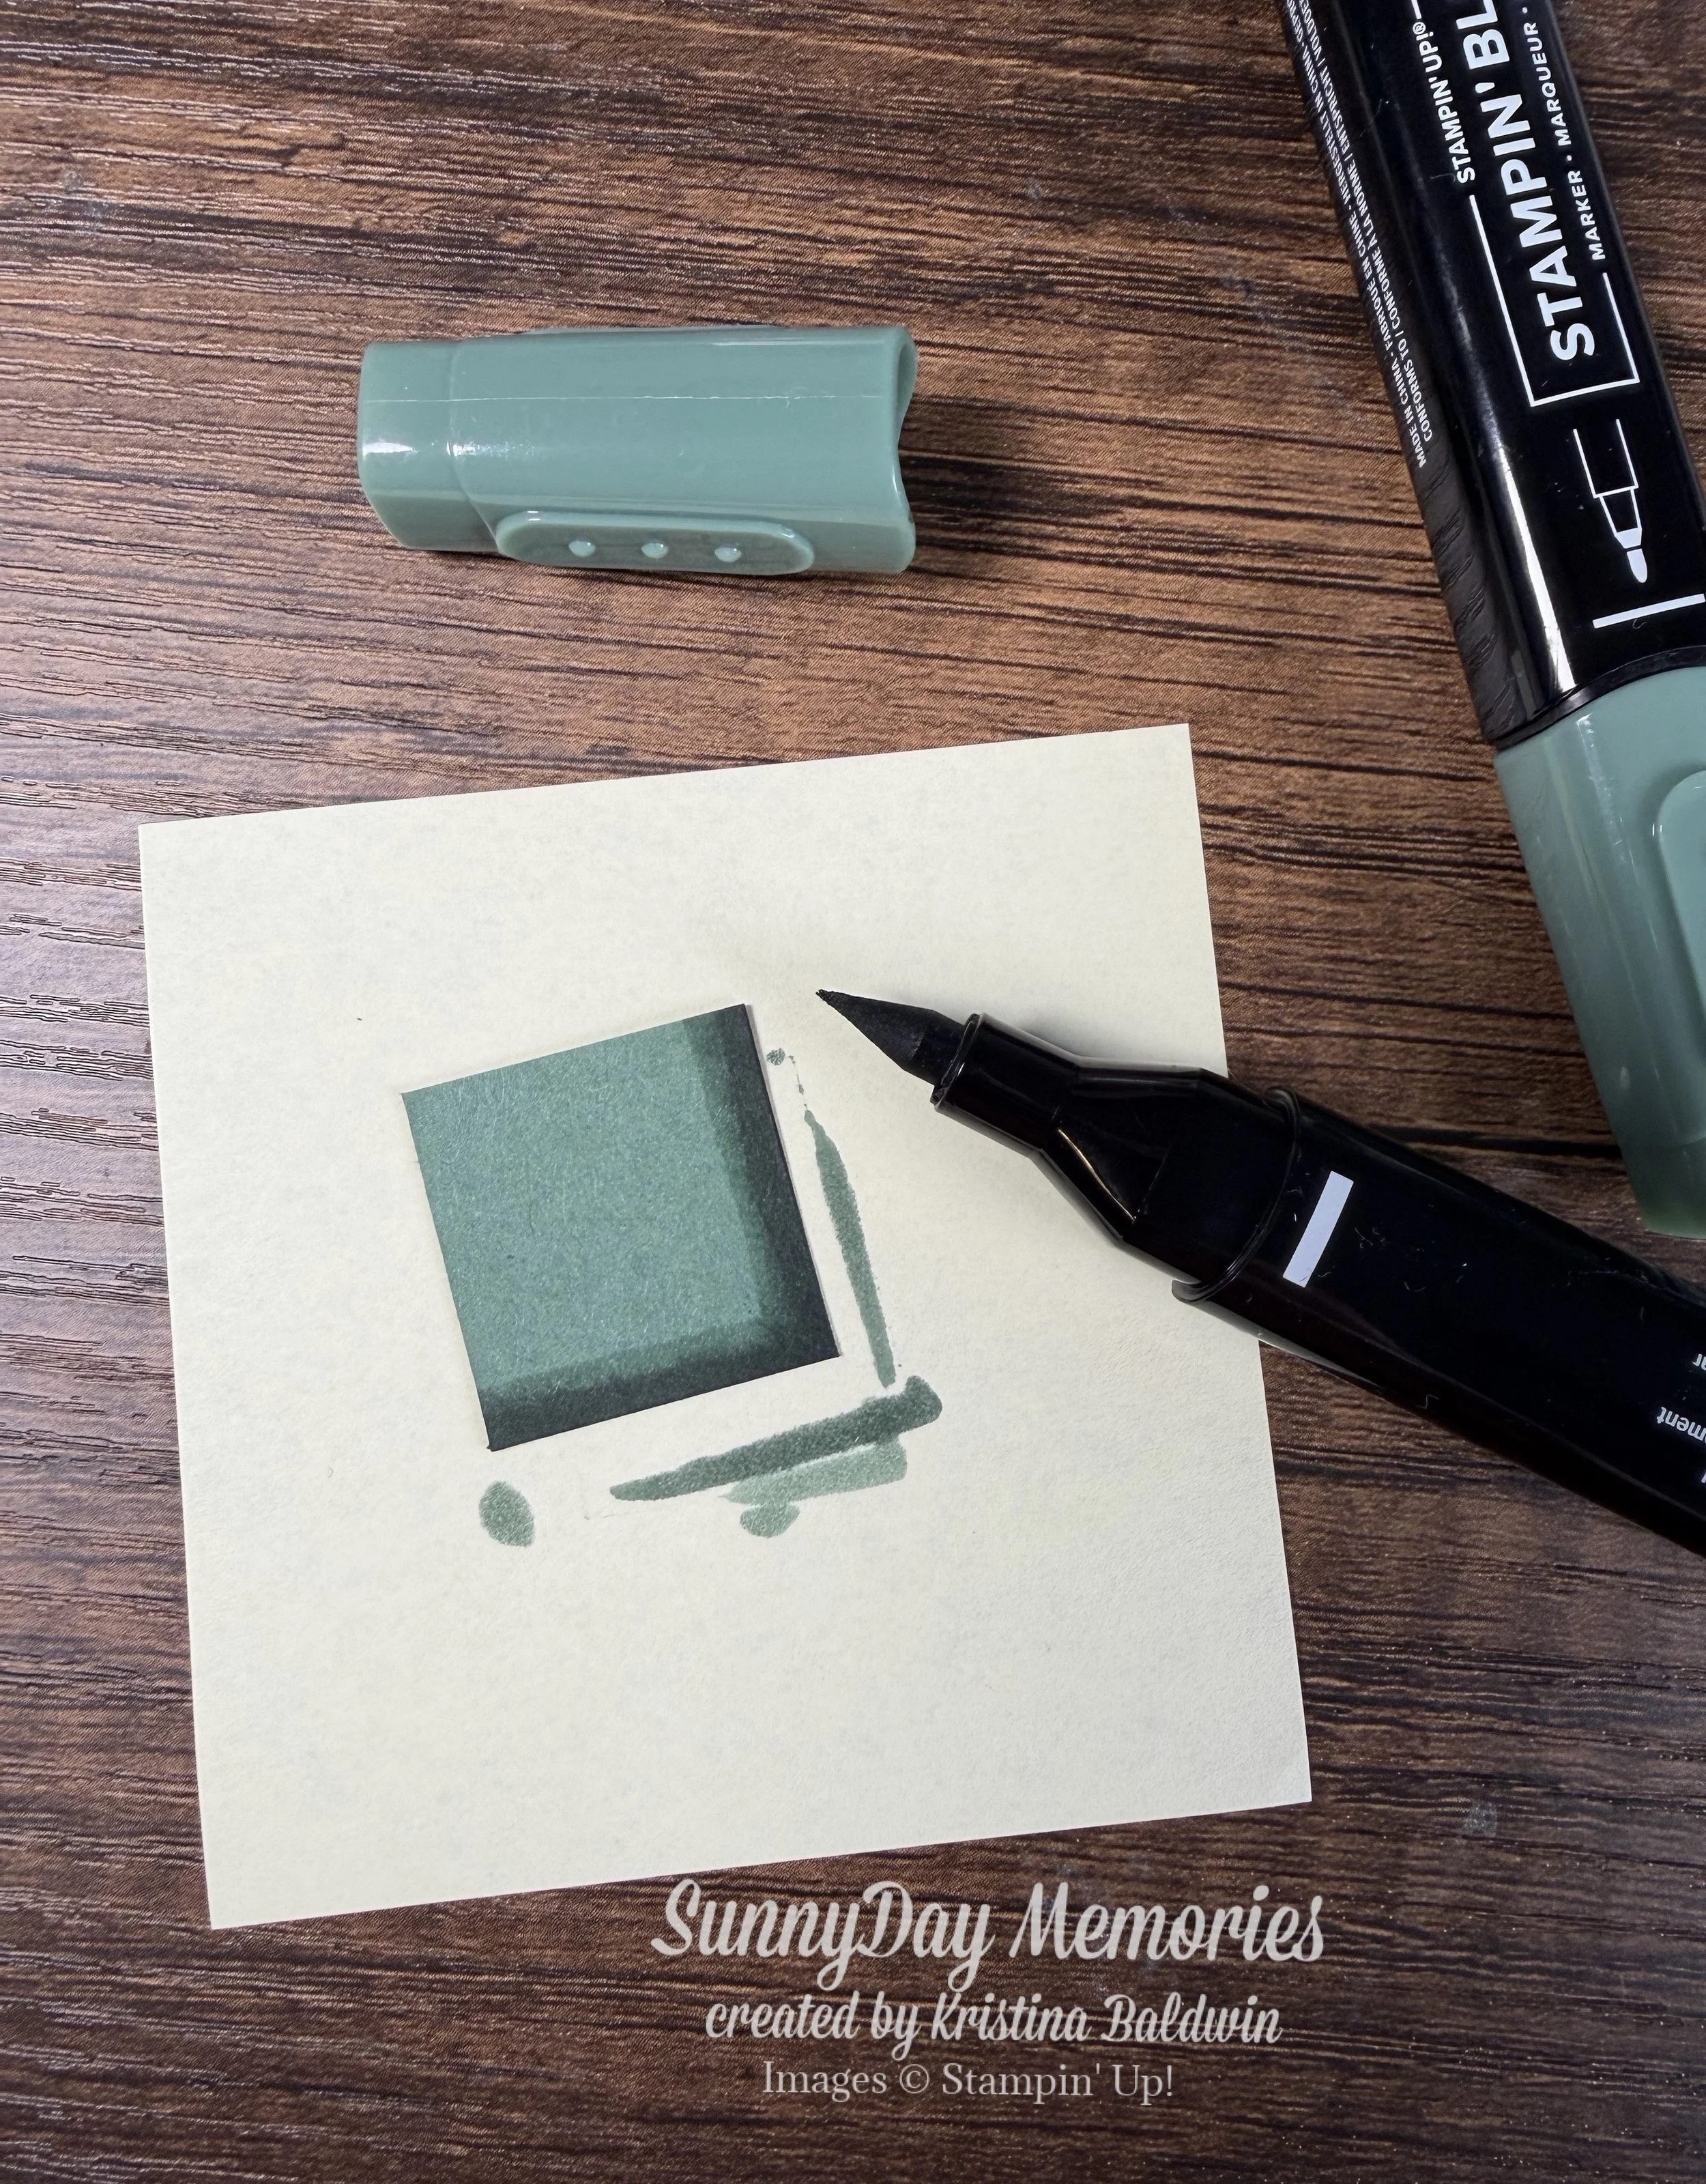
STEP 2:
Trace the color swatches from Step 1 with the DARK shade Stampin’ Blend so that it’s about half the width and closest to the edge of the cardstock. This gives you the illusion of dimension. Repeat with all your squares.
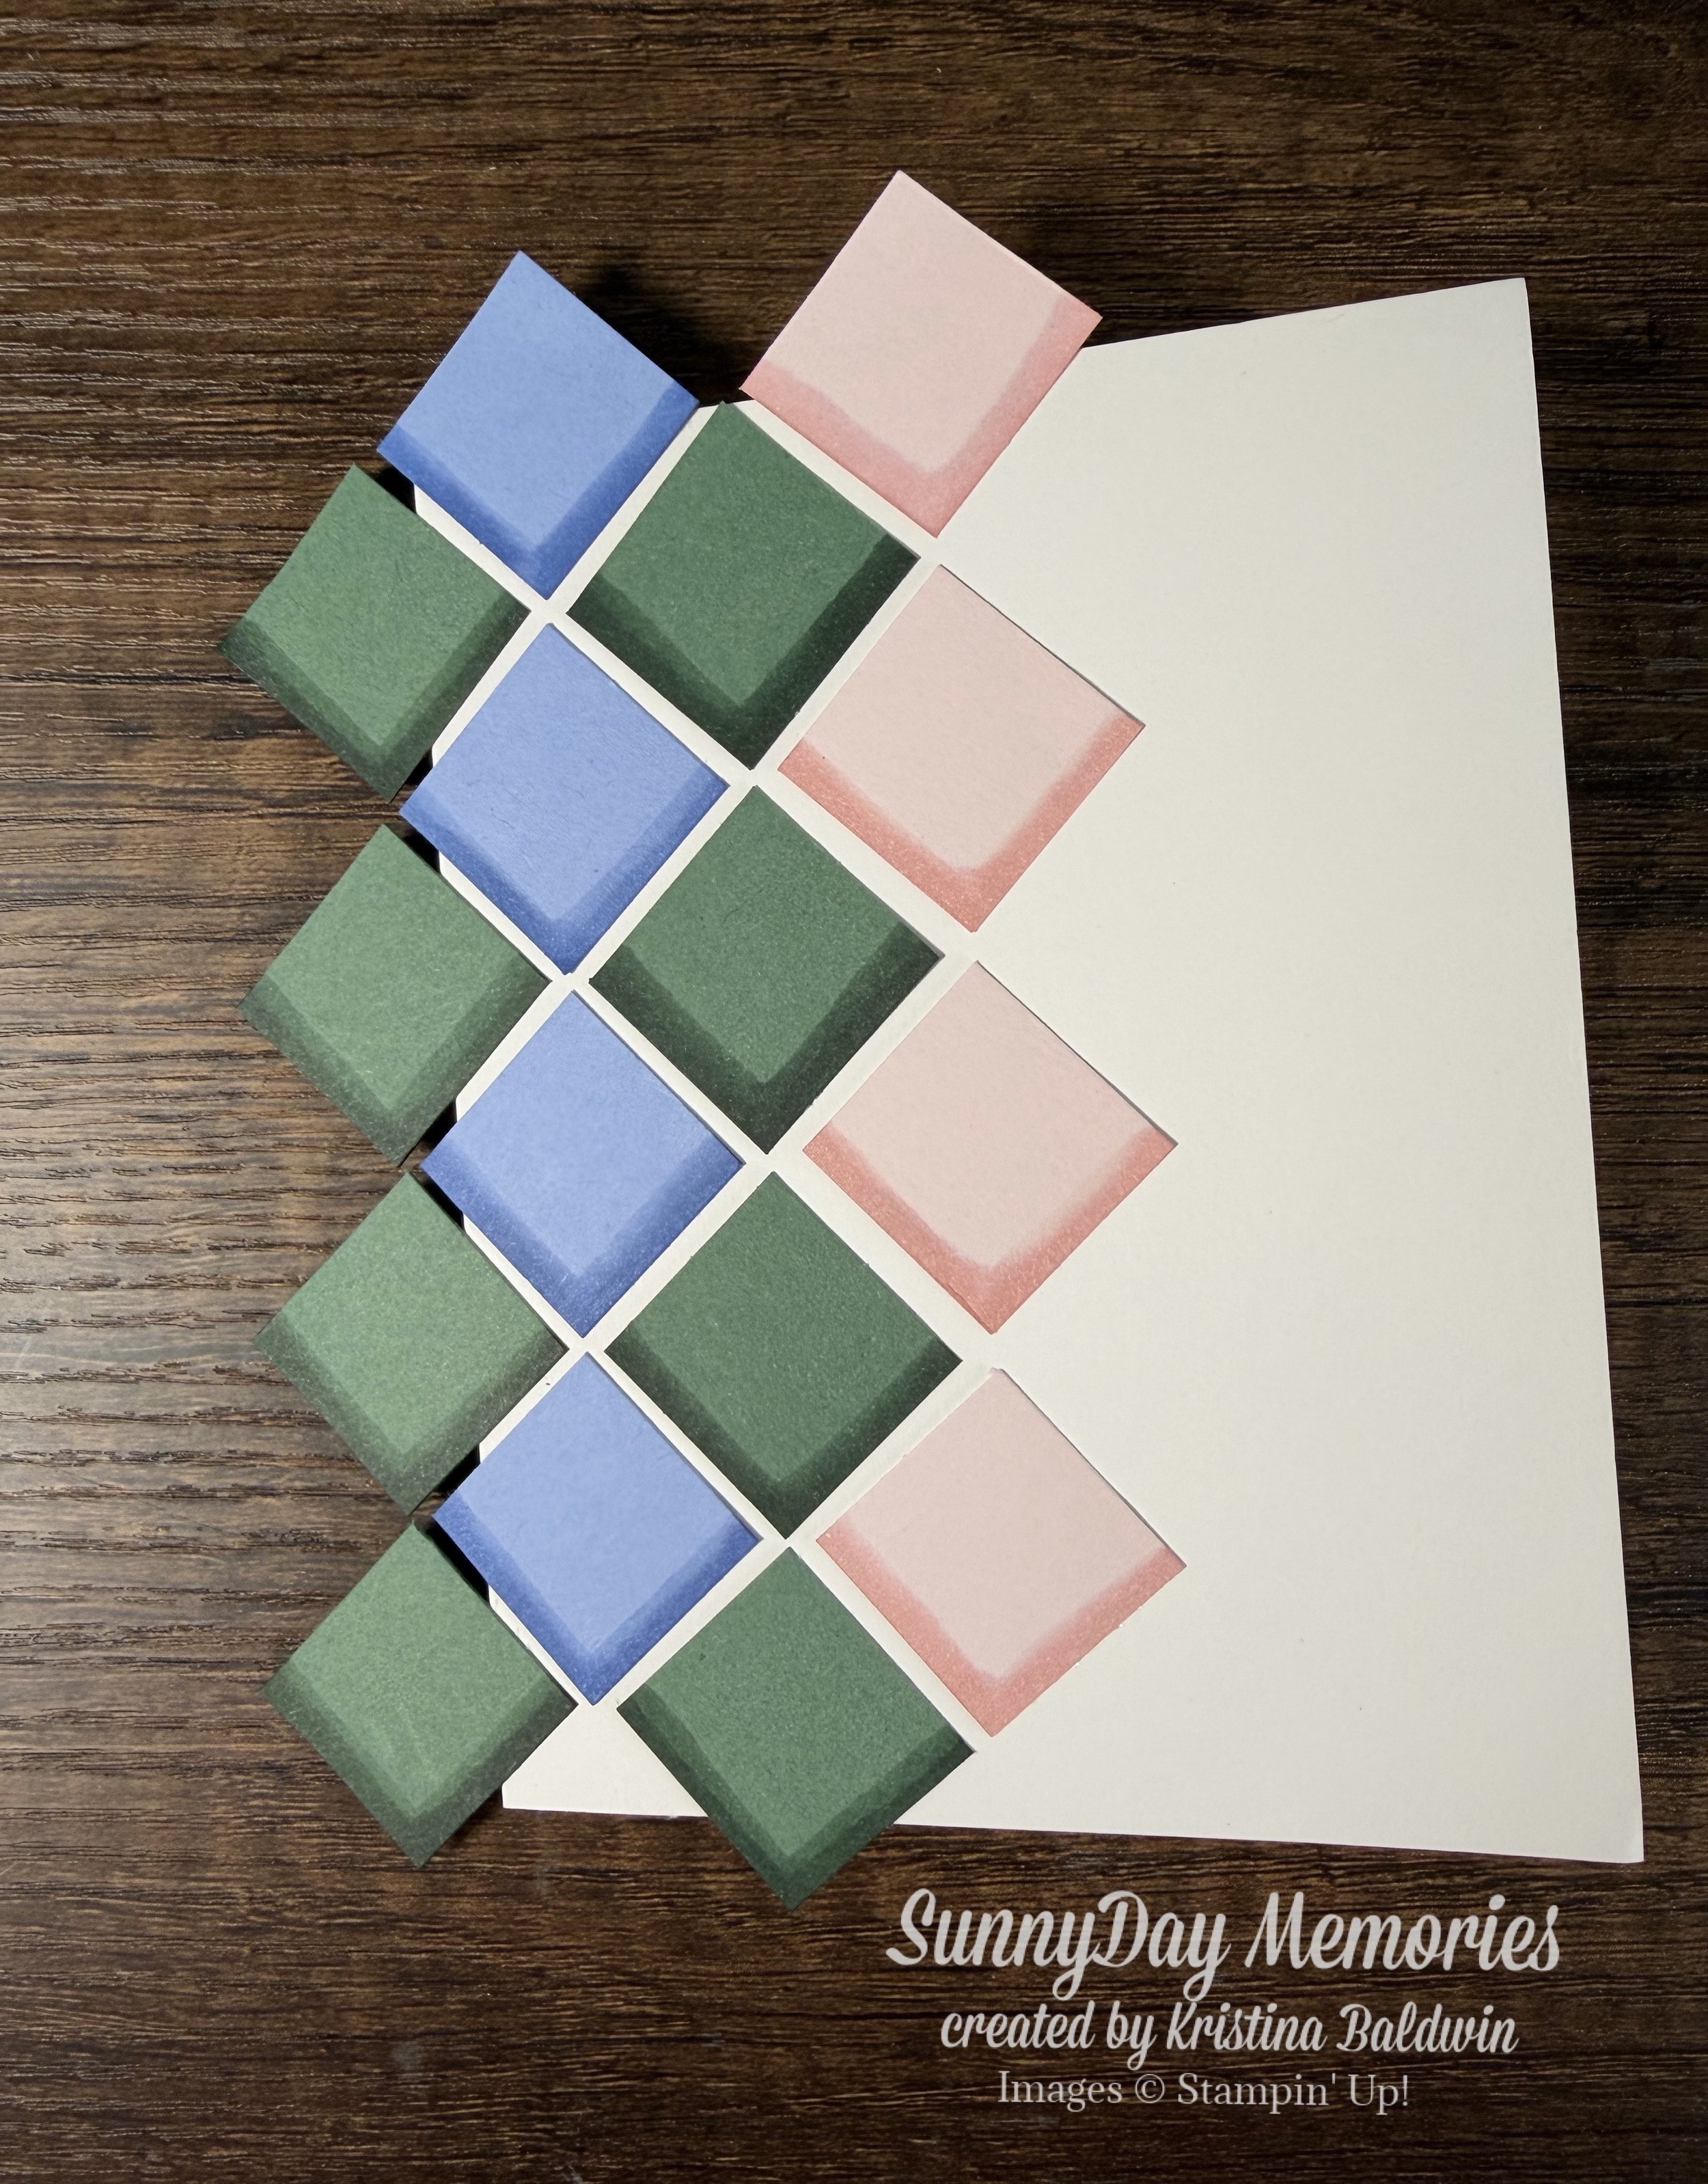
STEP 3:
To create the card using the prepared squares, start by adding your first square in a diamond orientation in the upper left corner of your card. Add your next one below it leaving a little gap. Center another colored square between those first two squares. You’ll do this same process all the way down your card.
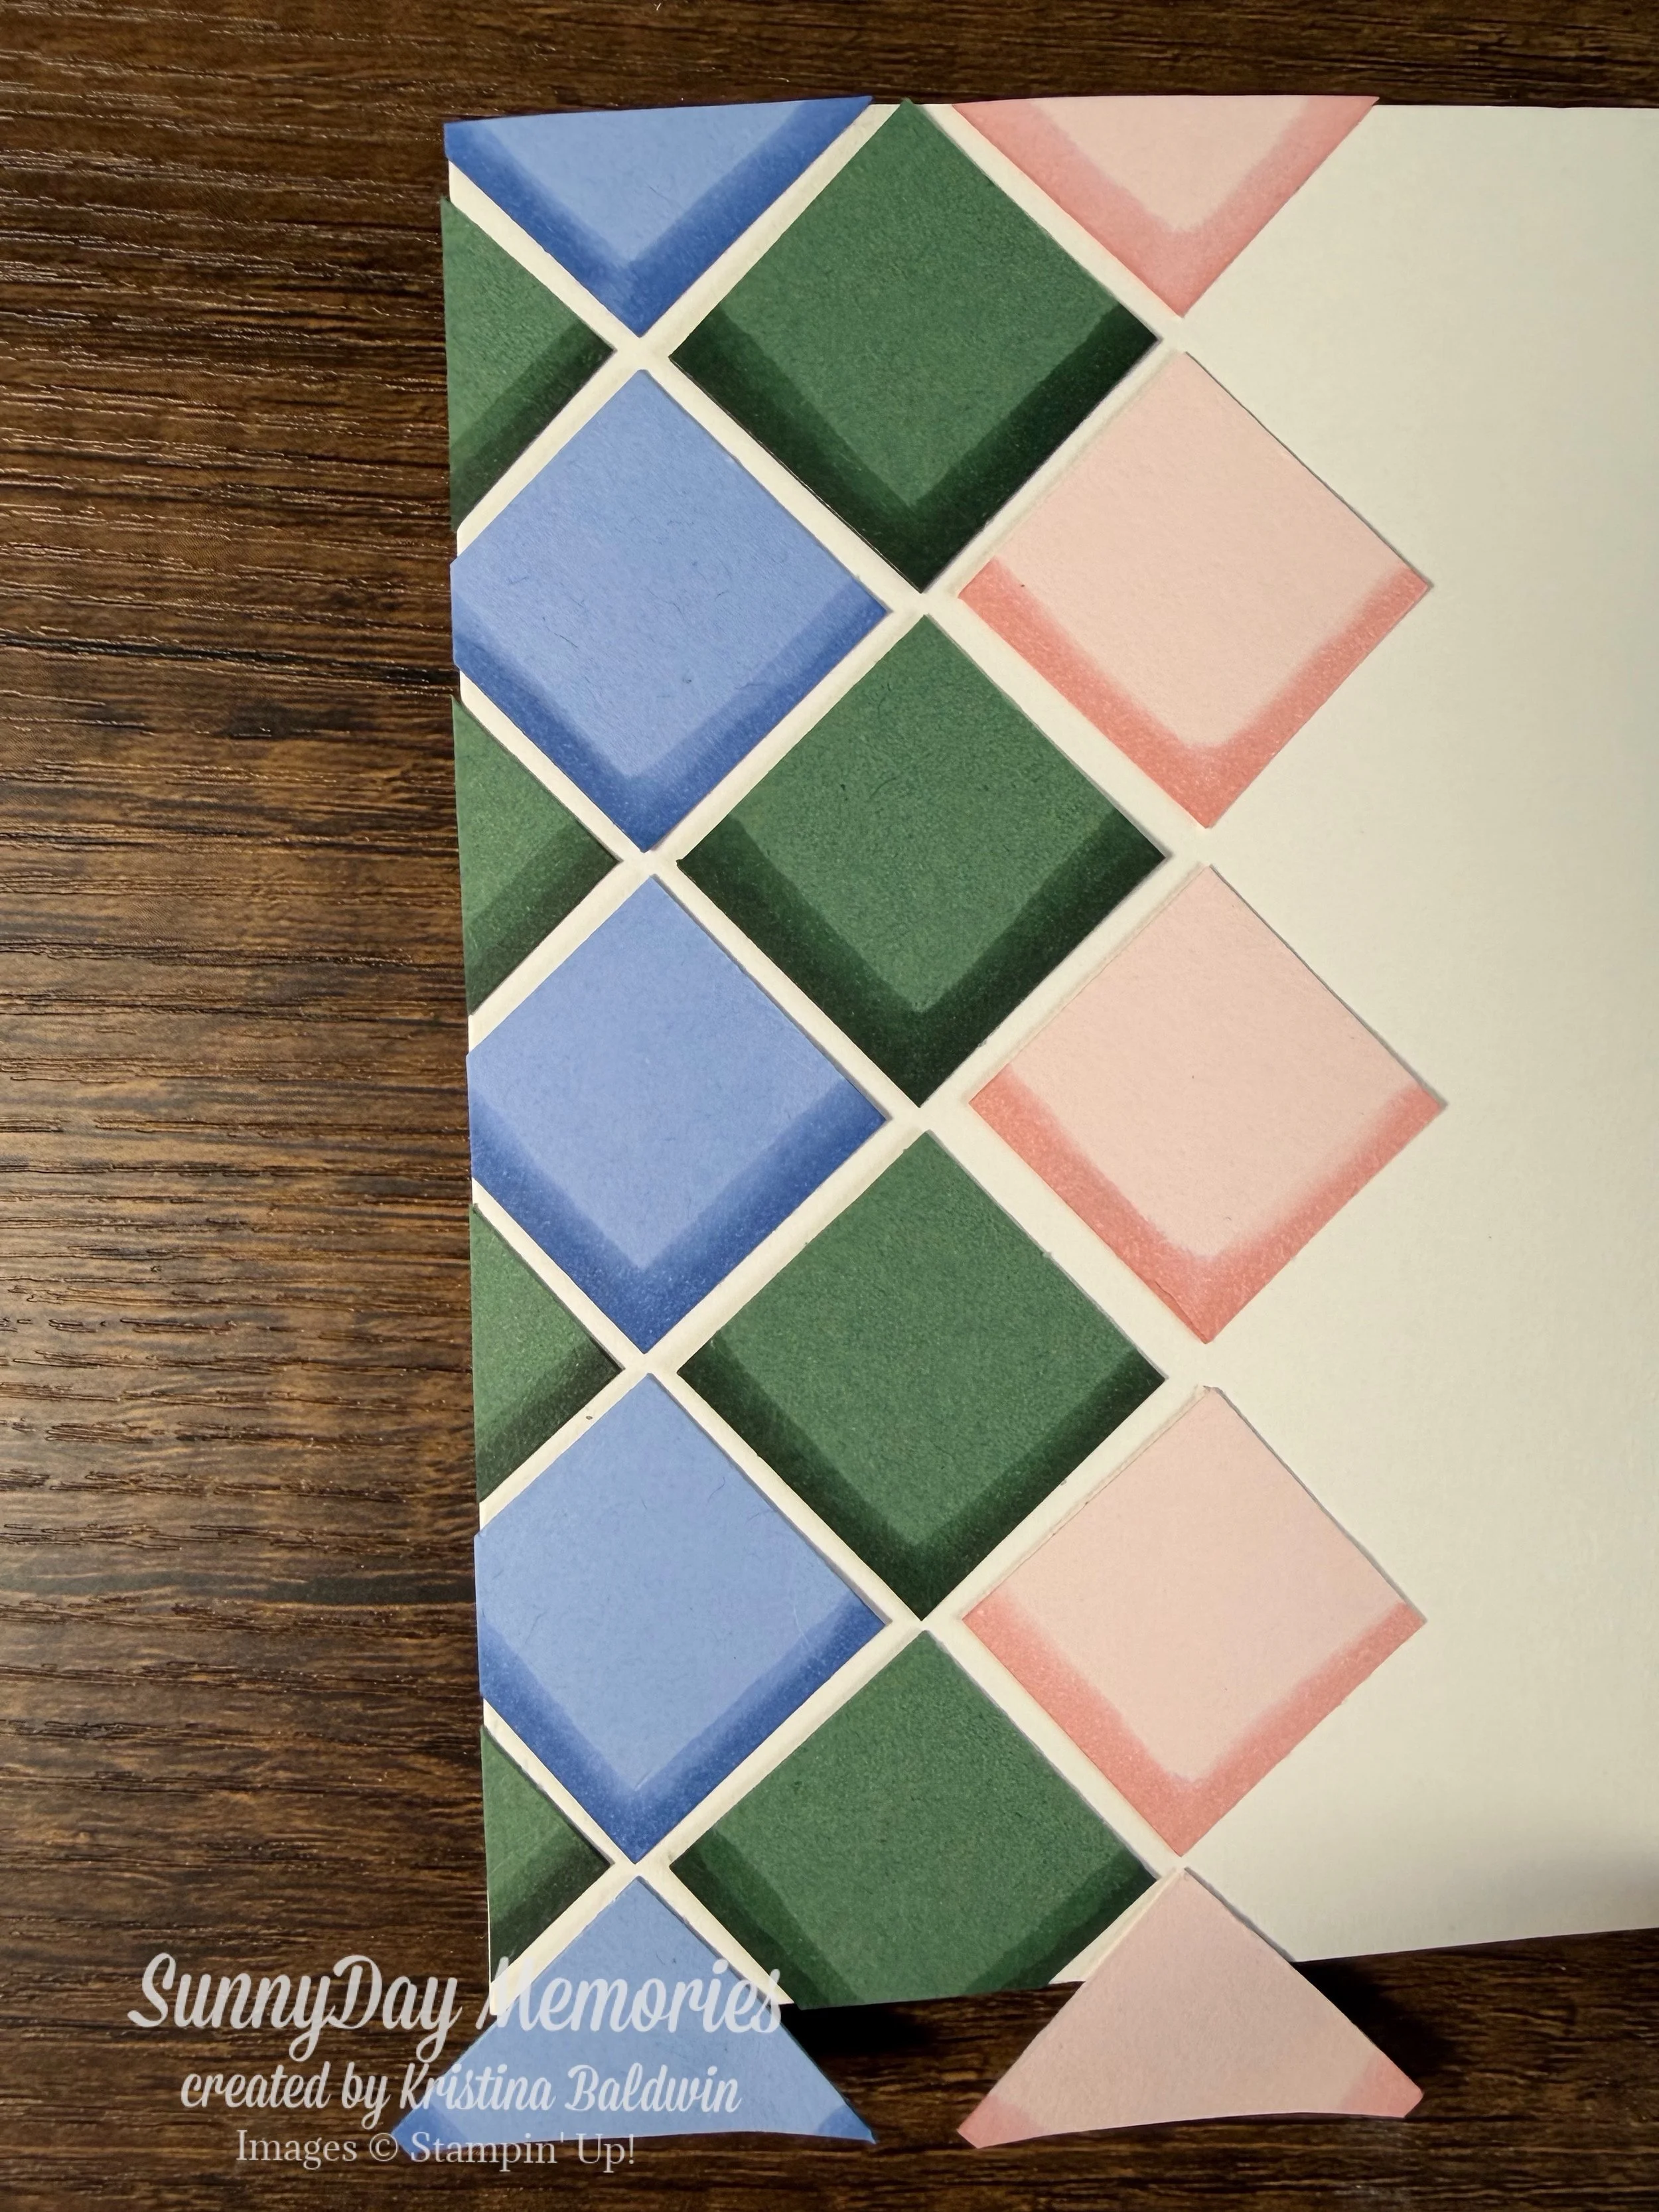
STEP 4:
After you’ve filled up your card as desired with these colored squares, cut away the excess colored cardstock that hangs over the edge of the card.
You could stamp a sentiment or add some embellishments. But, like I said, our challenge was to create something with ink, but no stamping. I do think it looks complete without any of those extras. The Dimensional Ink Technique is so unique that it really doesn’t need anything else to really shine.