
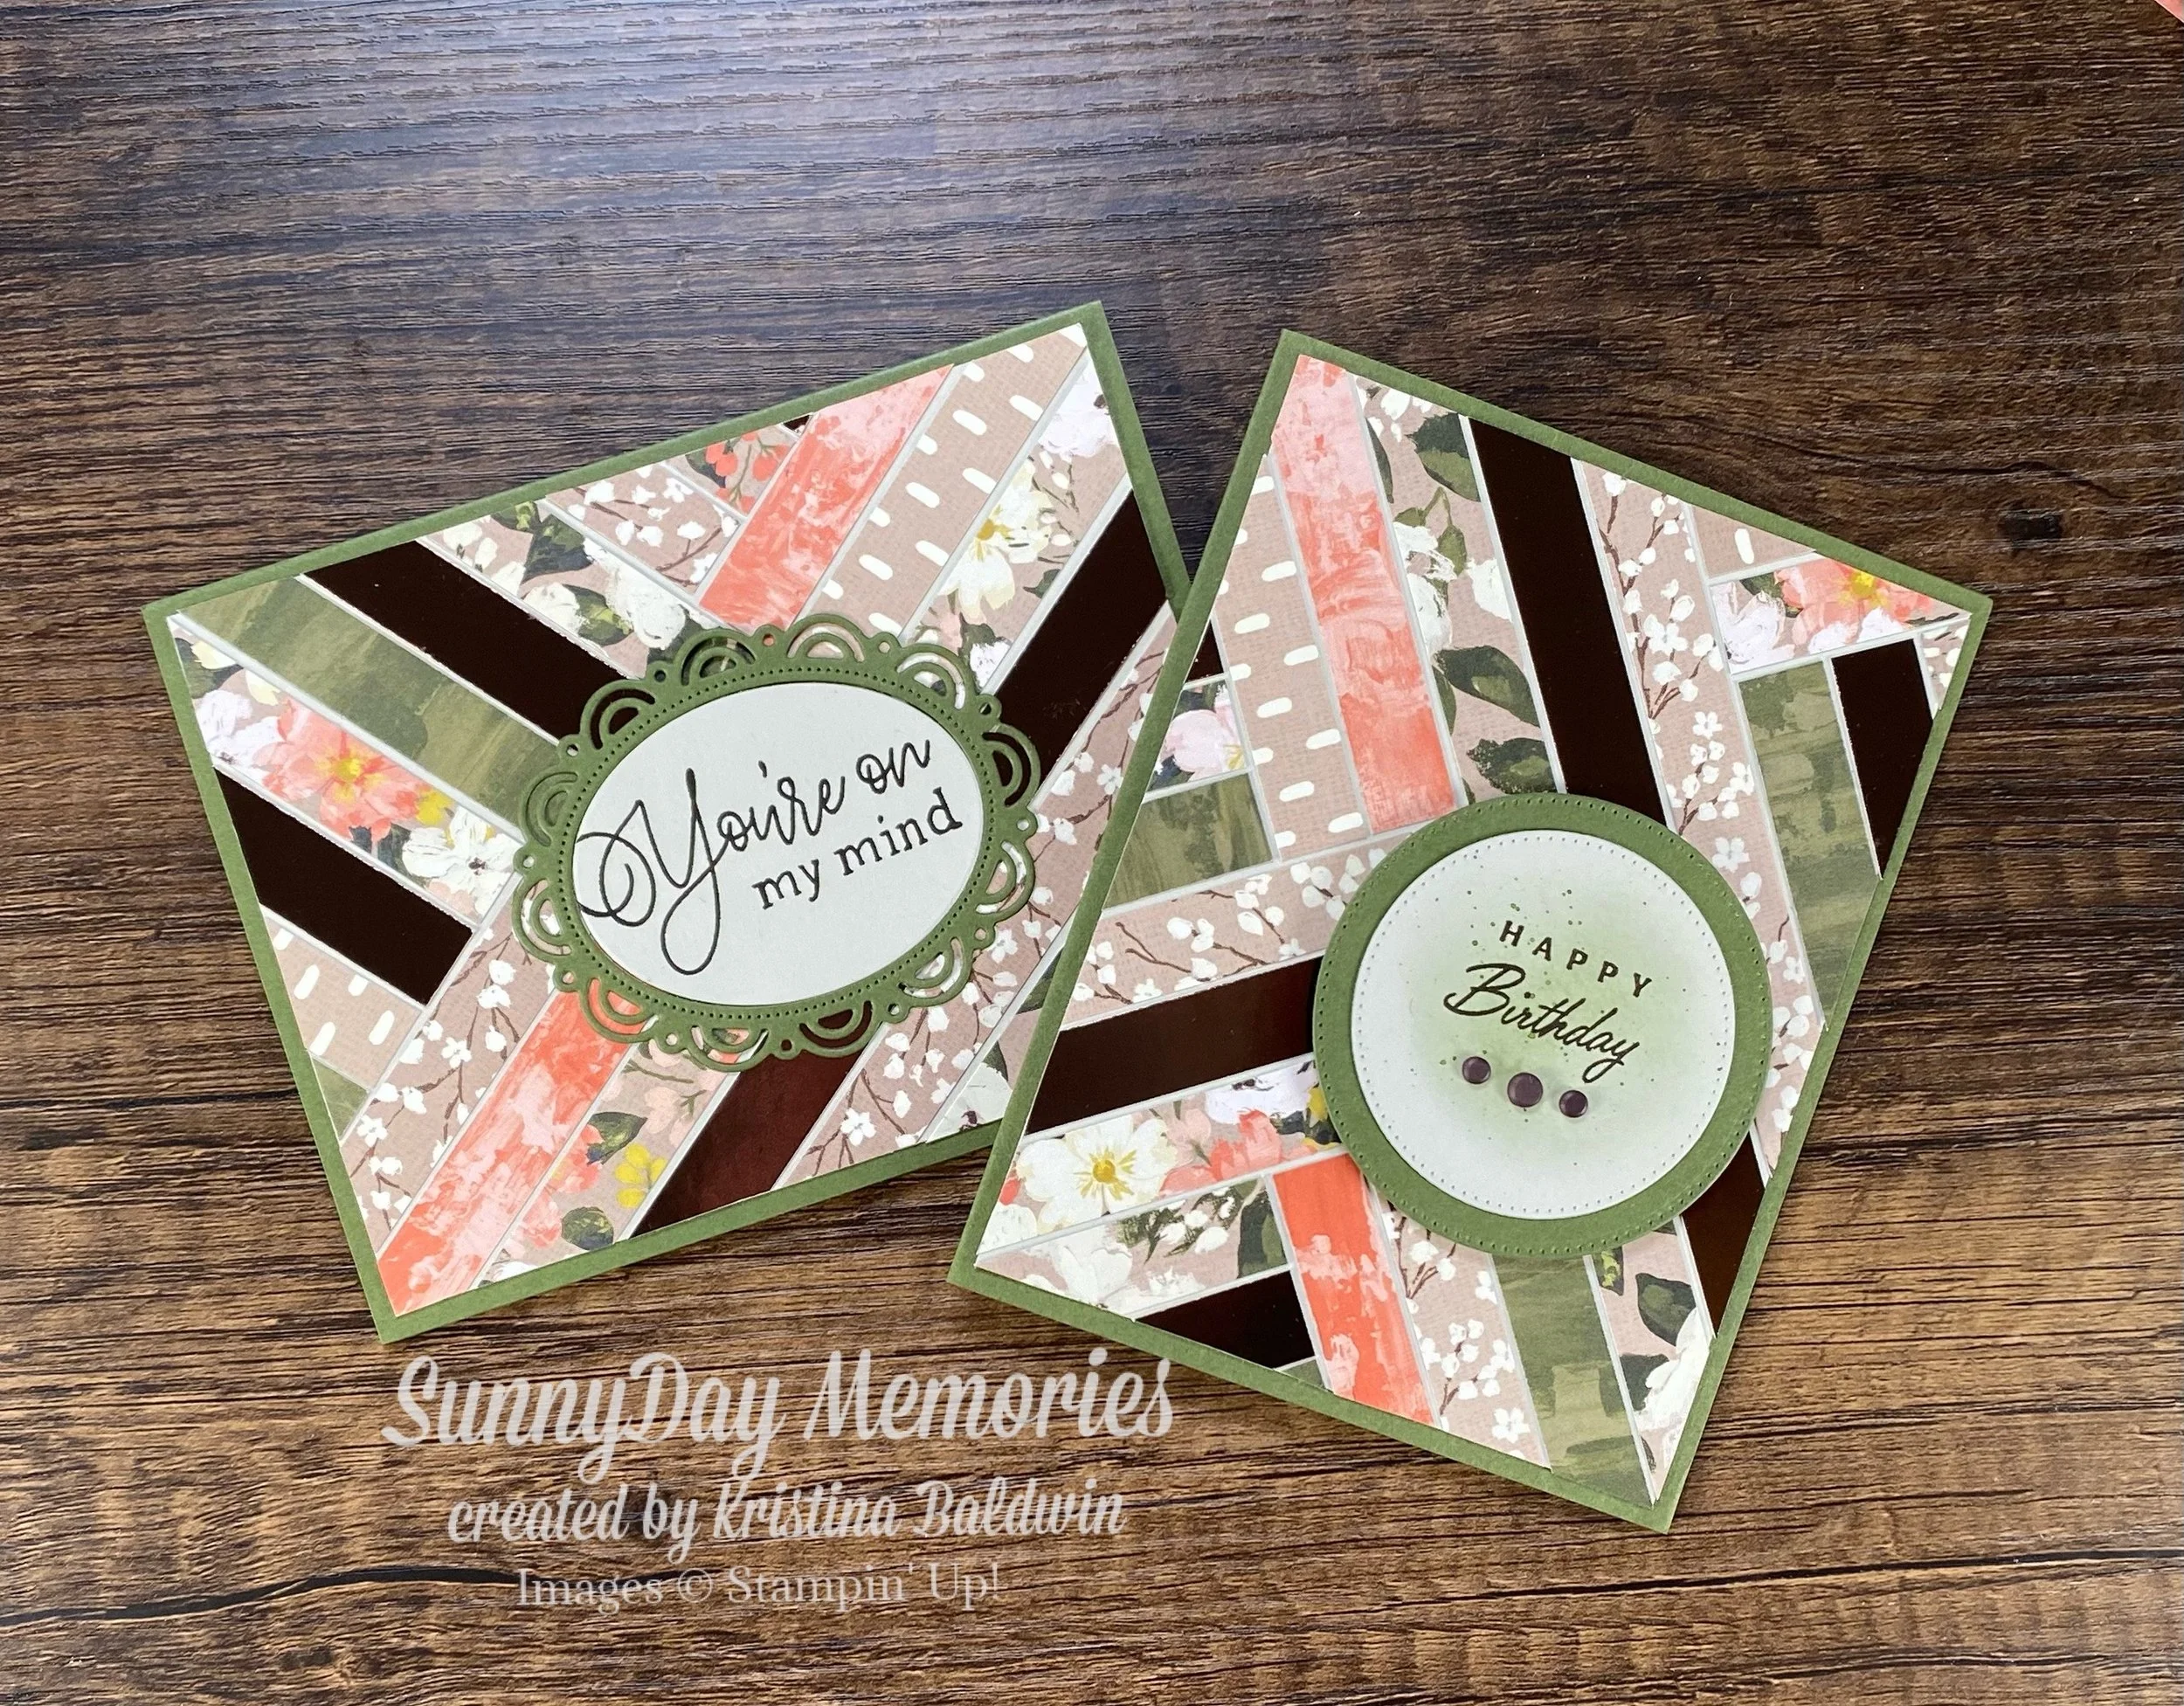
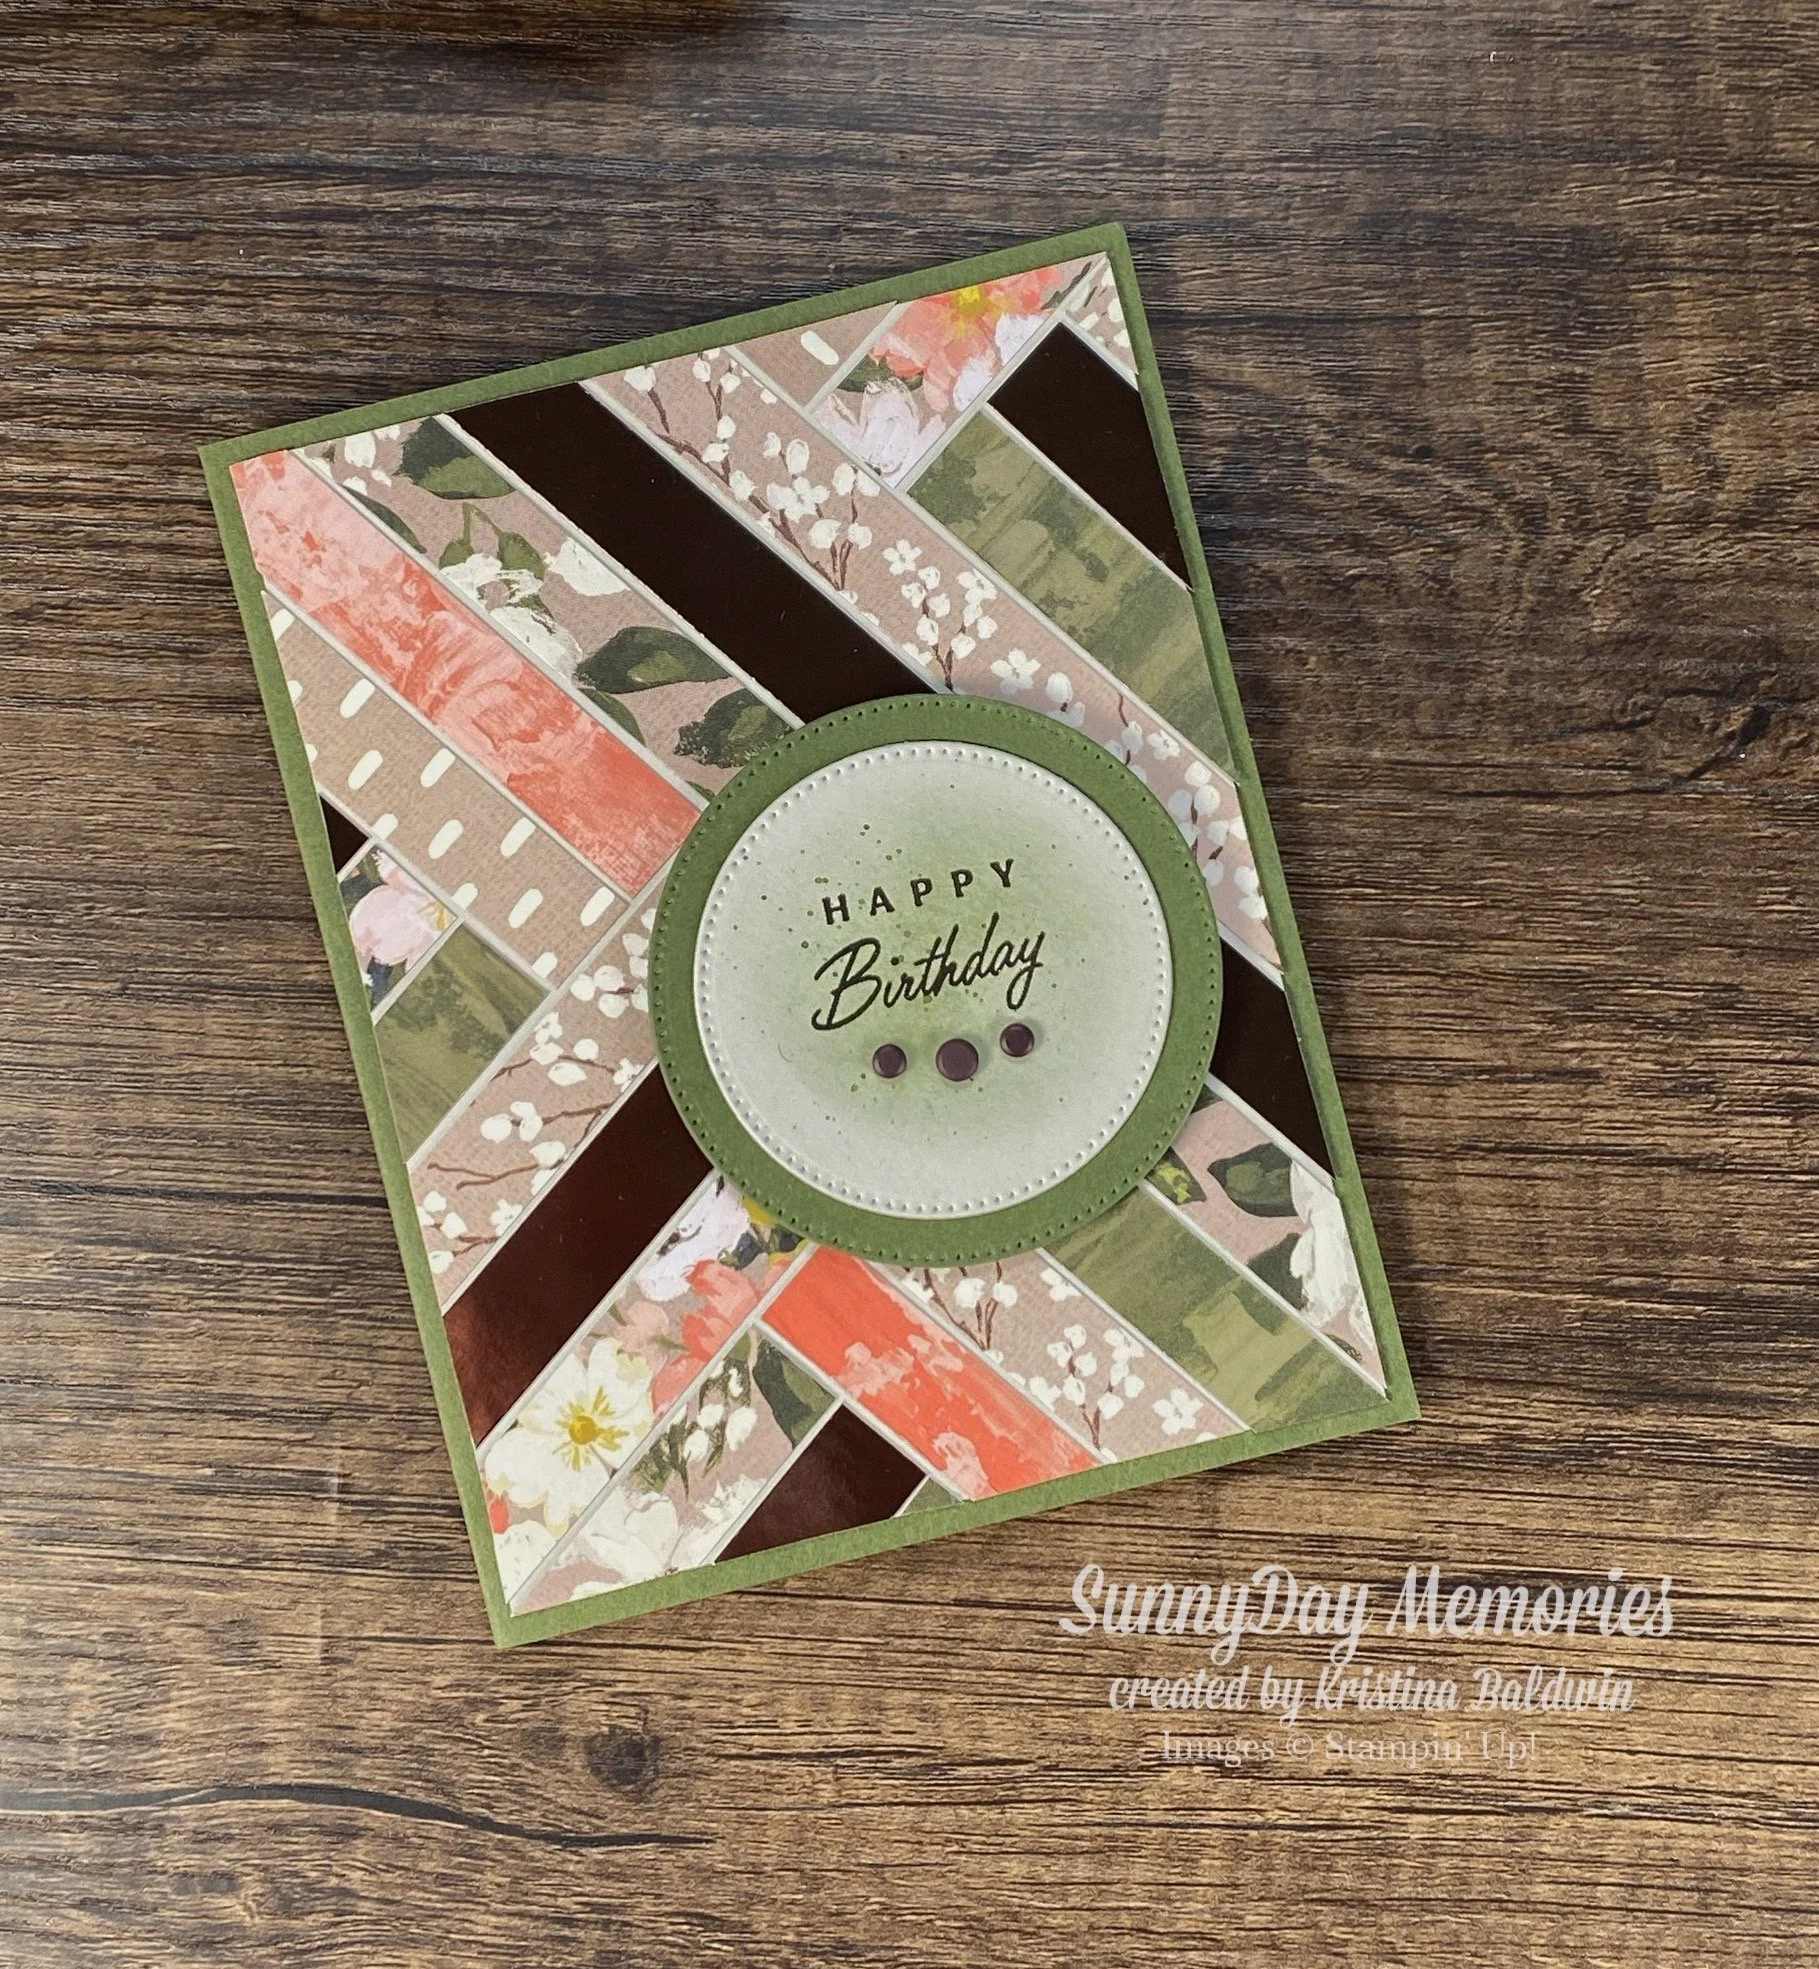
How To Create a Herringbone Technique Card
Today I’m going to share with you how to create a Herringbone Technique card. This style card is absolutely perfect for:
using up scraps you can’t seem to part with (we’ve all been there, right?)
showing off several beautiful coordinating patterned papers without it looking overwhelming
As you can see this technique can be created and showcased in either a vertical or horizontal orientation. Either way works beautifully. As I created my 2nd card (my horizontal or landscape orientation one), I took quick snapshots of the process to provide you with a nice visual tutorial of how to create this stunning technique.
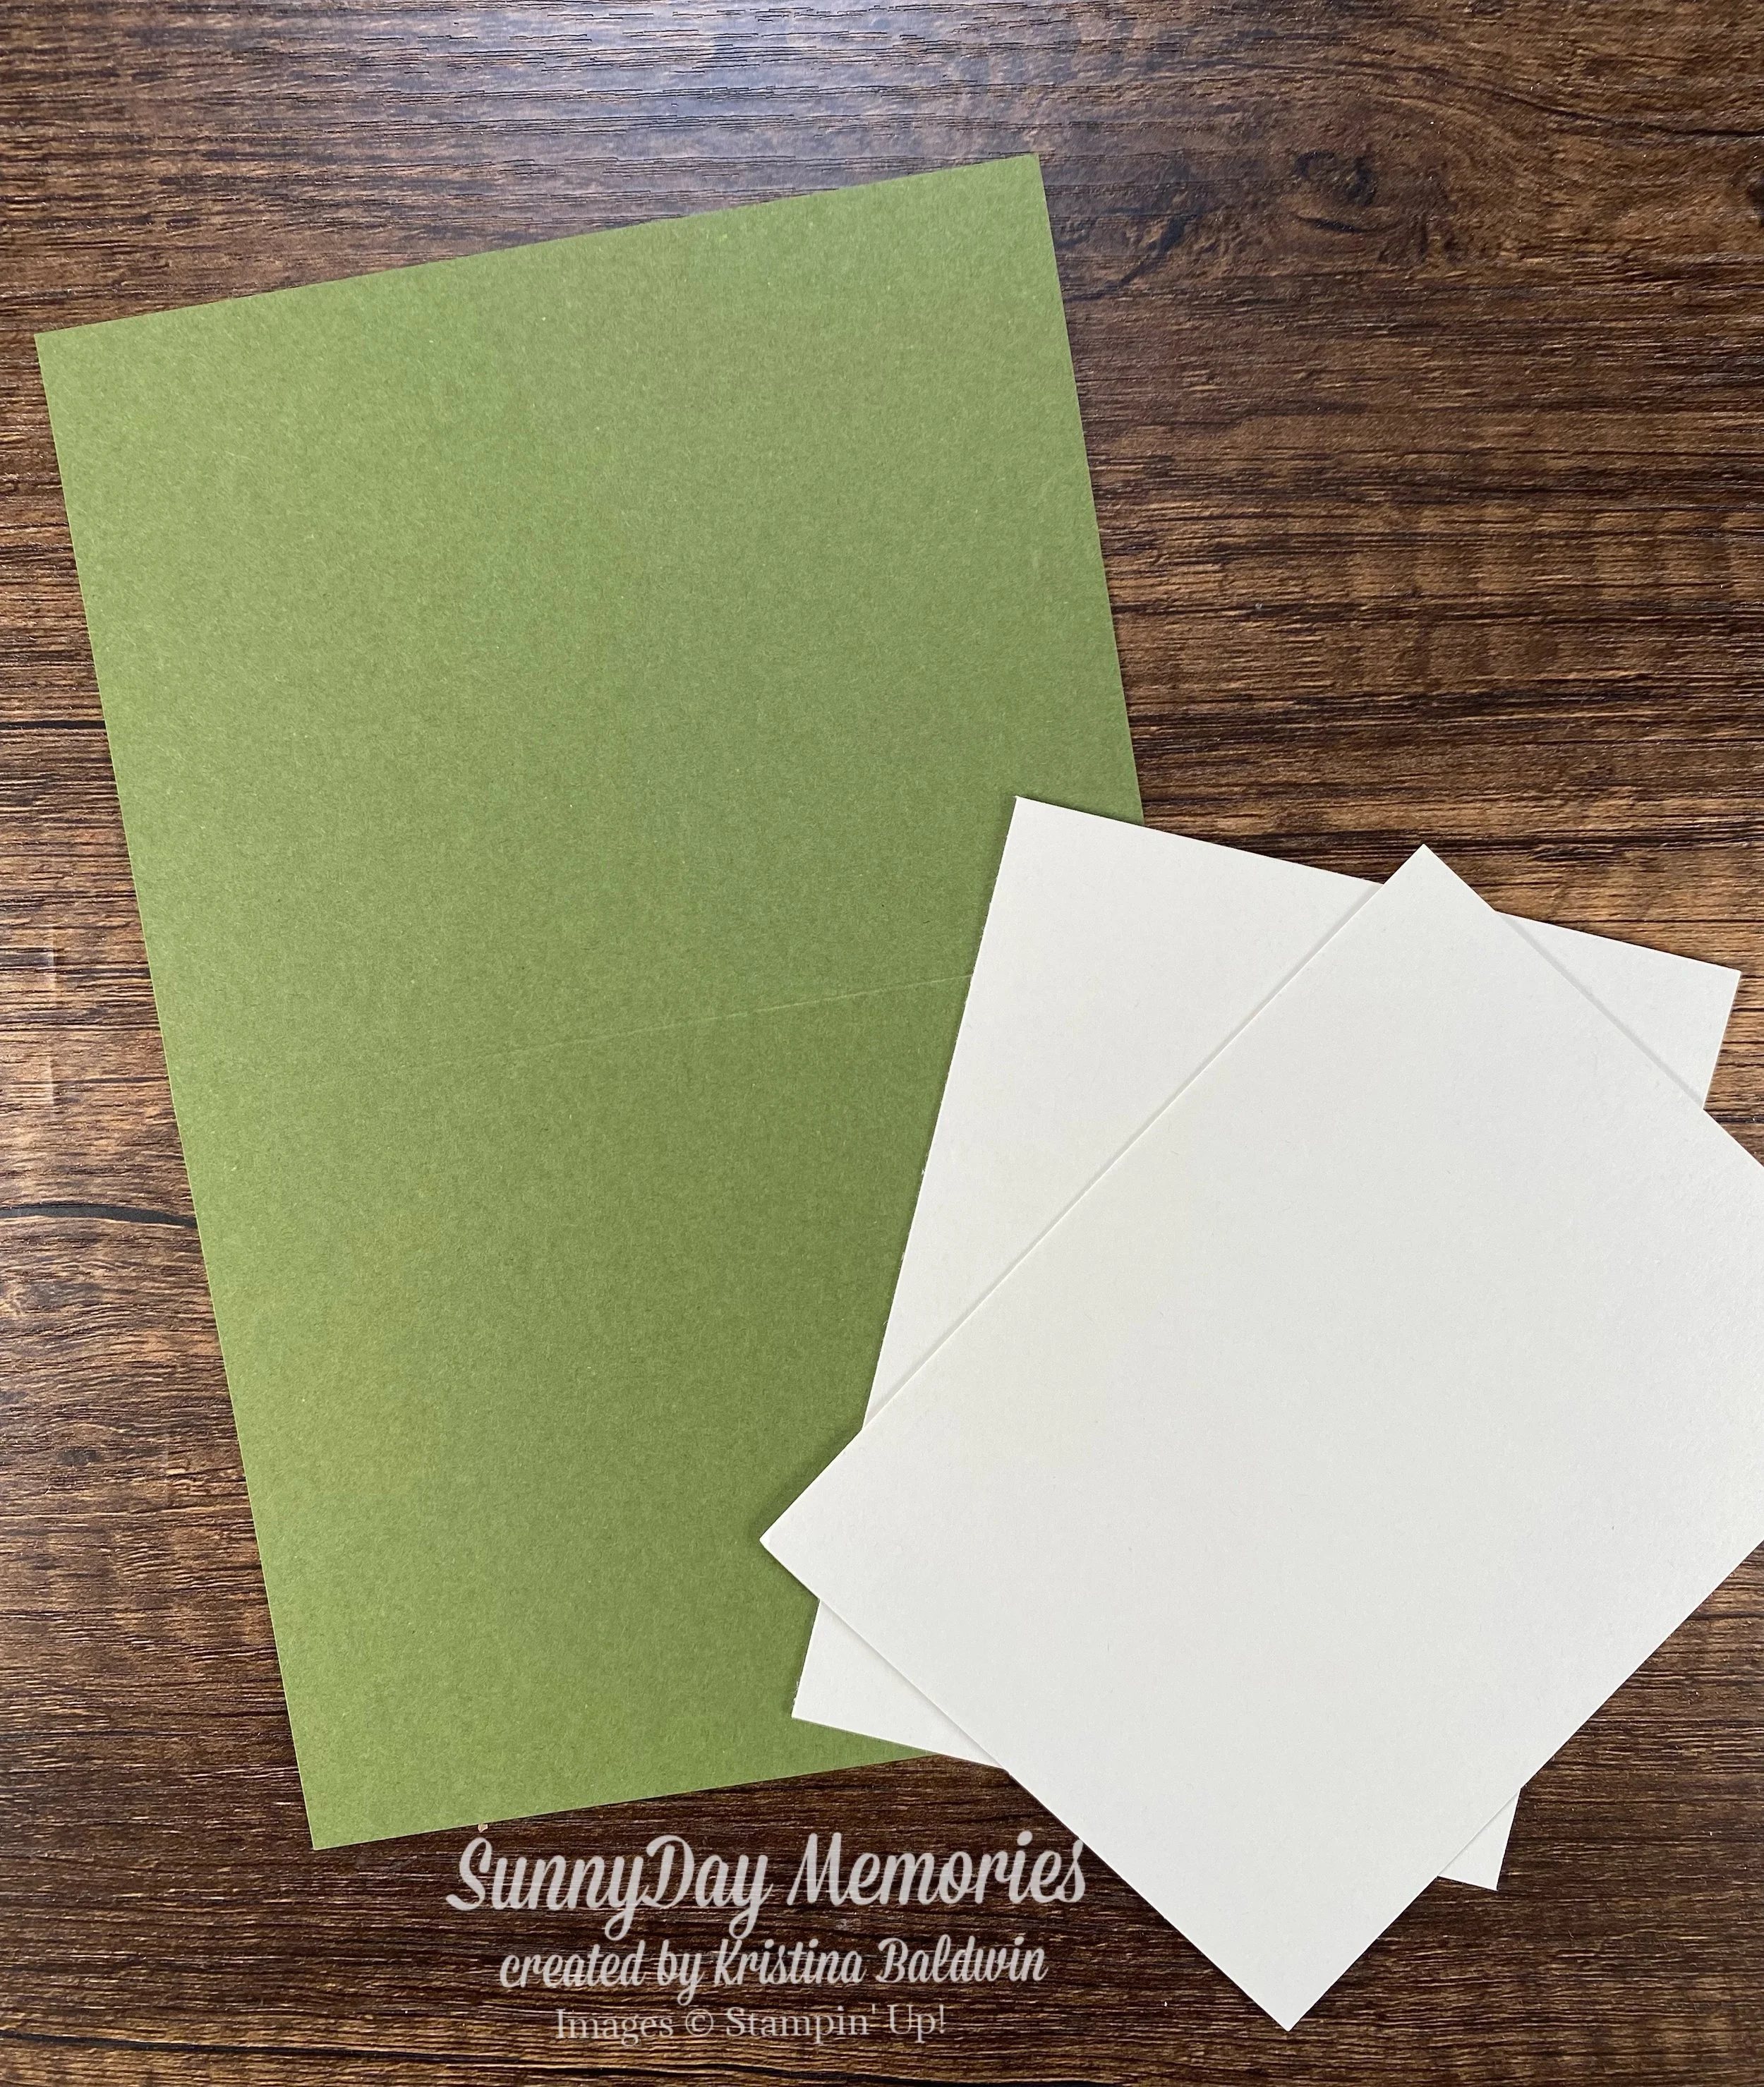
You don’t need a lot of supplies to create this style card. First off, you’ll want an A2 (5-1/2” x 8-1/2”) card base that is scored at 4-1/4”. Tip: selecting a color that only shows up a little in your patterned papers really helps it all “pop” nicely. That’s what I’ve done with mine. I selected Mossy Meadow since it’s just got small touches in the leaves. You’ll also want (2) 5-1/4” x 4” pieces of light neutral cardstock—like Basic White, Very Vanilla or Basic Beige (which is what I used.) If you’re using a lighter color cardstock for your card base, you won’t need 2 of these—just one. One of them is for the inside of the card if you have dark cardstock.

Next you’ll need strips of patterned paper that coordinate well together. The best width size for these strips is 1/4” or 1/2” wide. Then you’ll want them to be at least 6” long. I prefer to do my strips 1/2” x 12”. As you play with this technique, you’ll find your preference. Tip: add in some textured or glossy paper to add visual interest. I added in Earthen Toned Metallic Specialty Paper and I love the results.
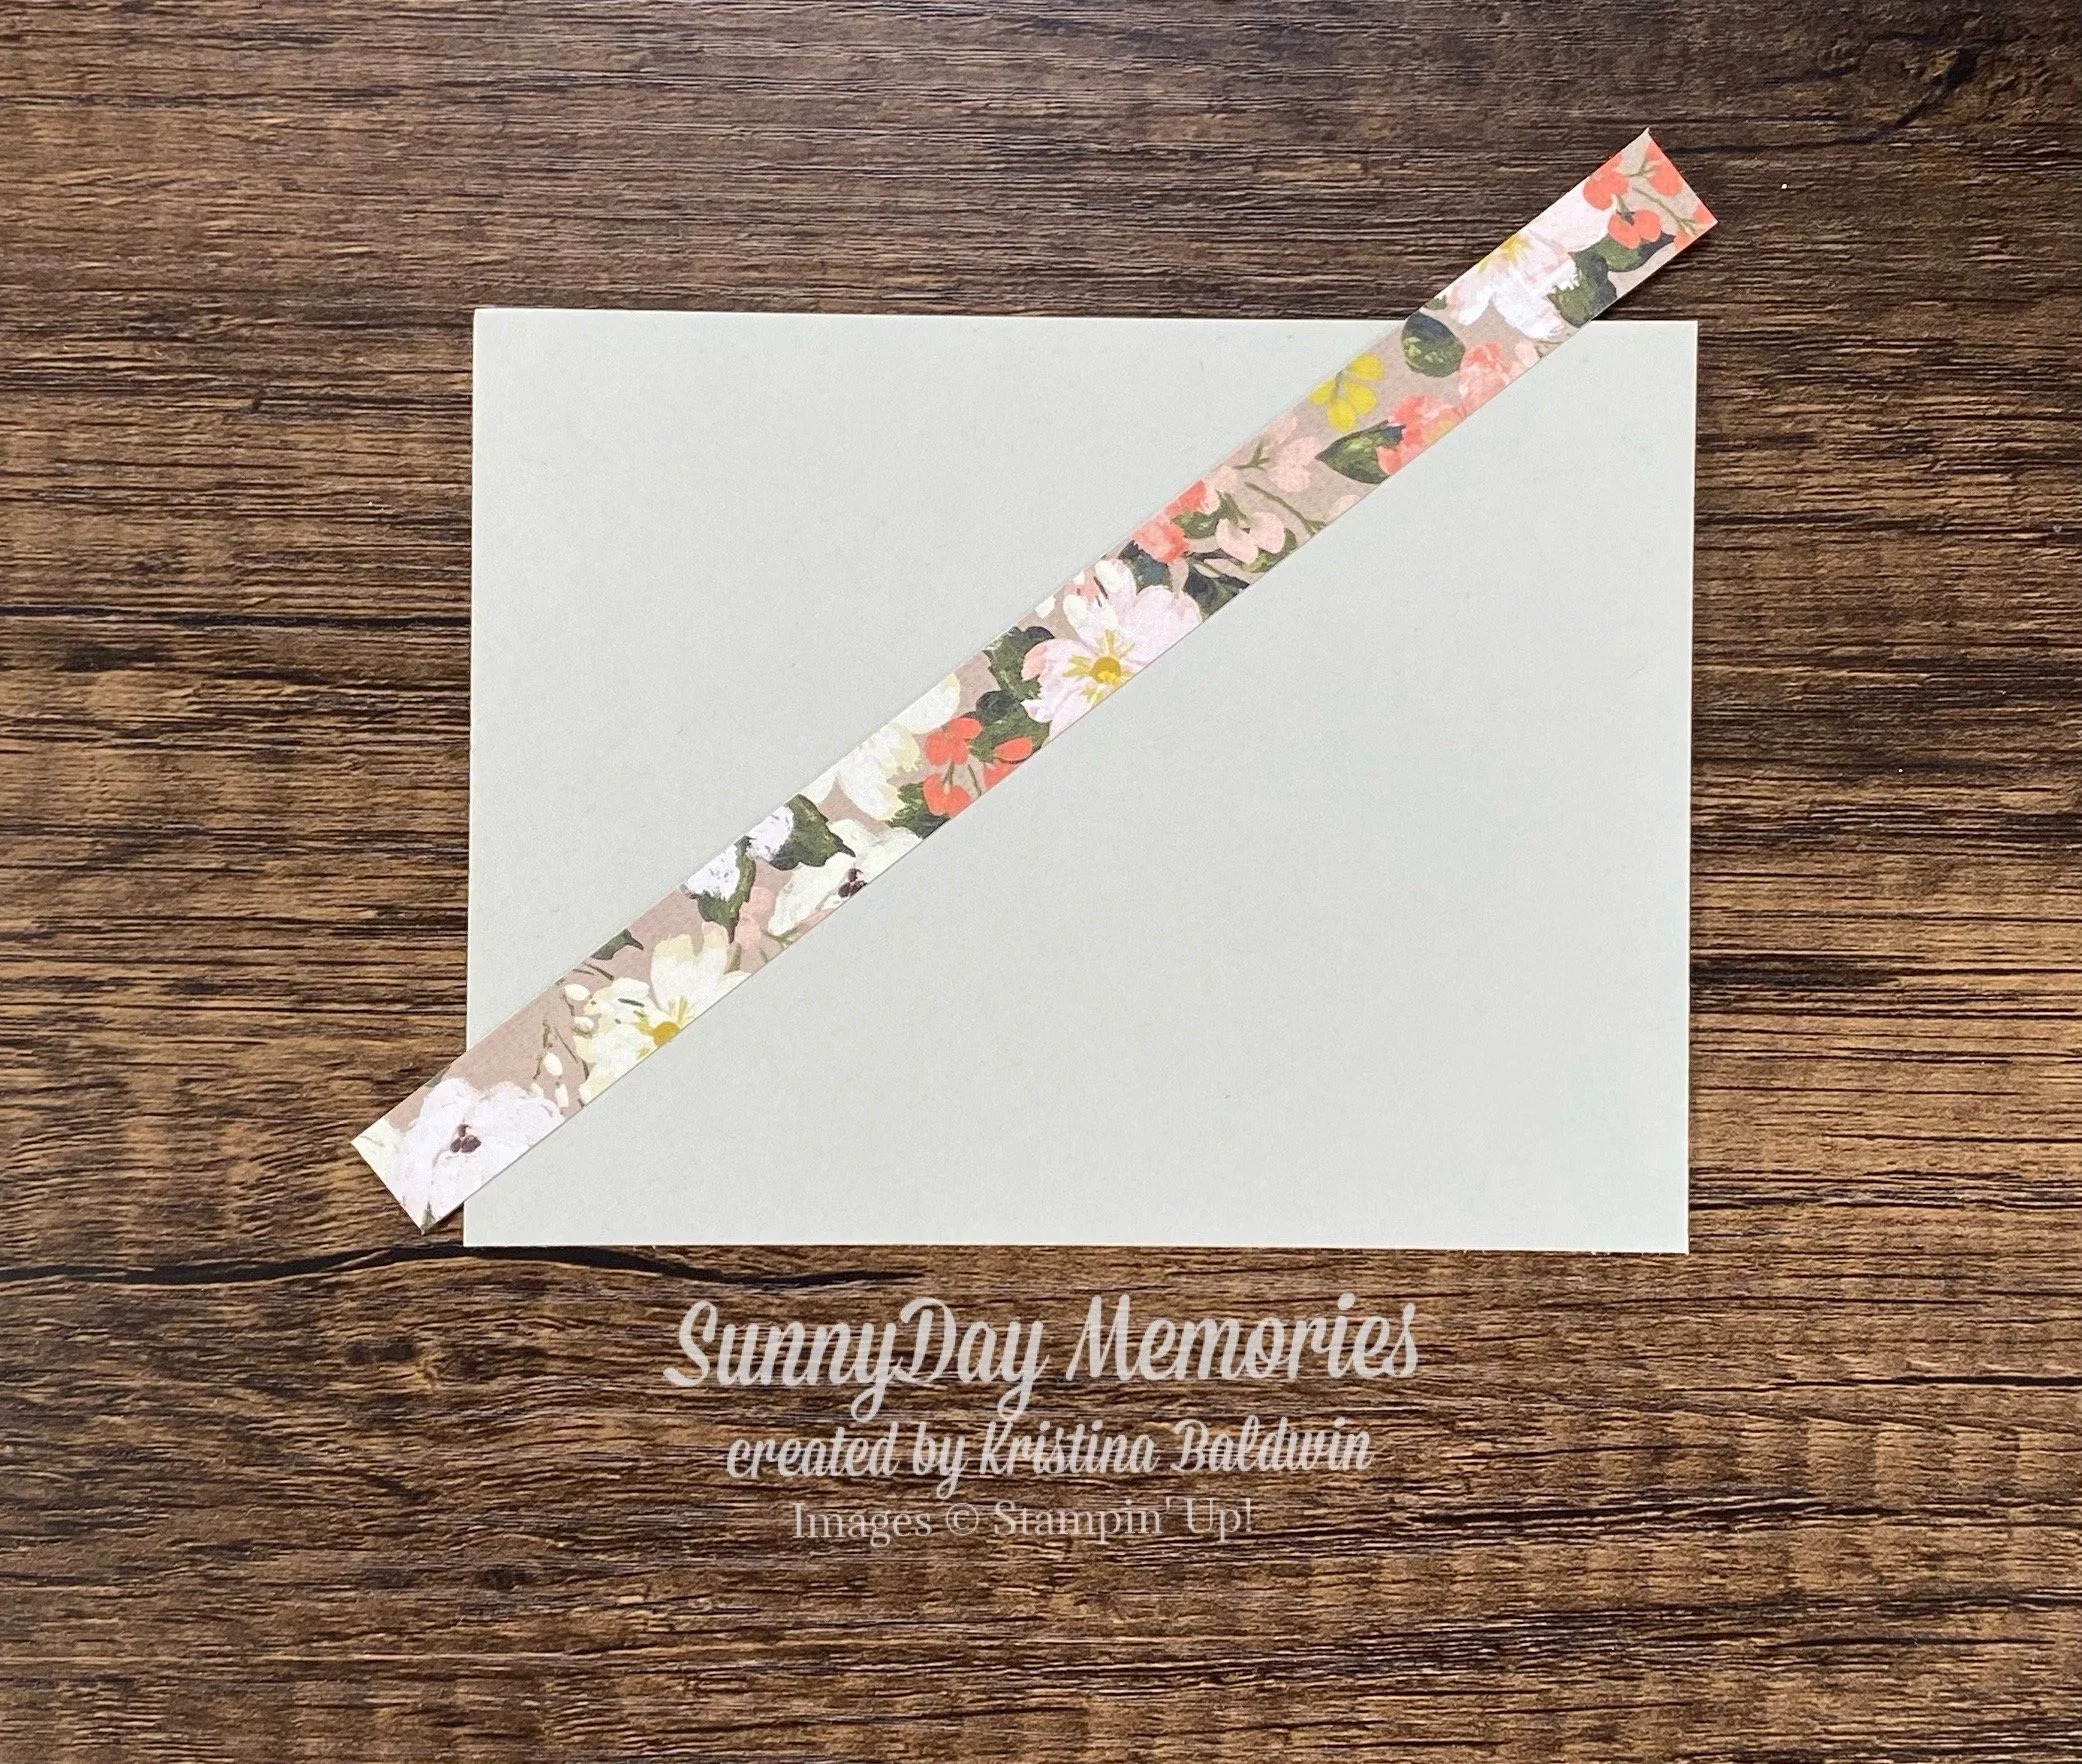
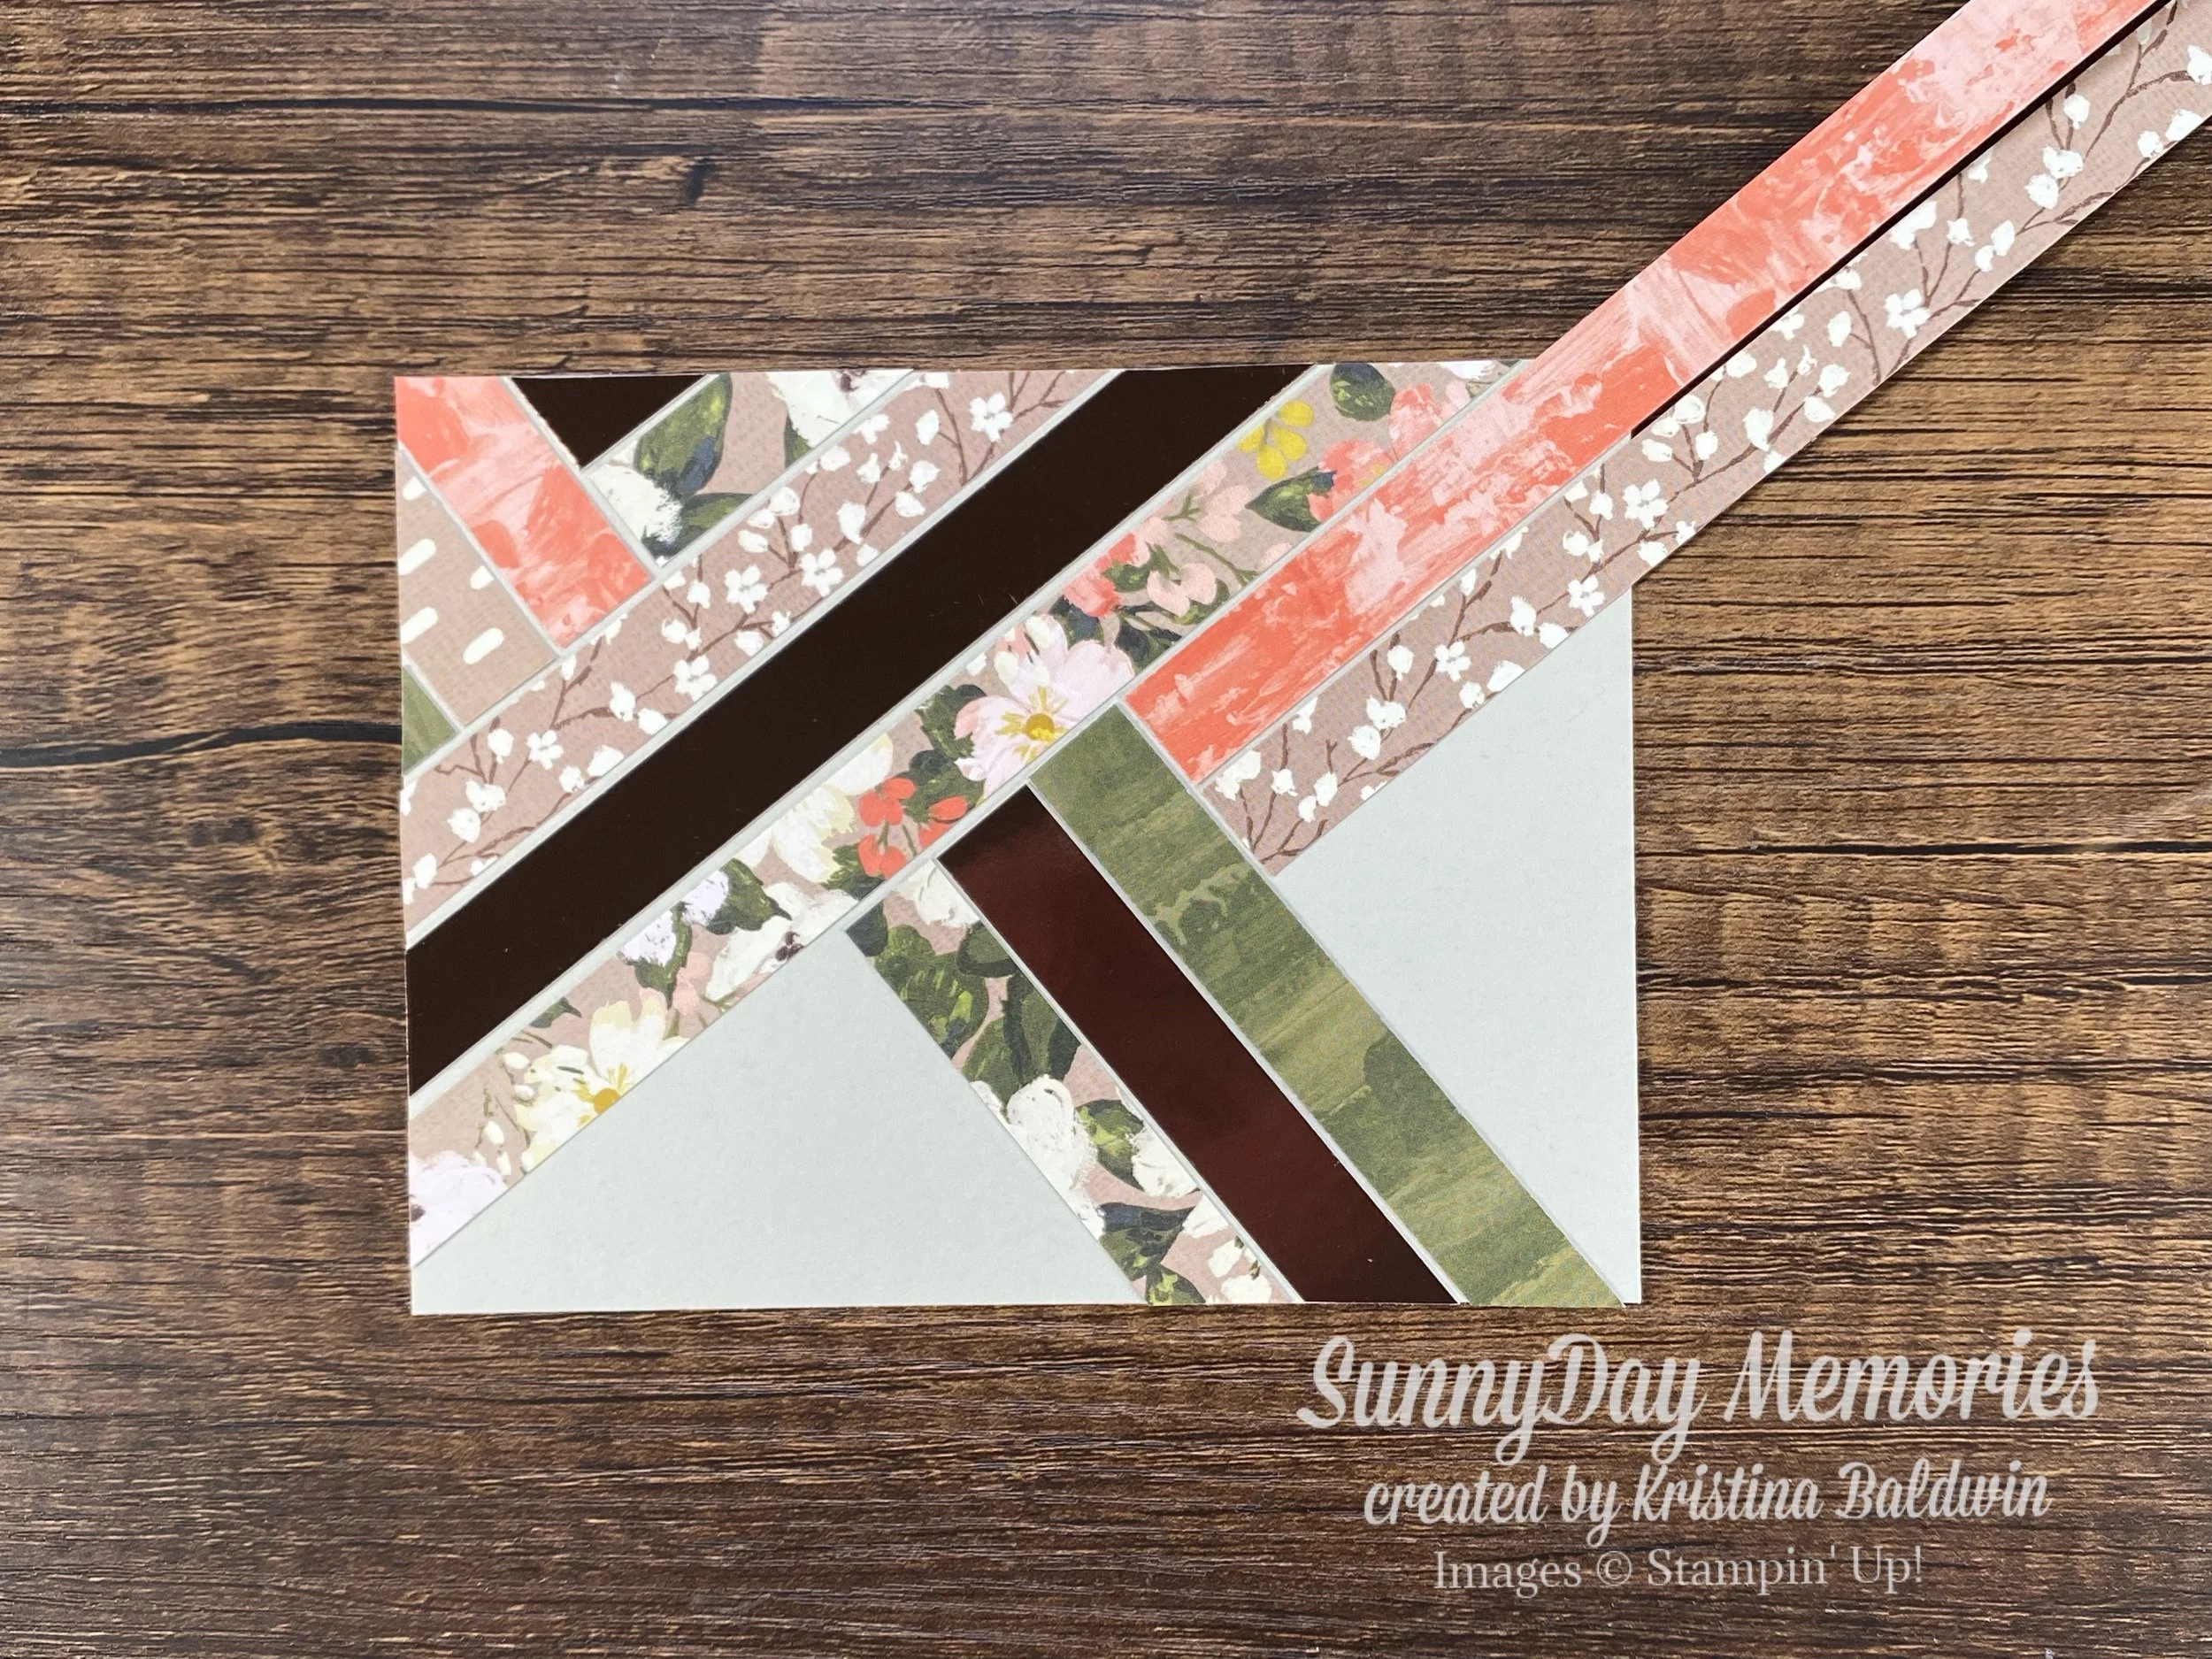
Ready to get started? First you’ll want to take one of your strips and adhere it diagonally across the 5-1/4” x 4” neutral cardstock piece. Tip: I find using a tape runner style adhesive works best for this technique. It allows you to pull up your strips and reposition them if necessary.
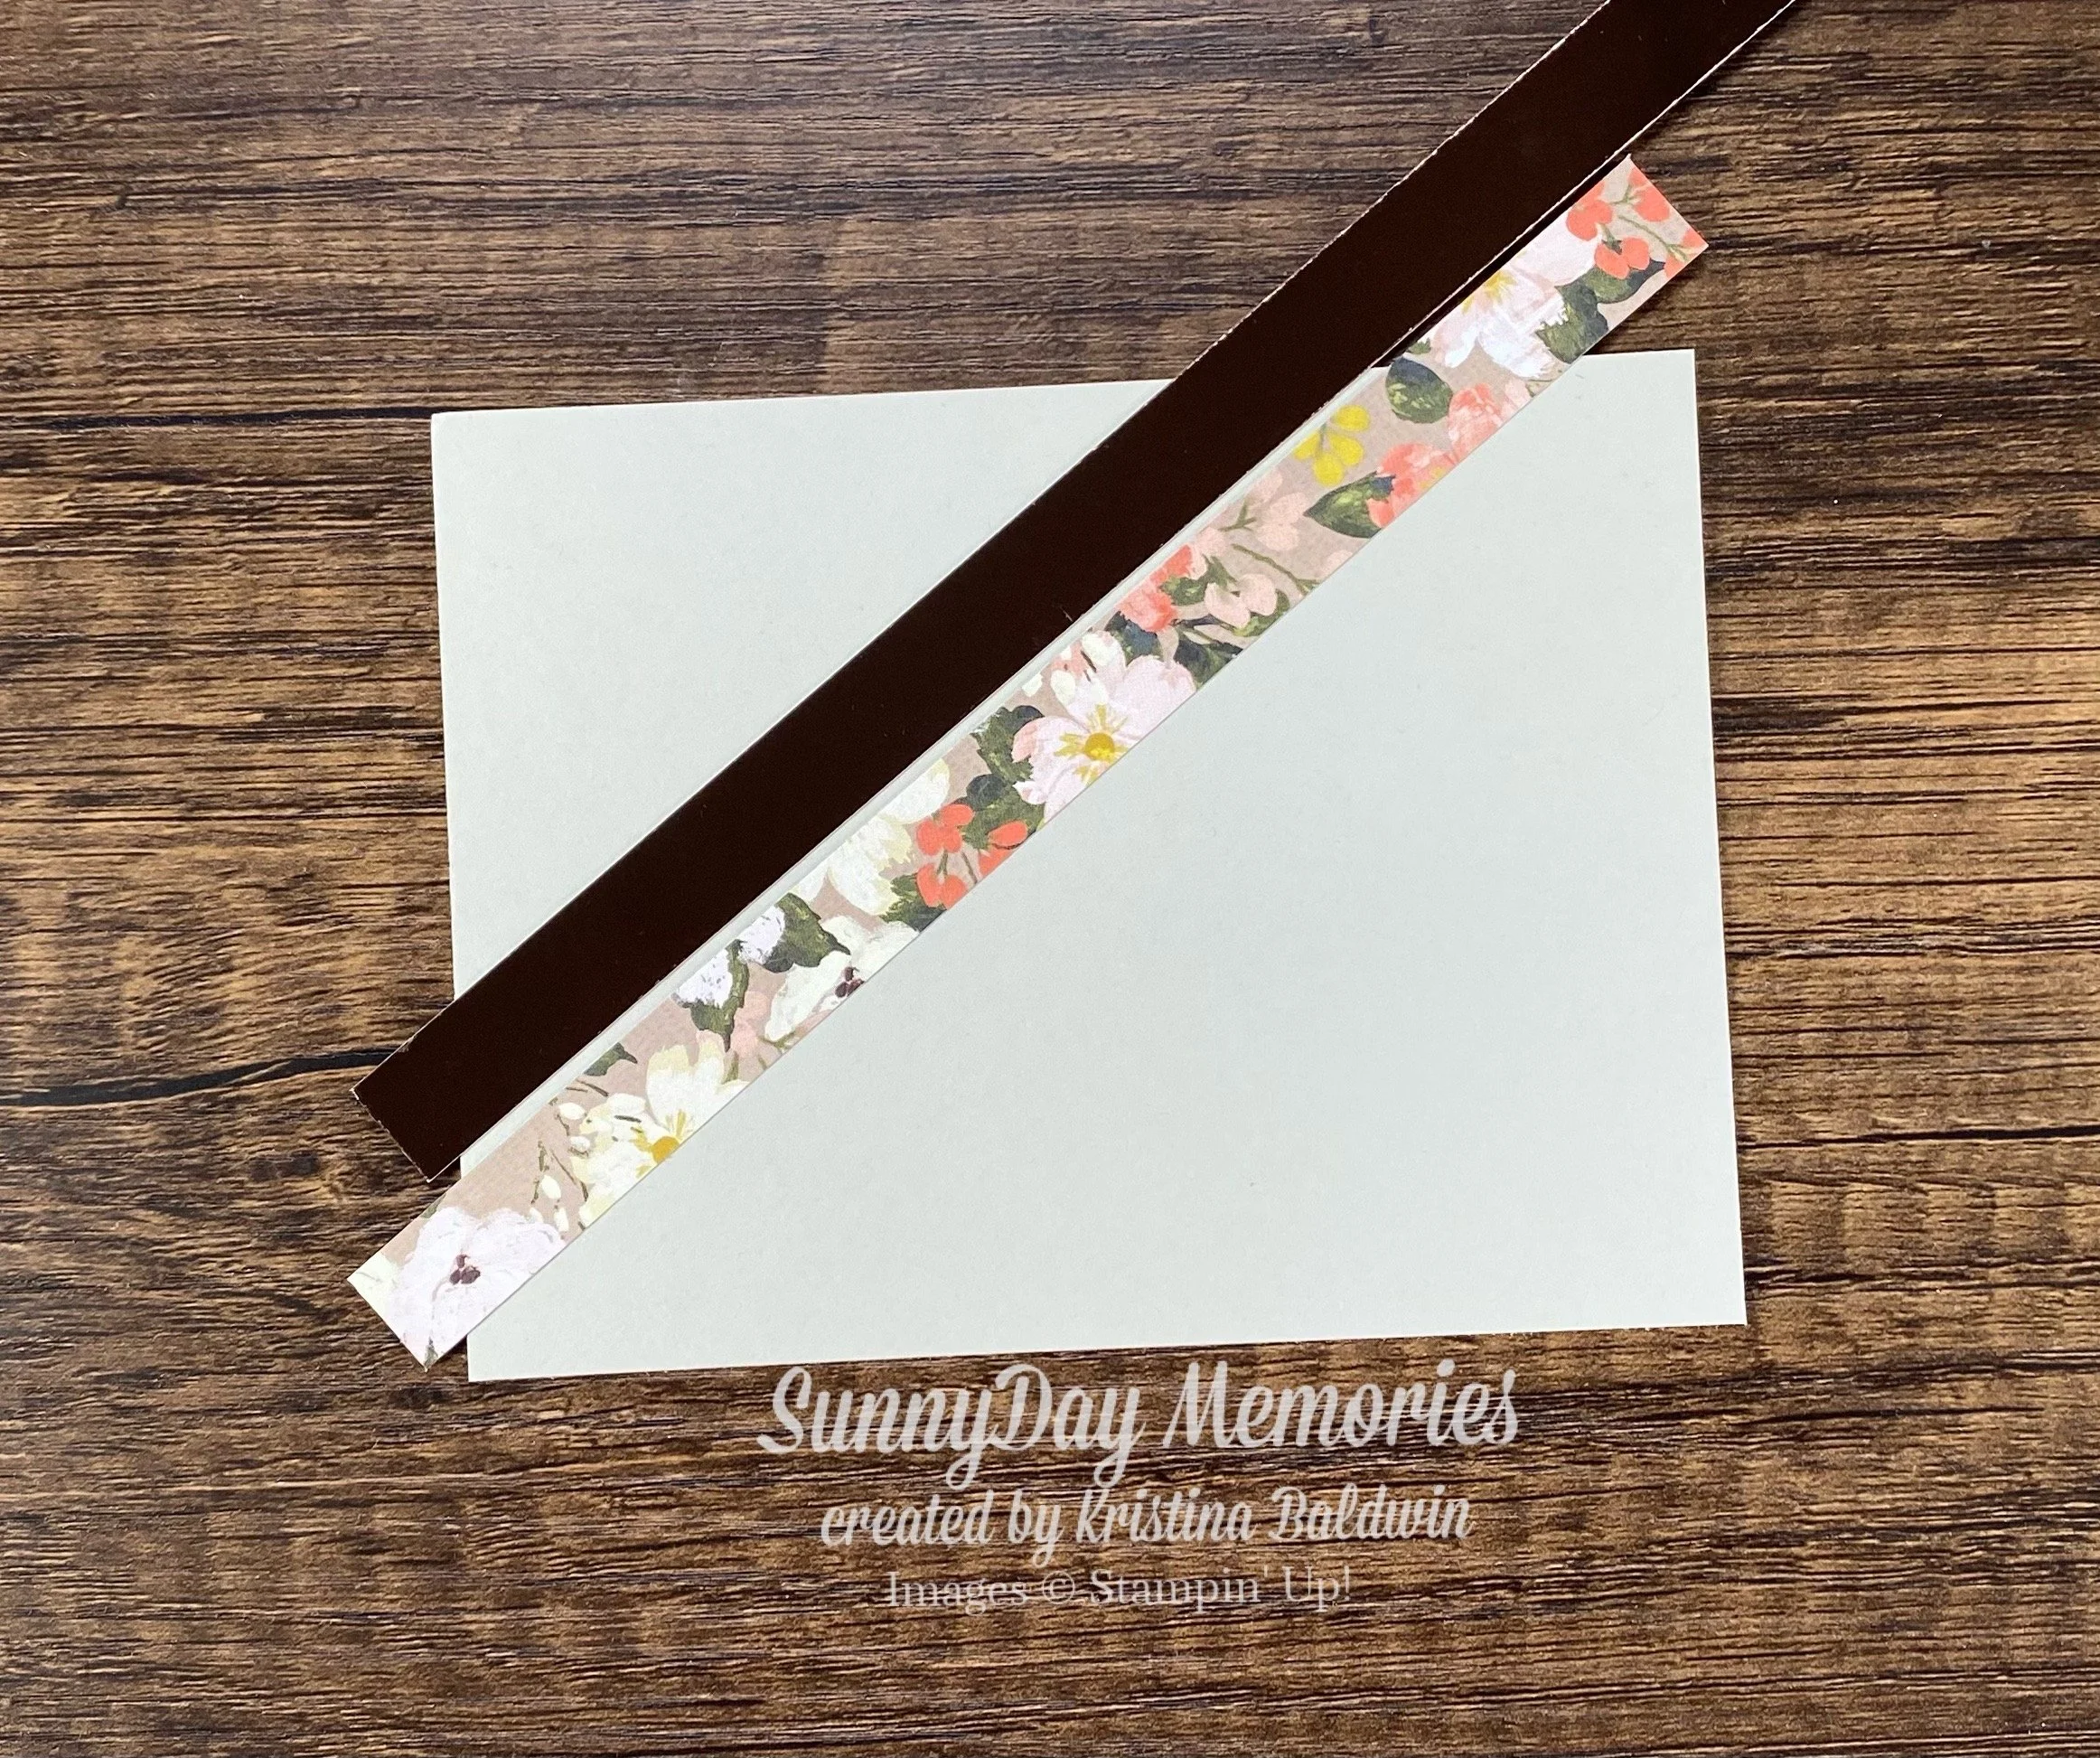
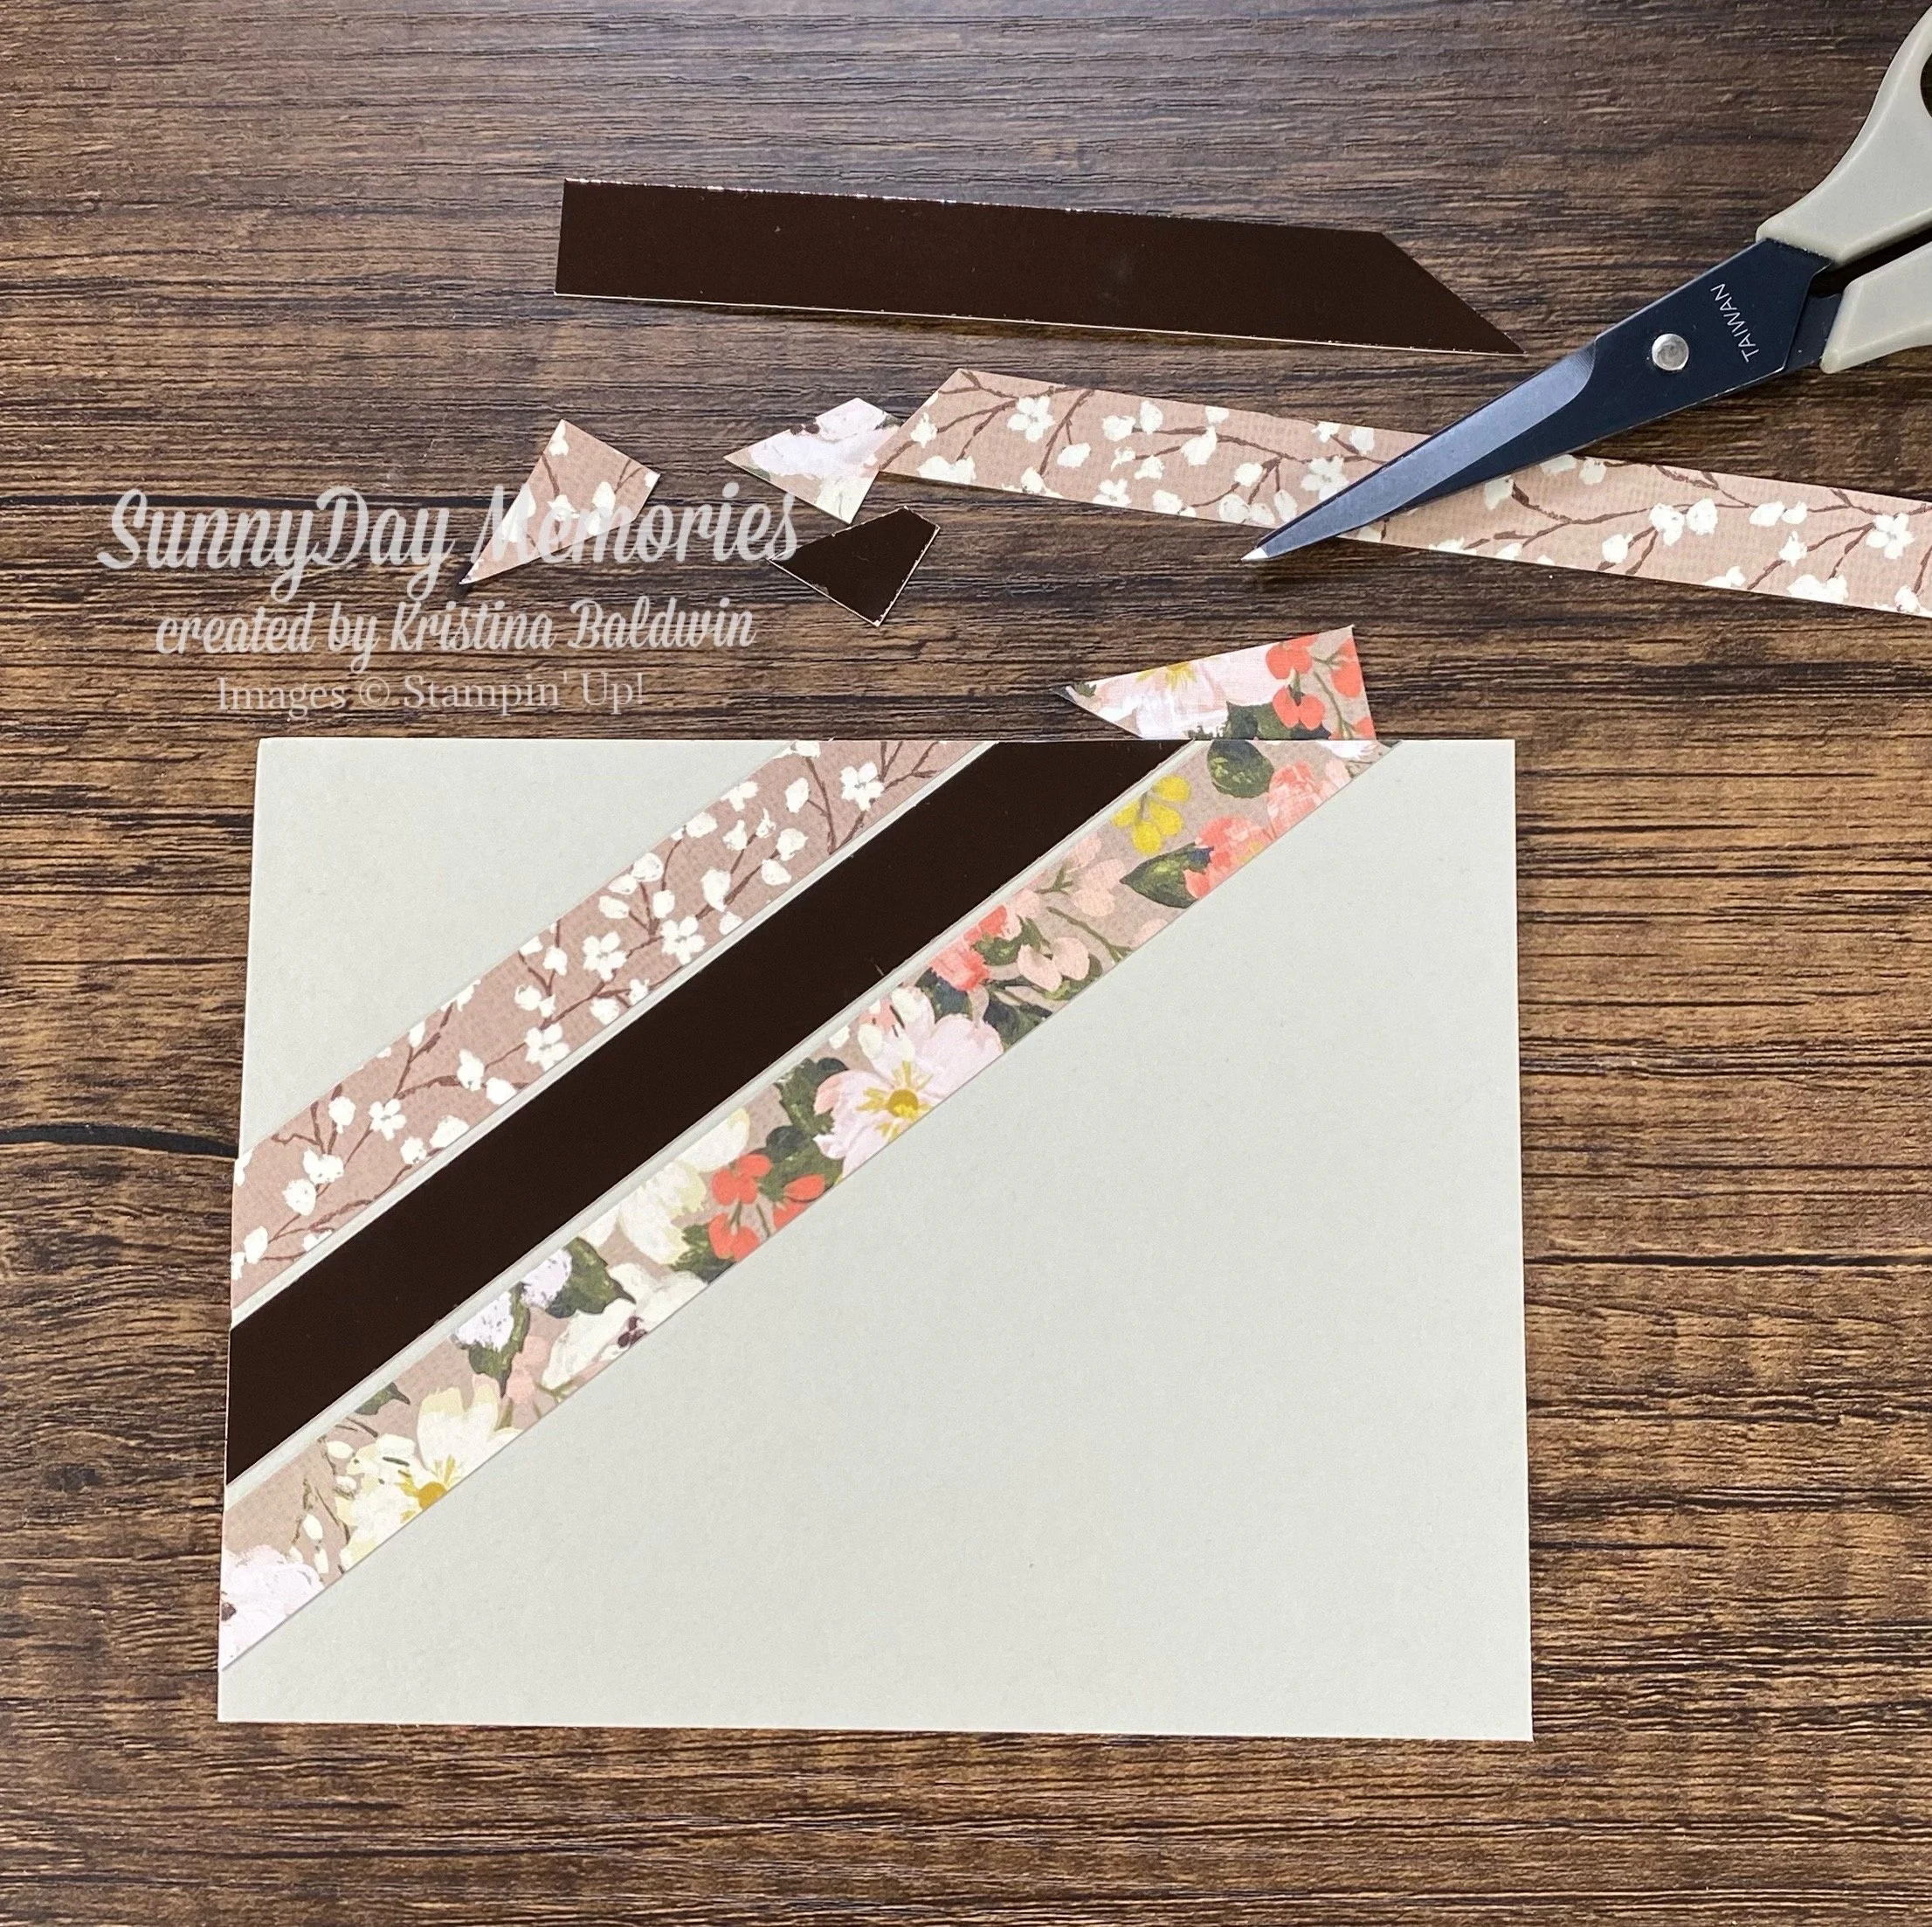
After adding your first strip, add 2 additional strips leaving a slight gap between each strip (this creates a nice resting spot for your eyes so that it’s not several patterns butted up against each other.) Then flip over your piece and trim away the excess strips. I save these pieces and re-use them on the card but you can choose to just grab new strips. Note: if you re-use the leftovers, you will need to make a straight edge cut (since they’ll be angled) along the end so that they will work with the card design.
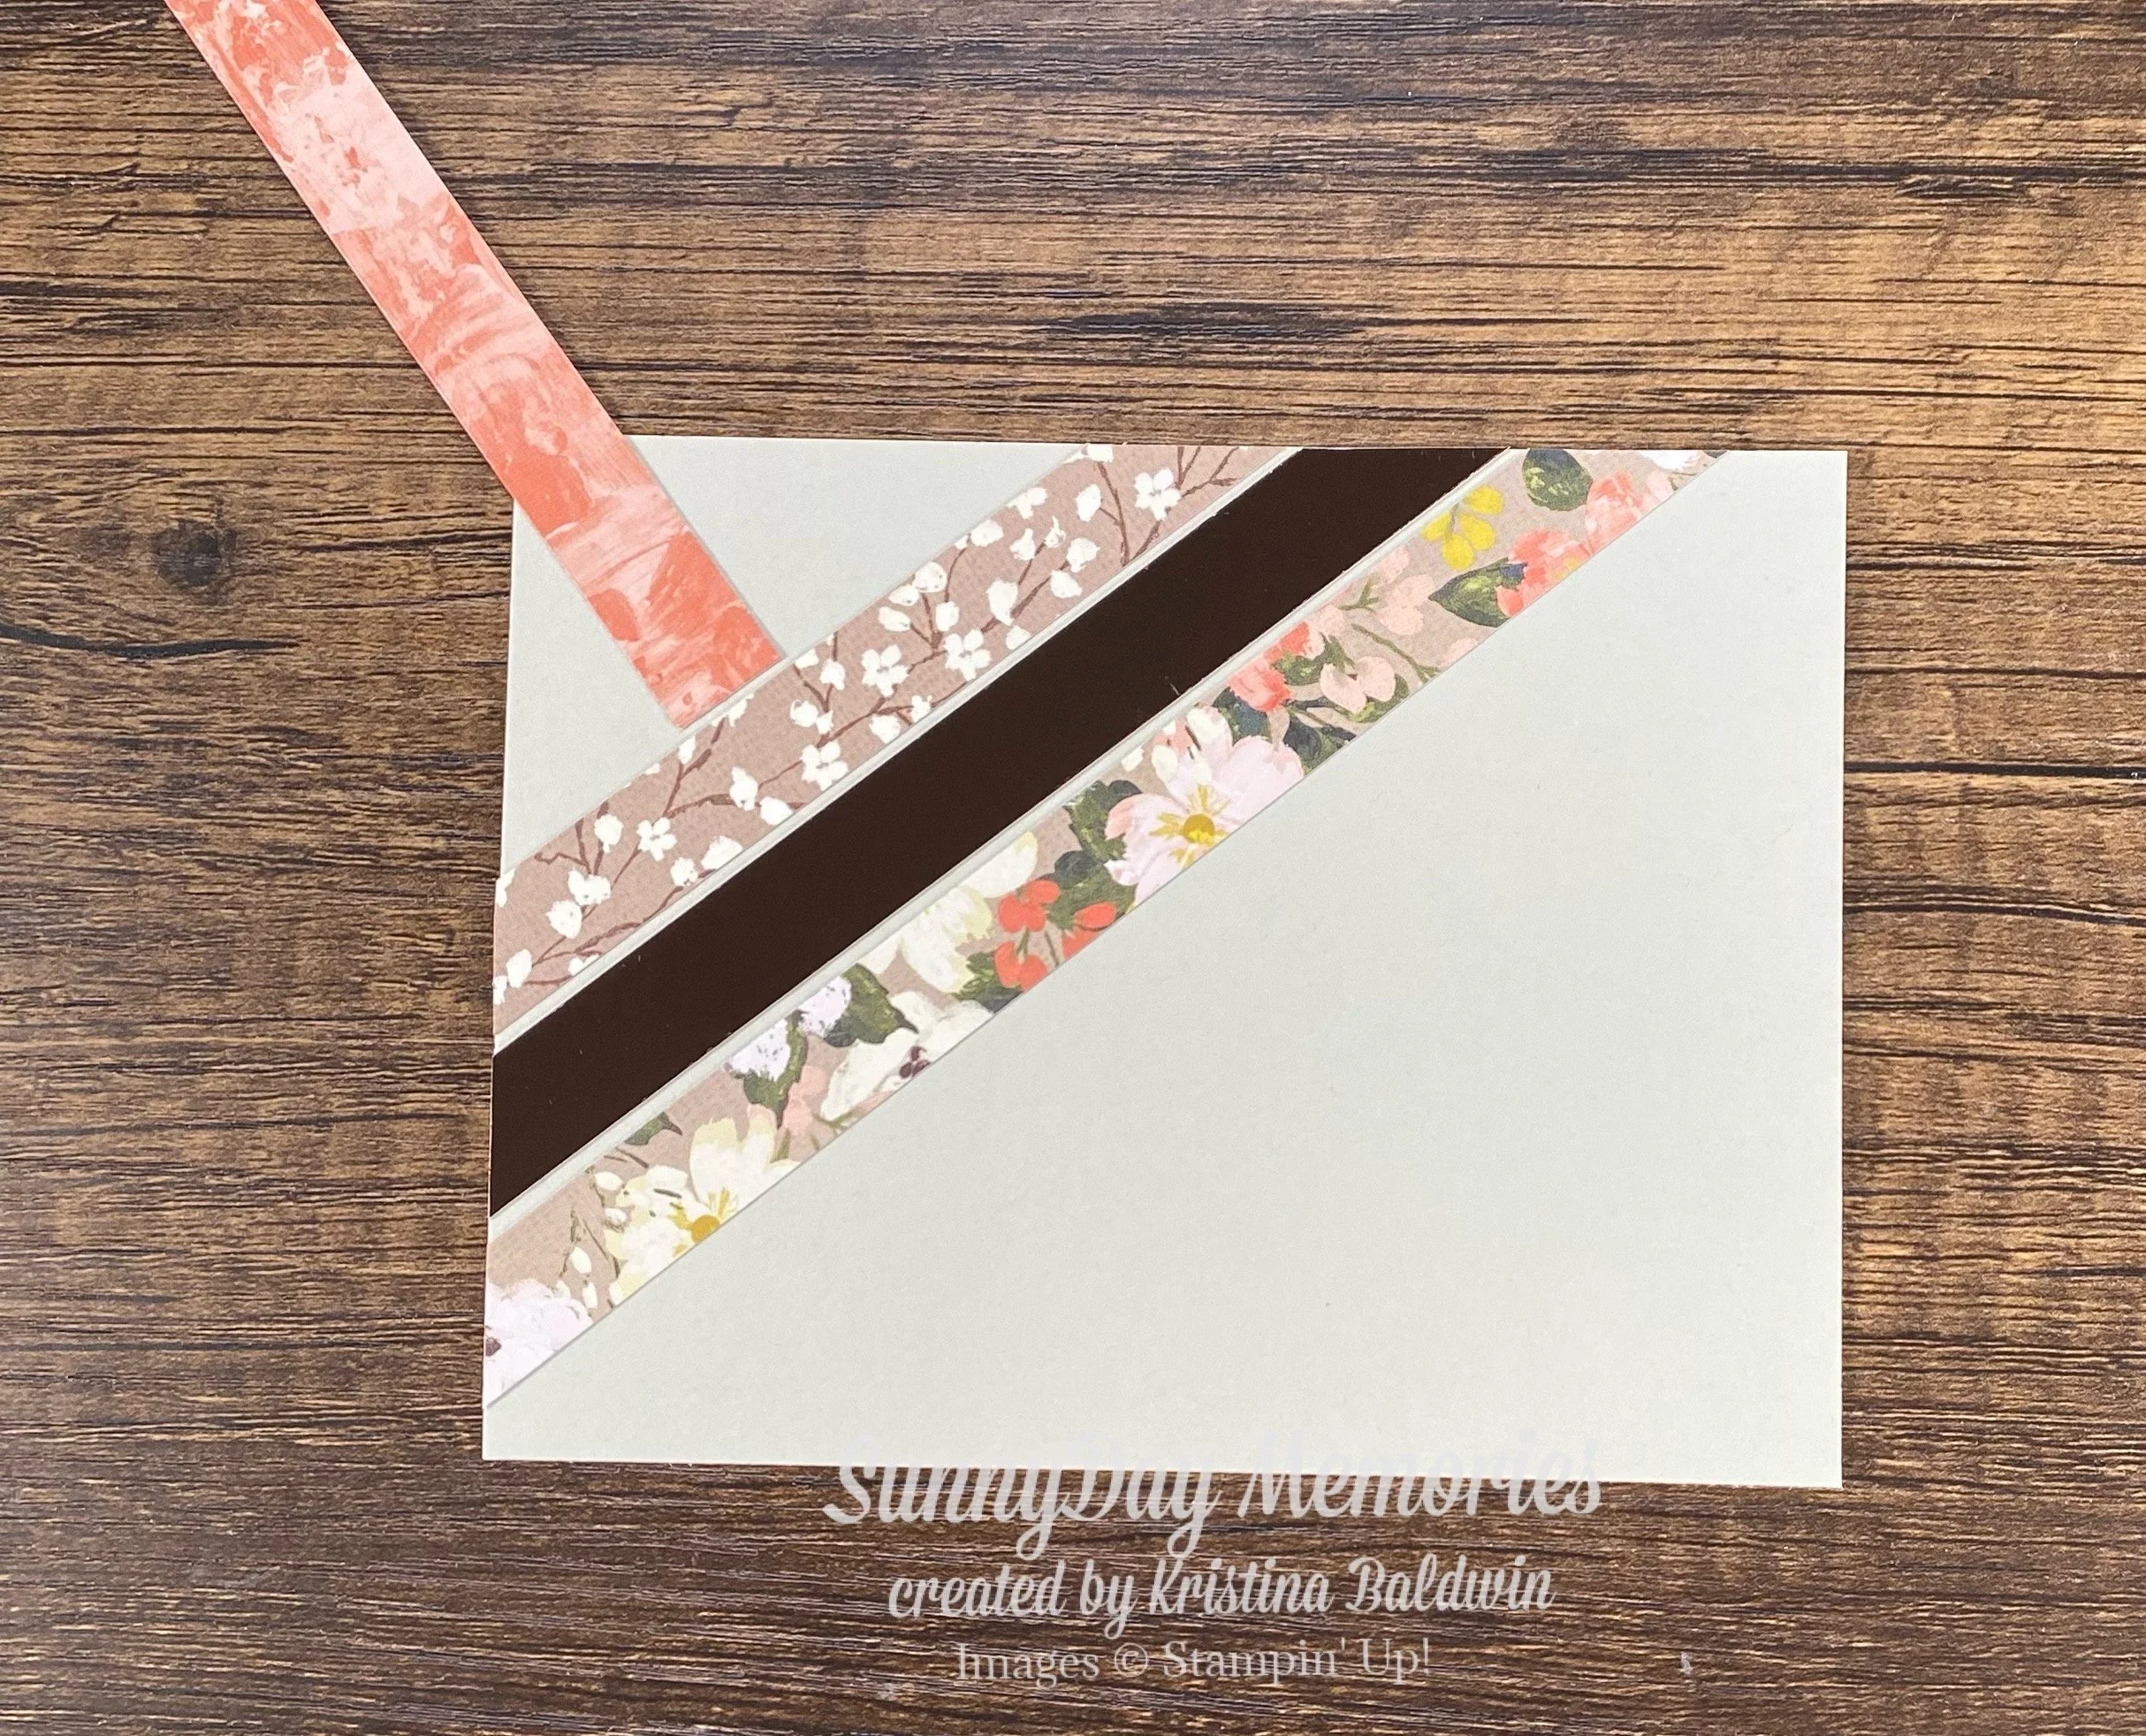
Next you’ll want to add a strip perpendicular to the original 3 strips.
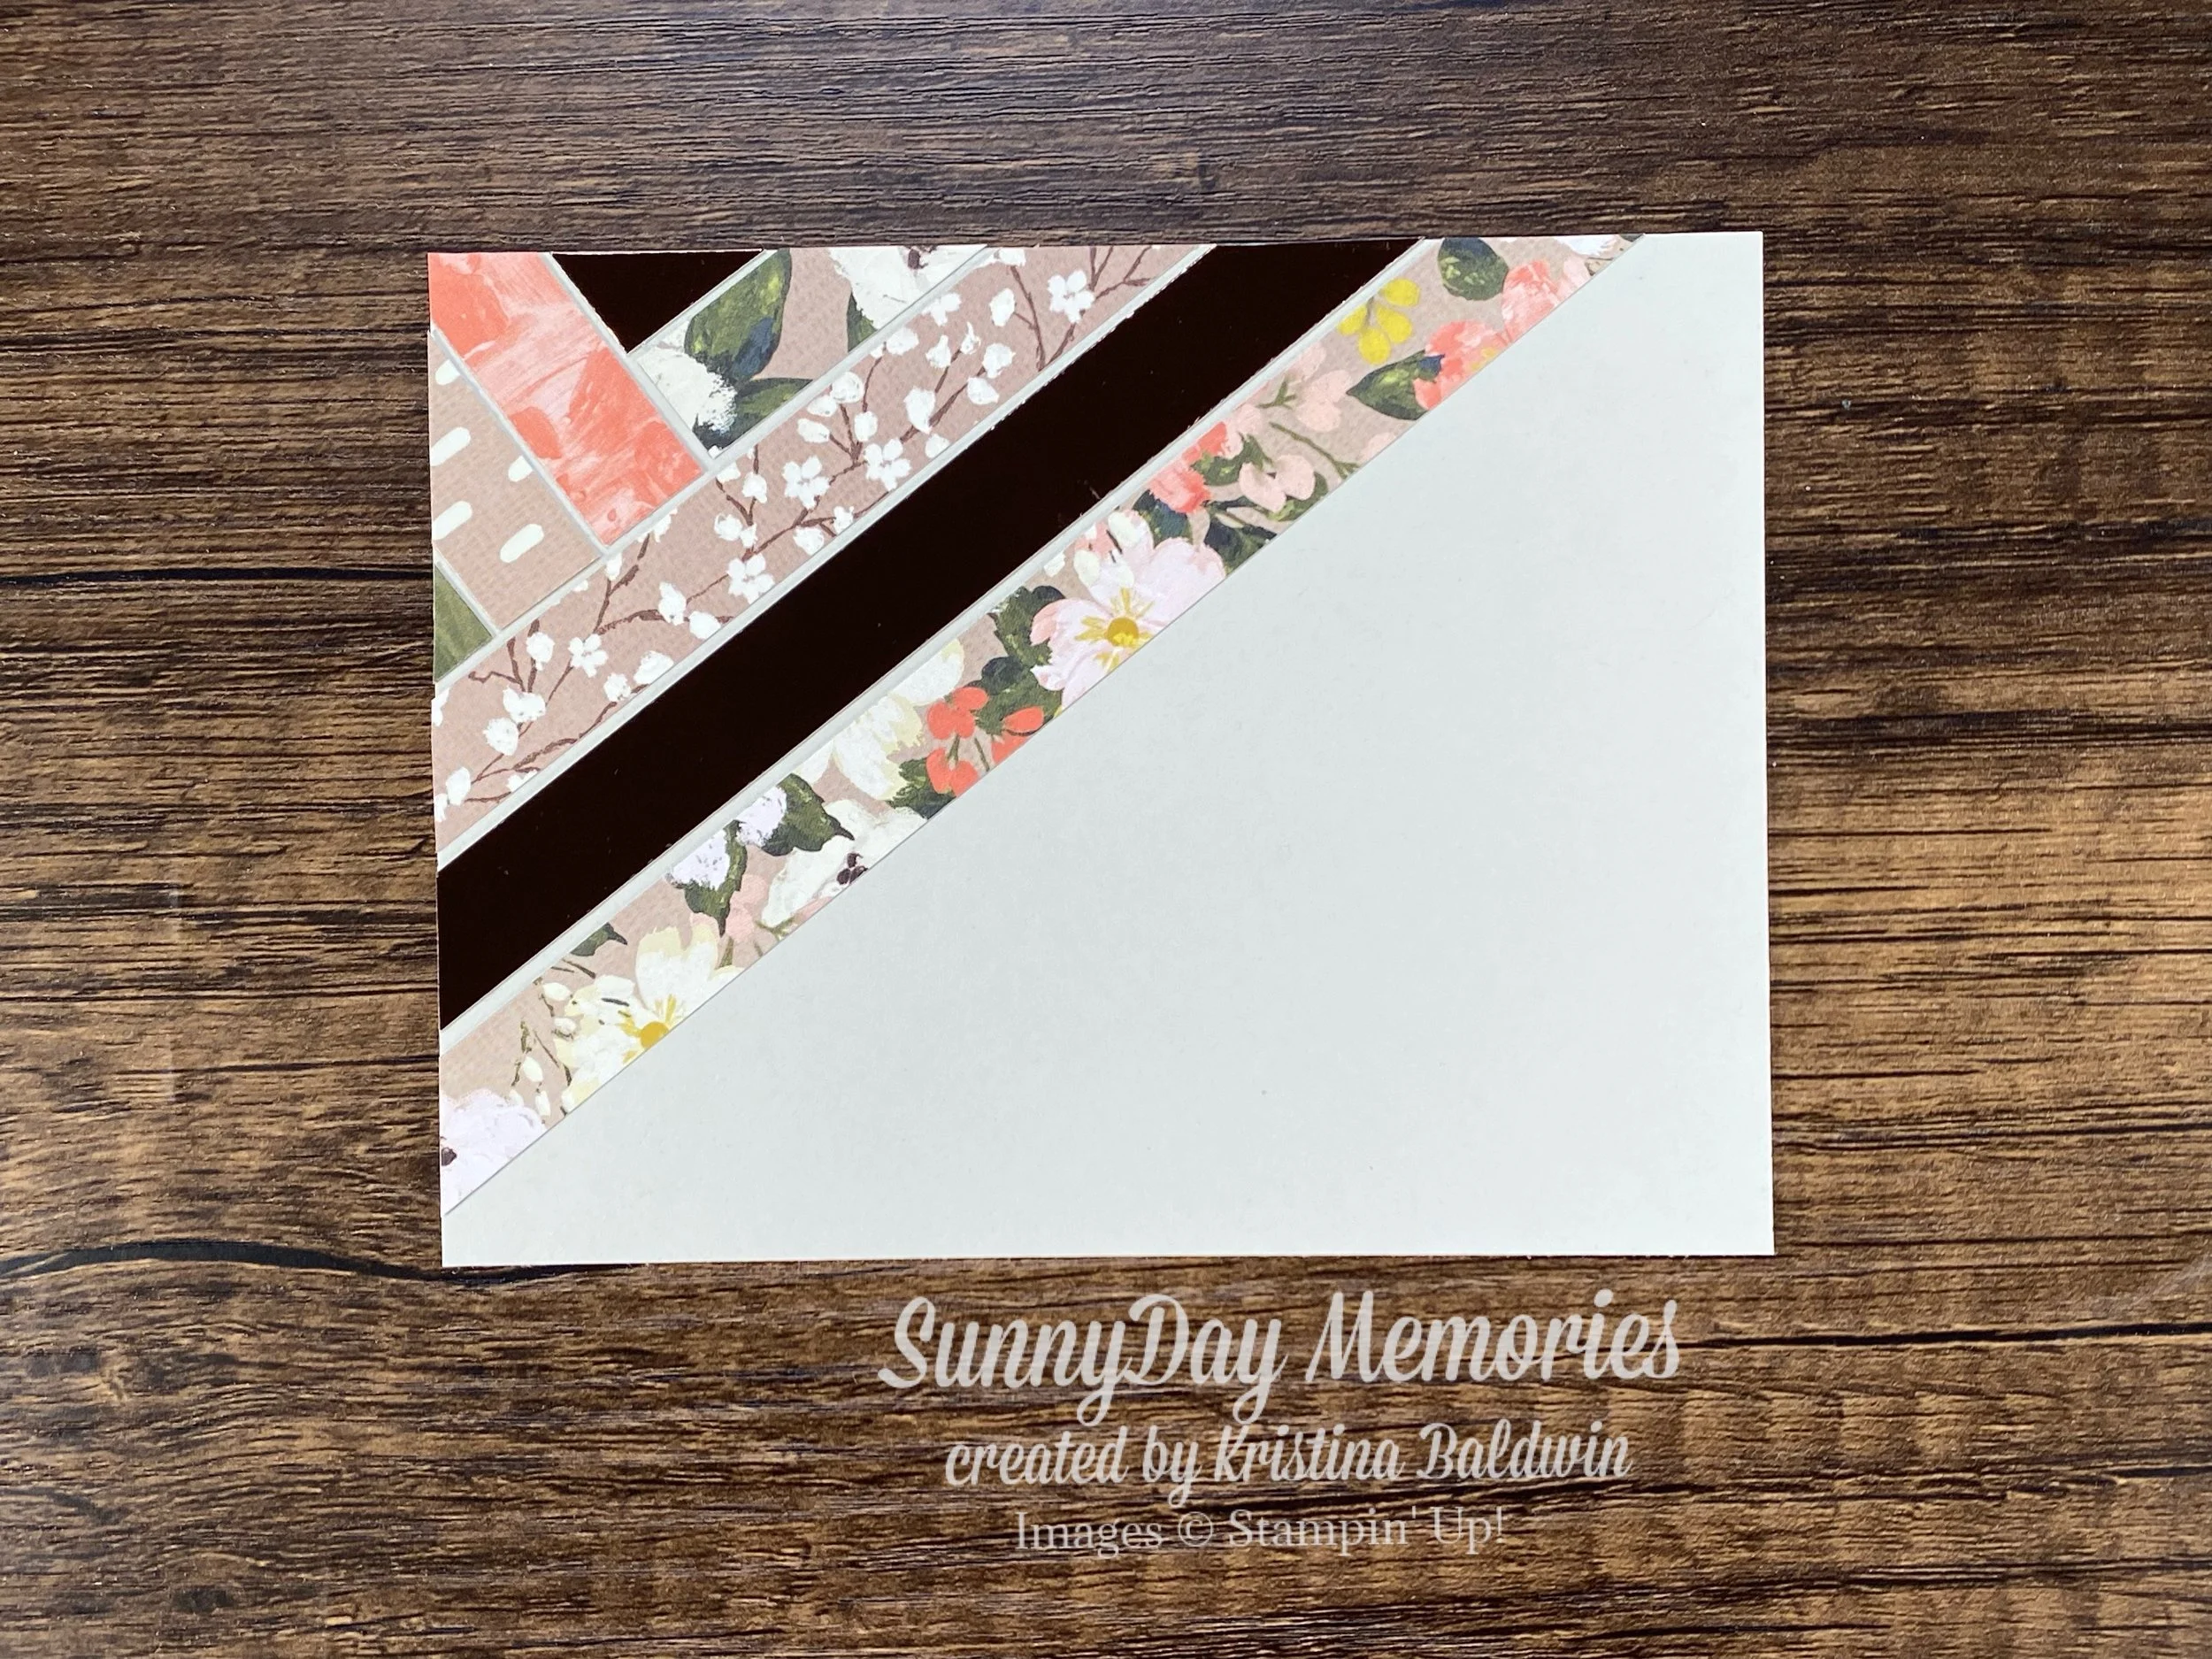
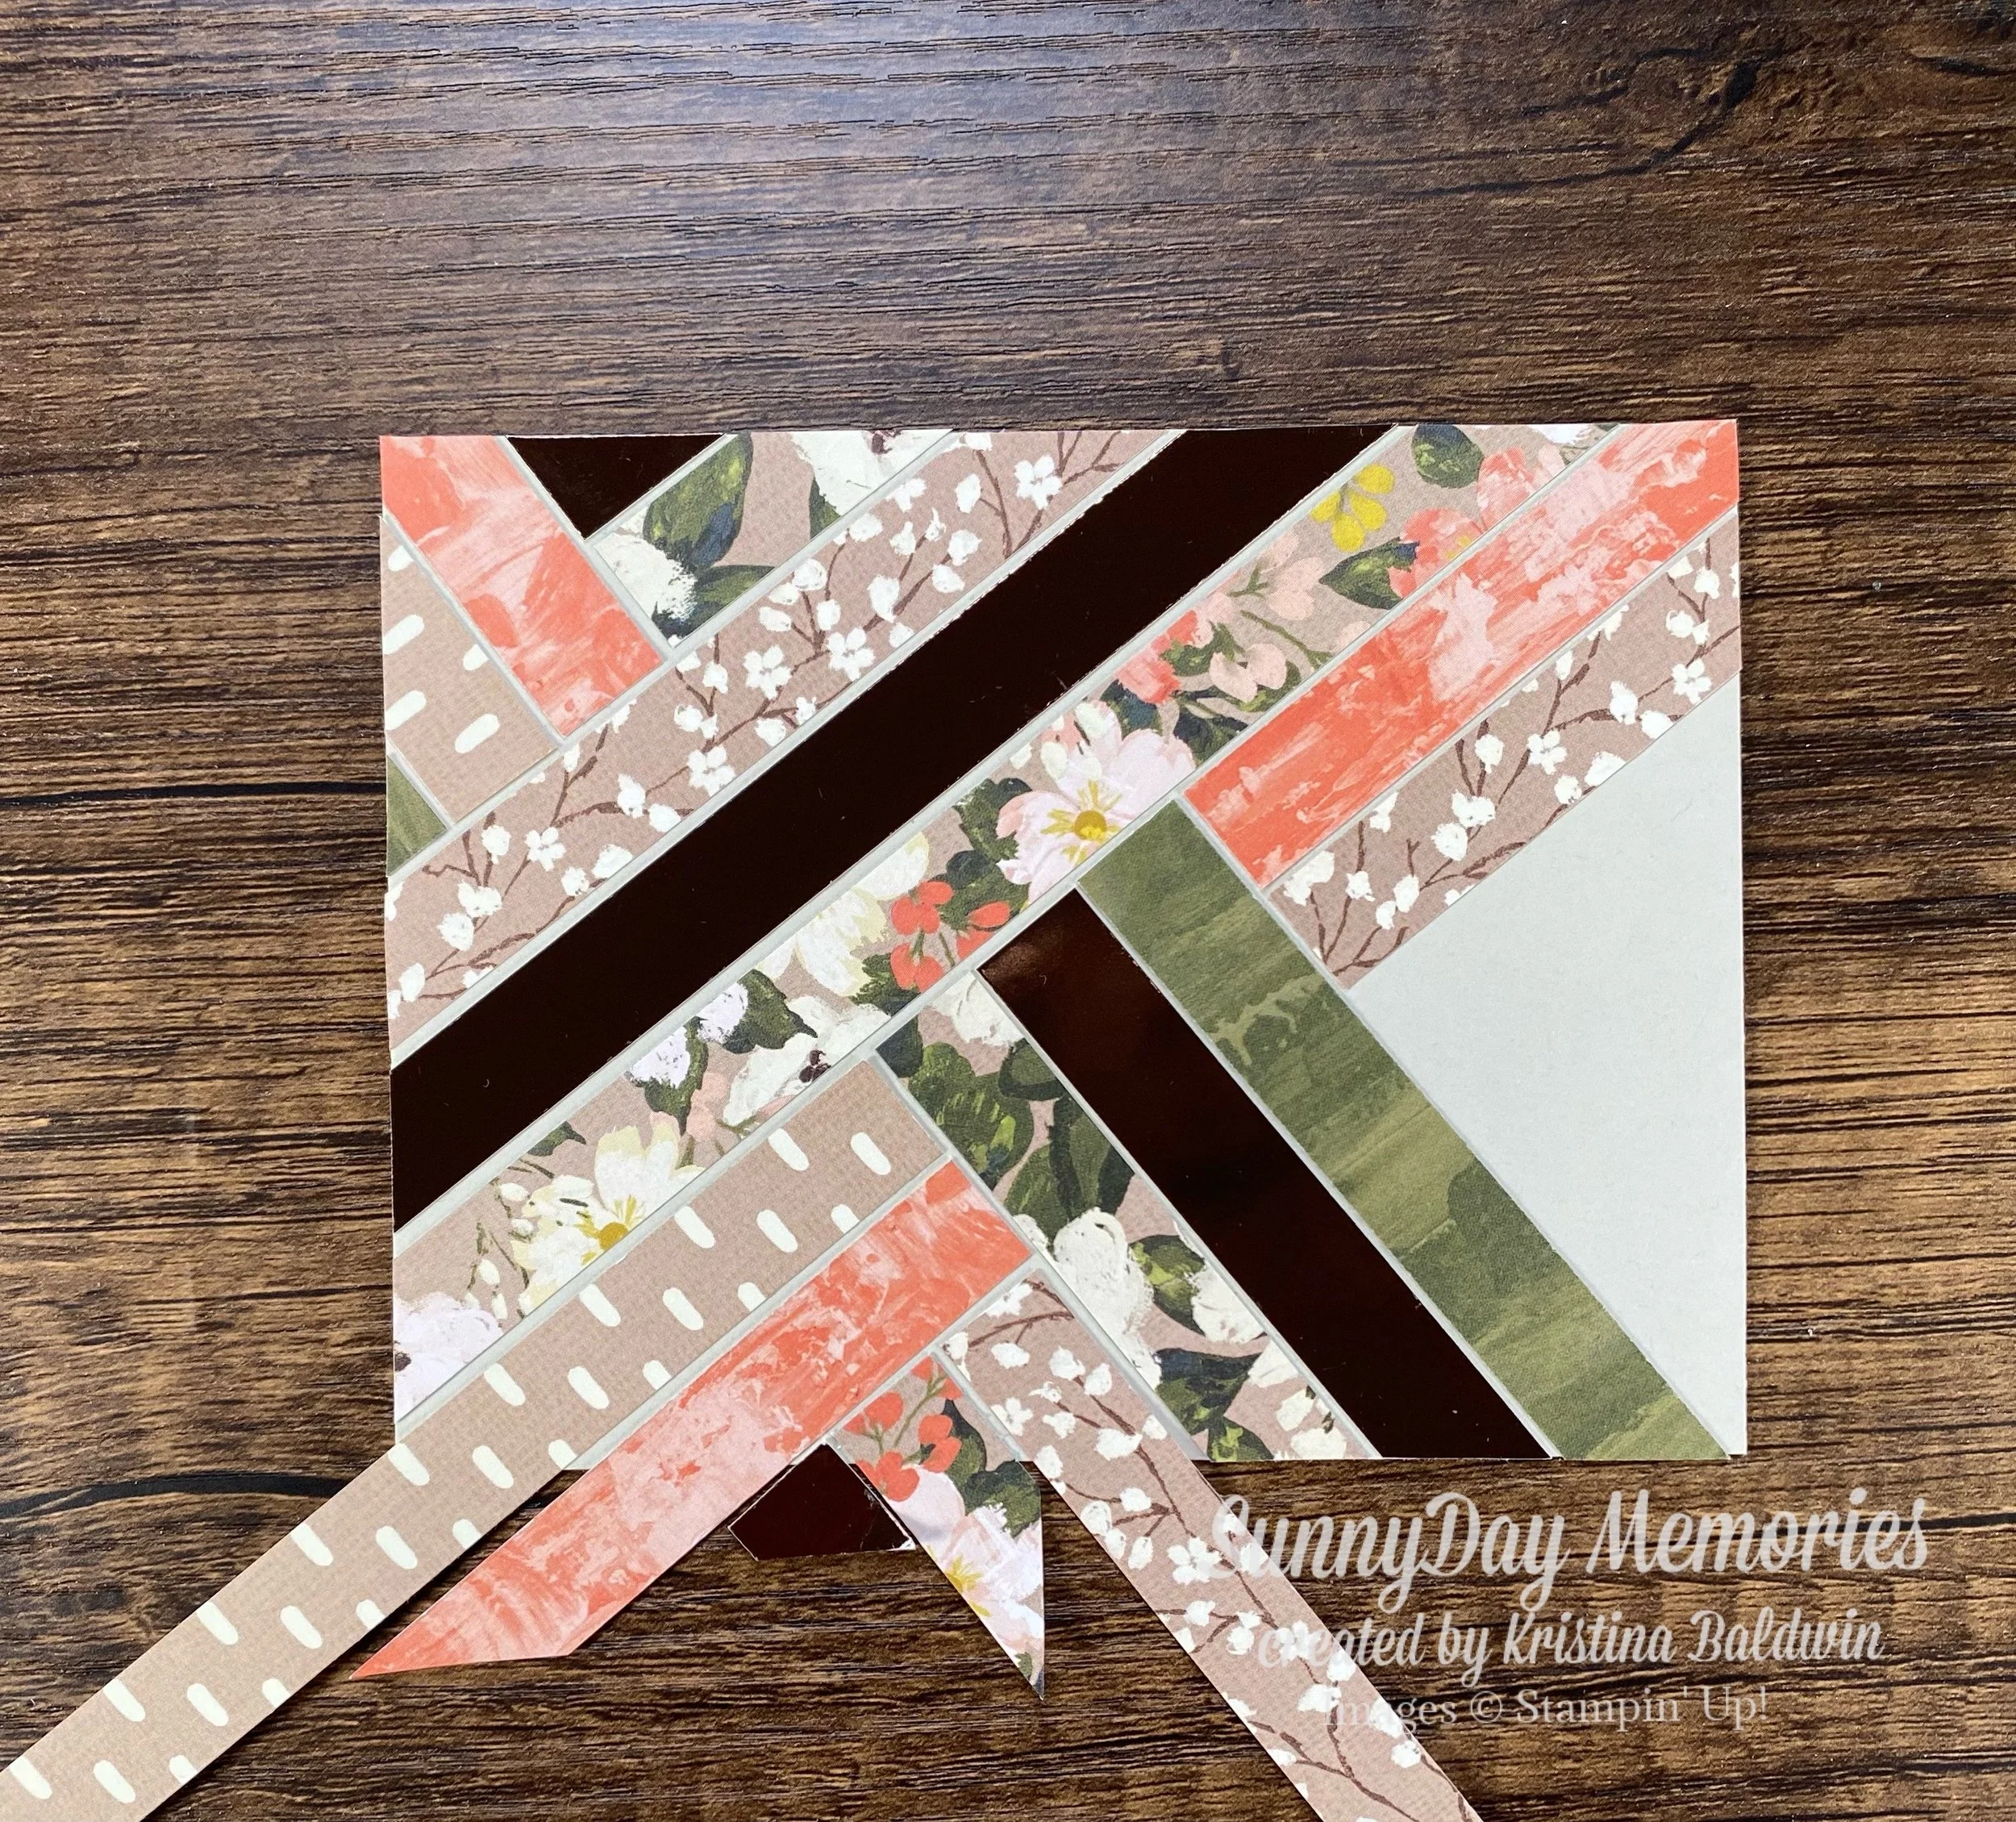
You’ll add a 2nd perpendicular strip, again leaving a slight space between the first strip. Then you’ll complete that portion of the cardstock piece by adding strips that are perpendicular to those strips. Trim away the excess strips.
You’ll then begin working below your original patterned paper strip, by adding a strip that is perpendicular. Again, don’t forget to leave a small space between where the 2 strips meet.
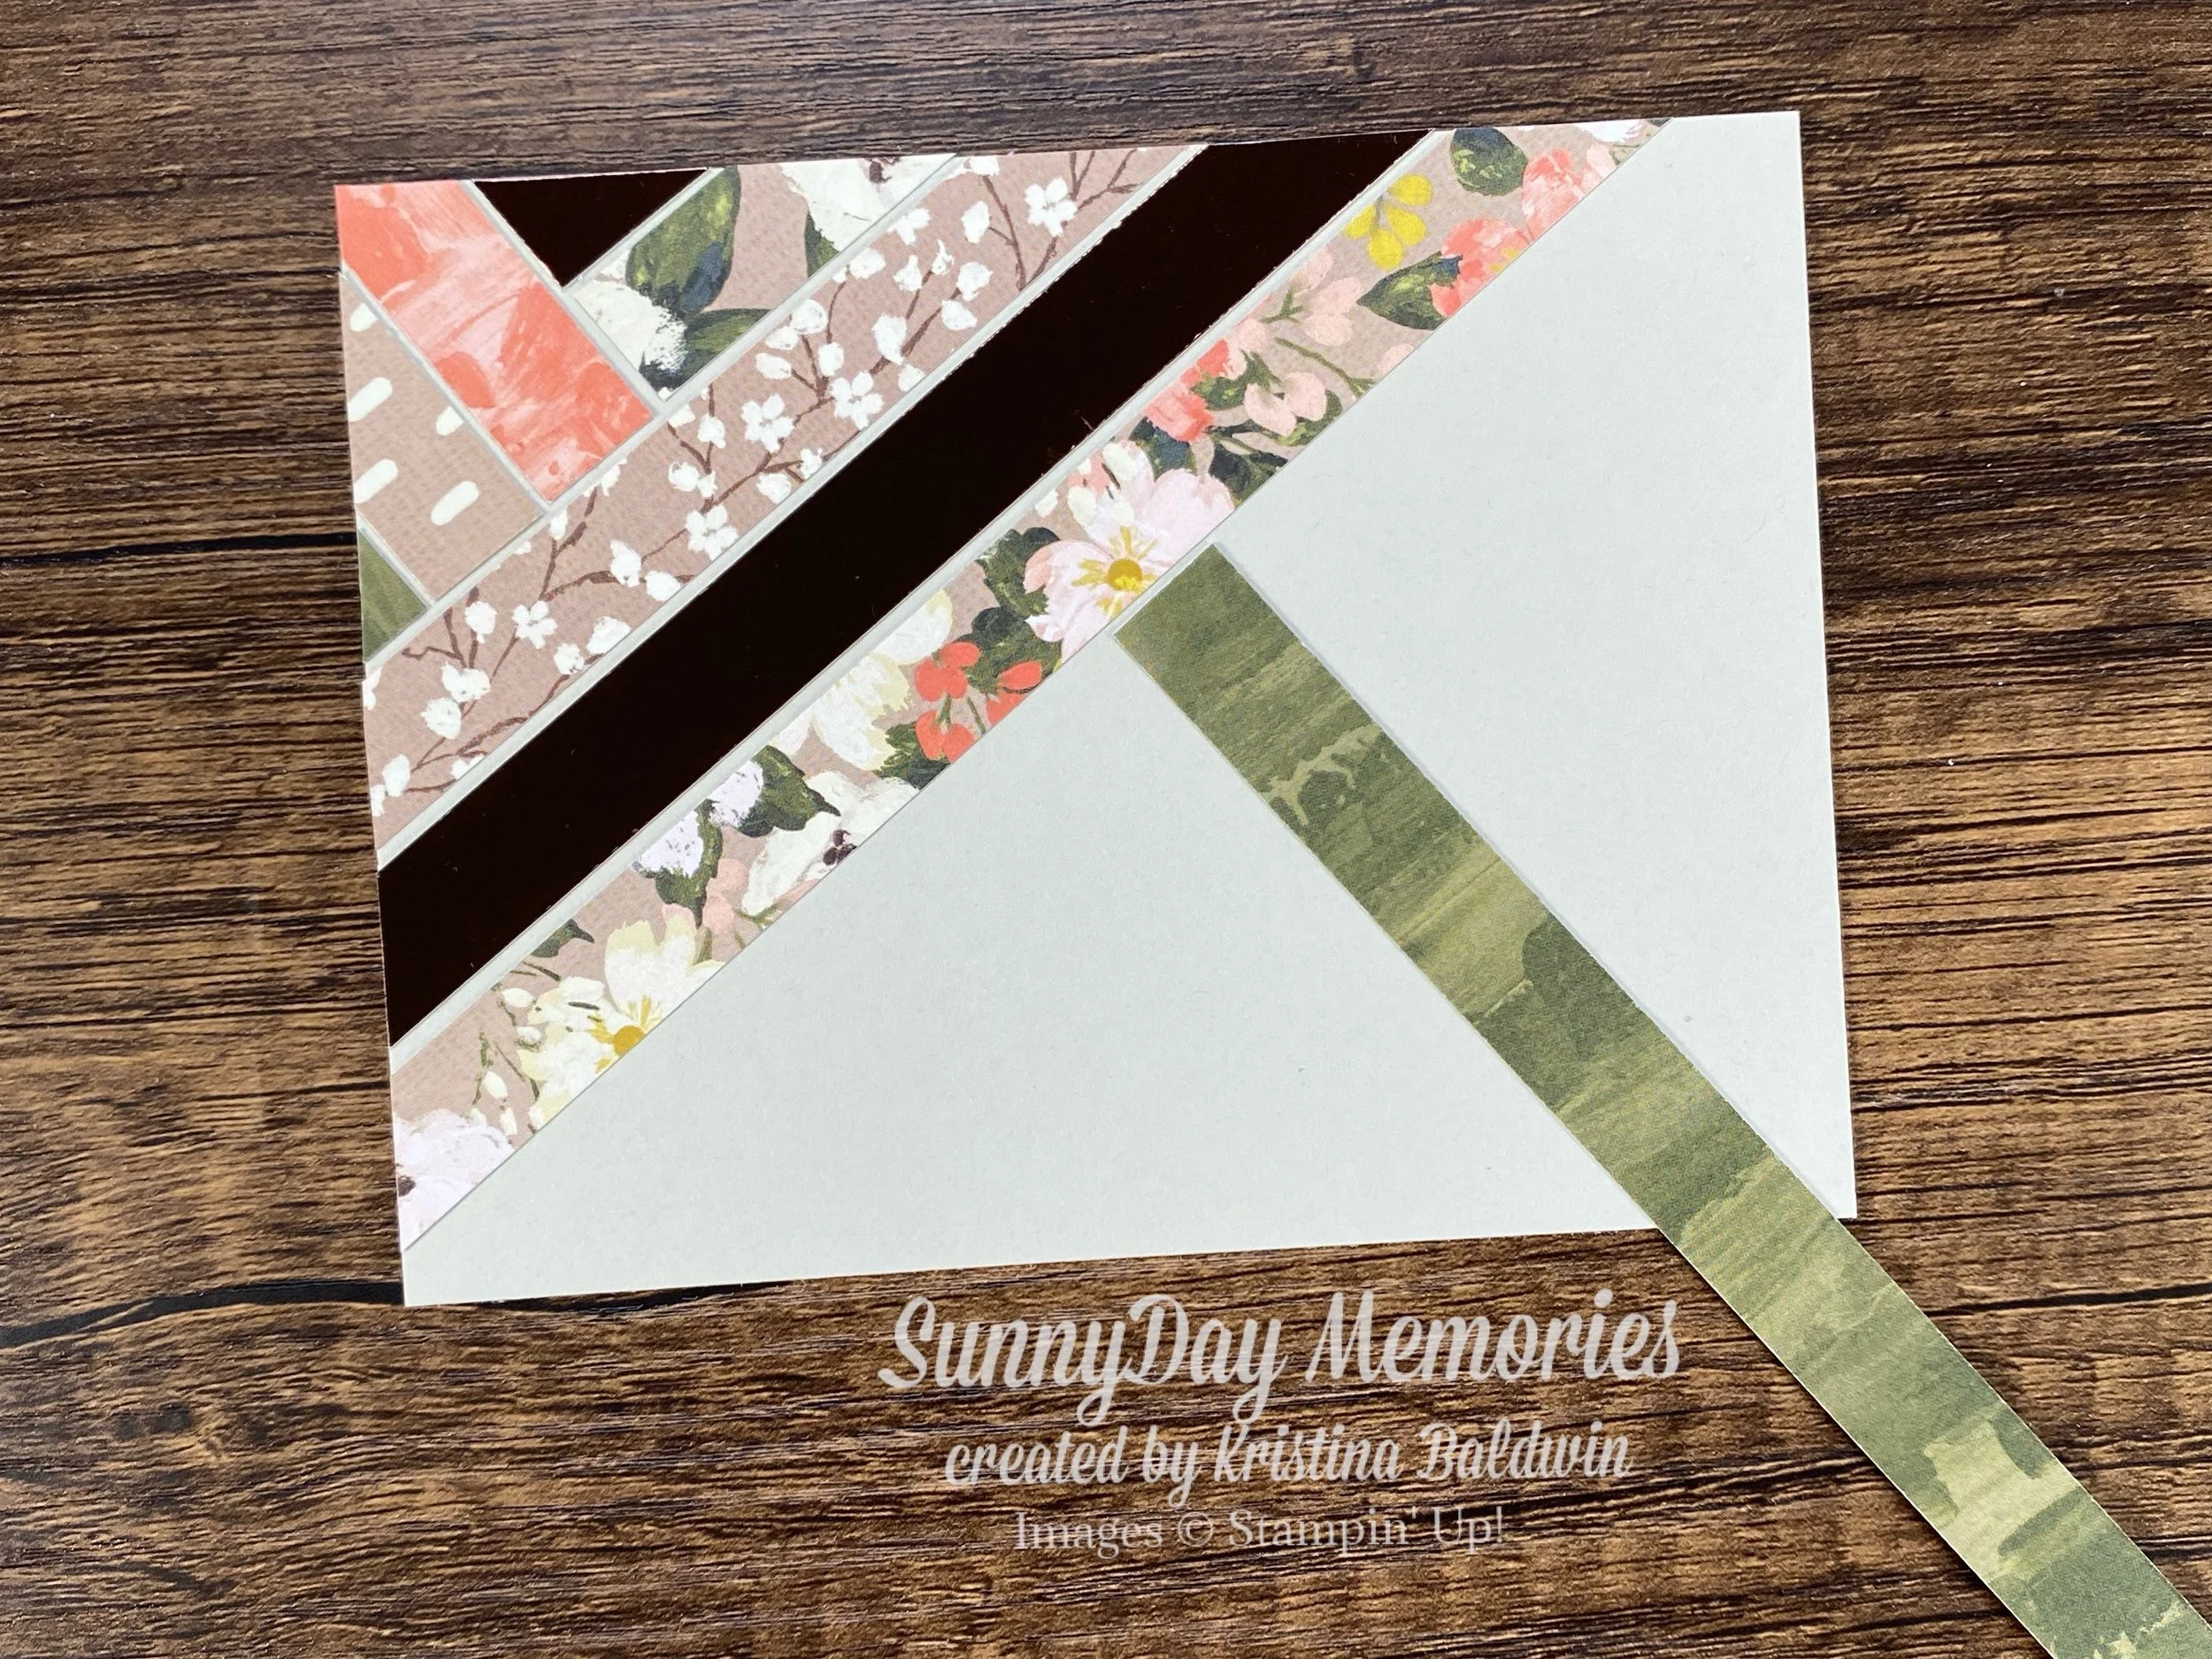
You’ll continue the same process we originally did where you add 2 additional strips, leaving space between each and then trimming off the excess. Then you’ll add 2 more strips that are to the right of them and are perpendicular, leaving space between them. Trim away the excess.
Then go to the left side and repeat the process adding 3 strips, with spaces, that are perpendicular. Finish out the side by adding 2-3 small strips along the base, as necessary, and trim the excess.
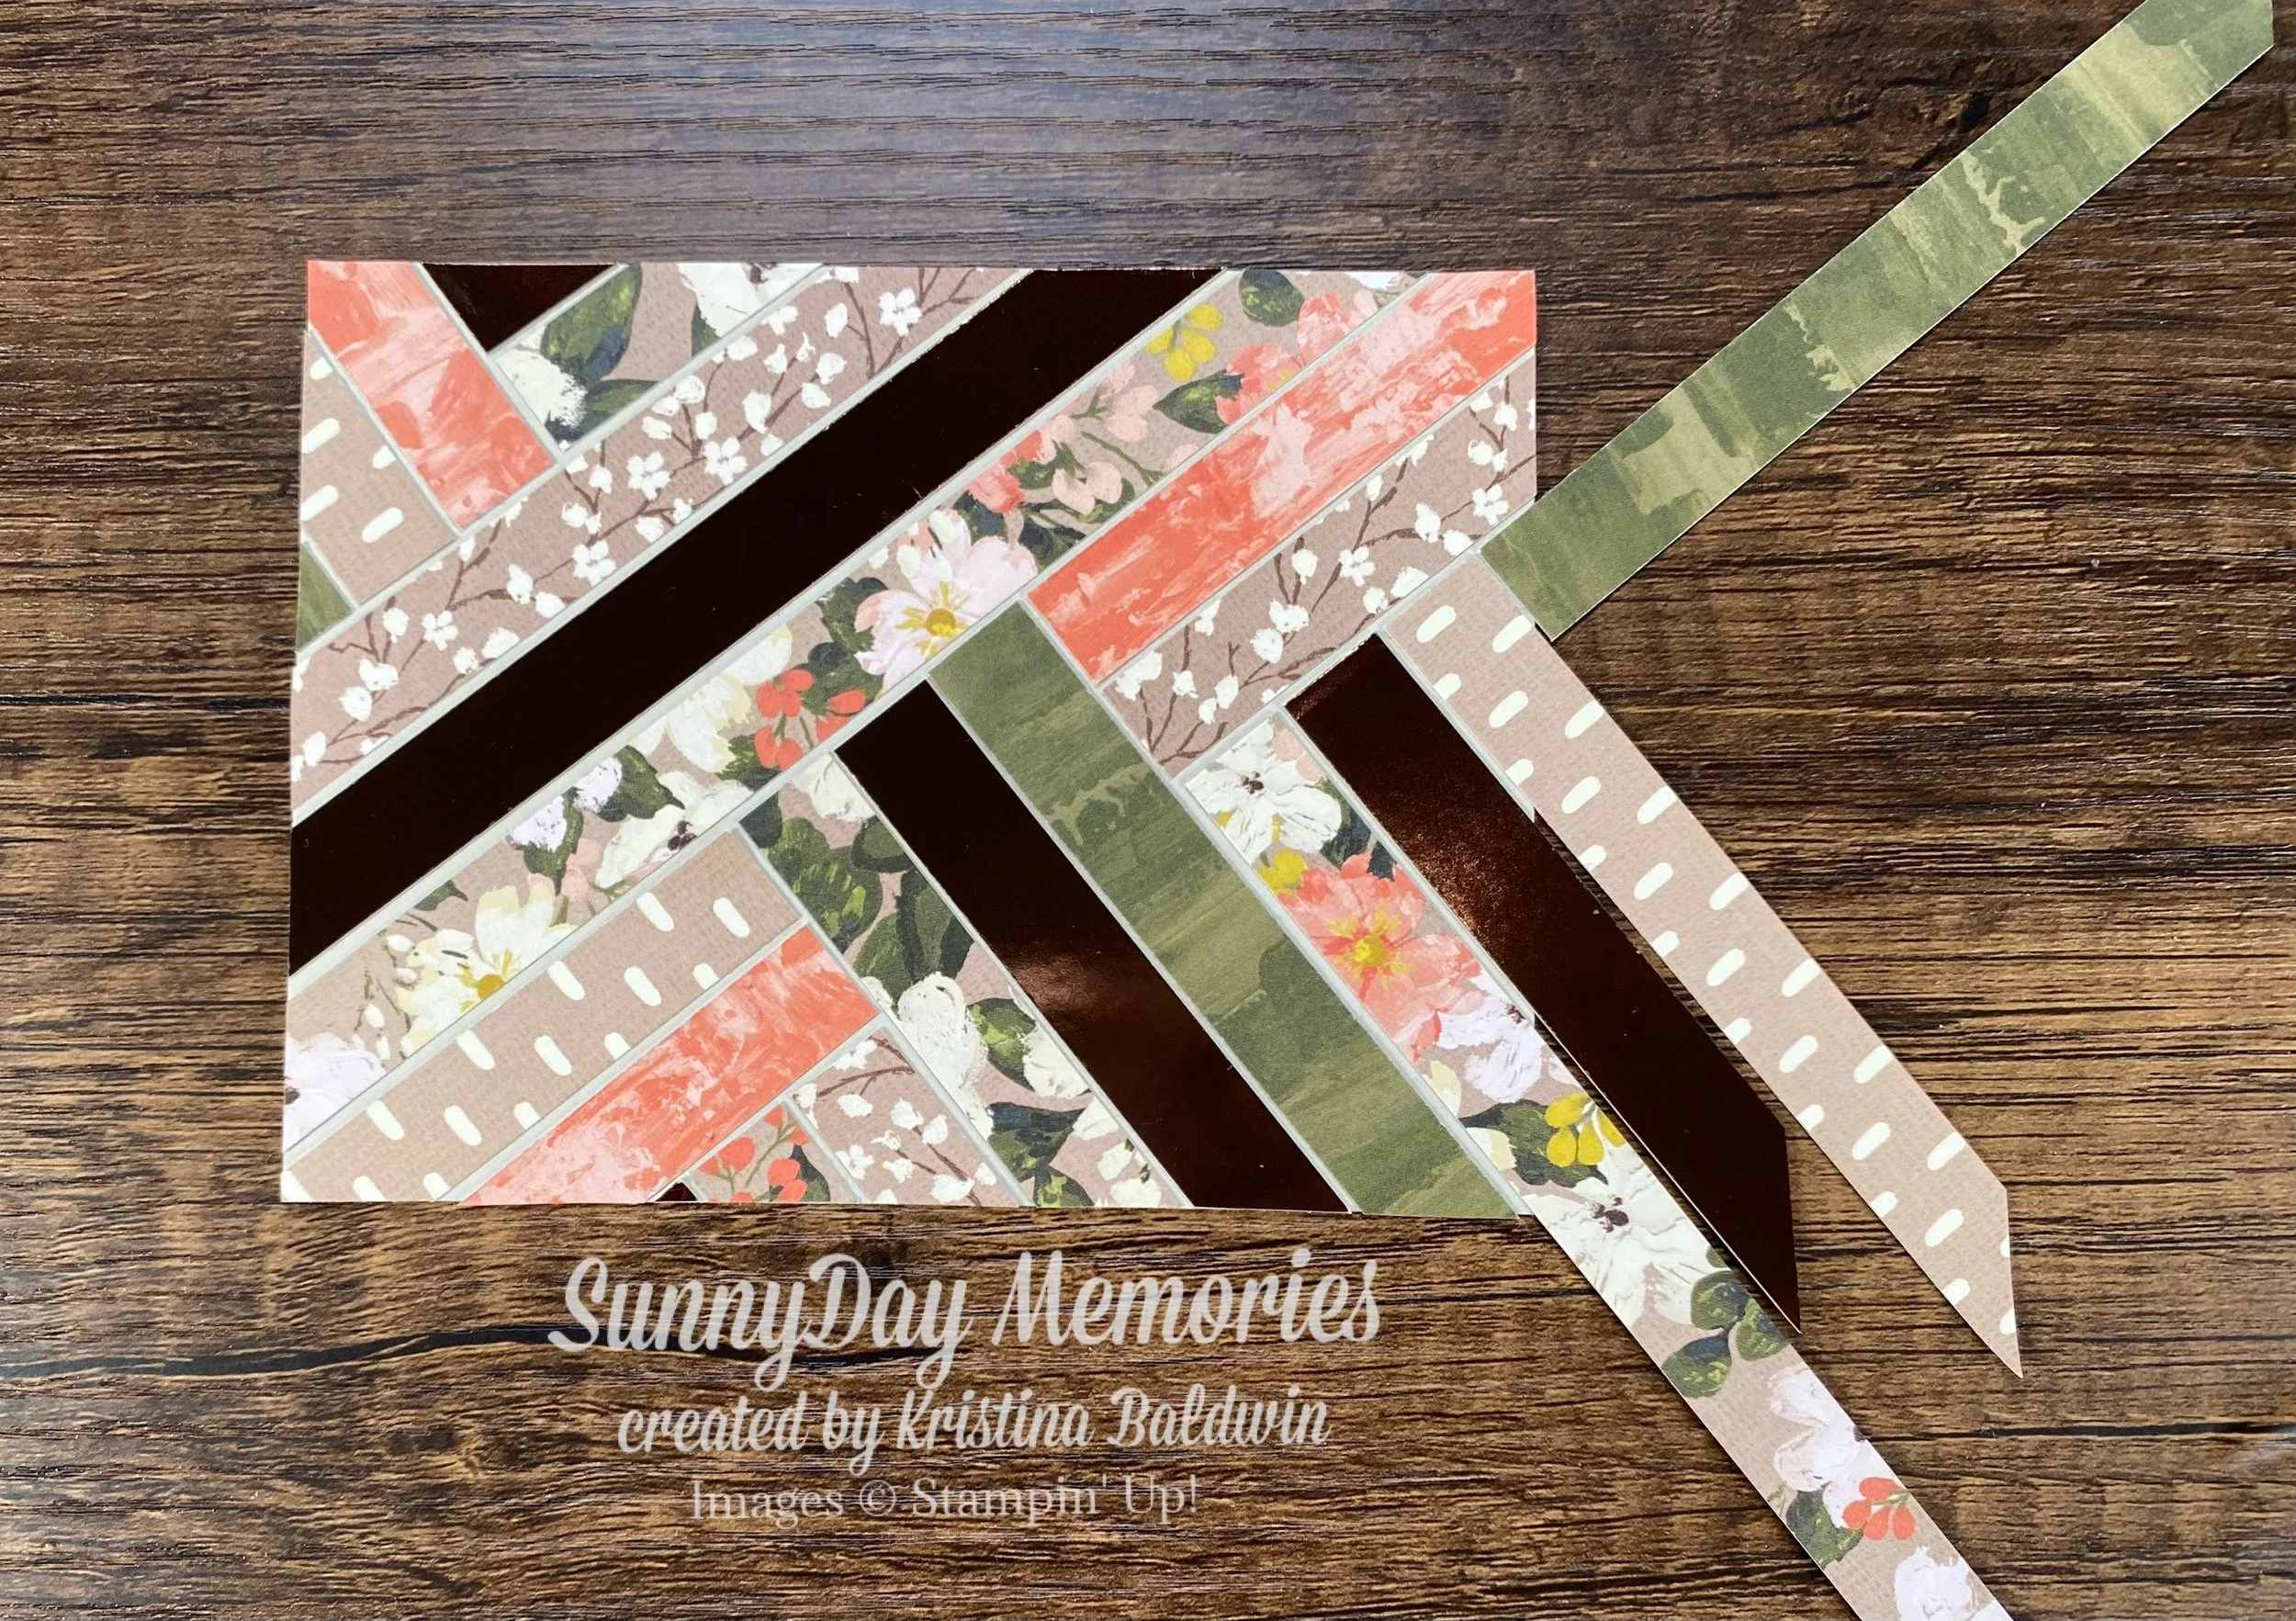
Return to the right side of the cardstock piece and fill it in with 3 strips that are perpendicular to the ones above. And finish with one strip going perpendicular to them on the edge—if necessary. Trim away the excess. The idea is to be alternating patterns and alternating between the number of strips going each direction.
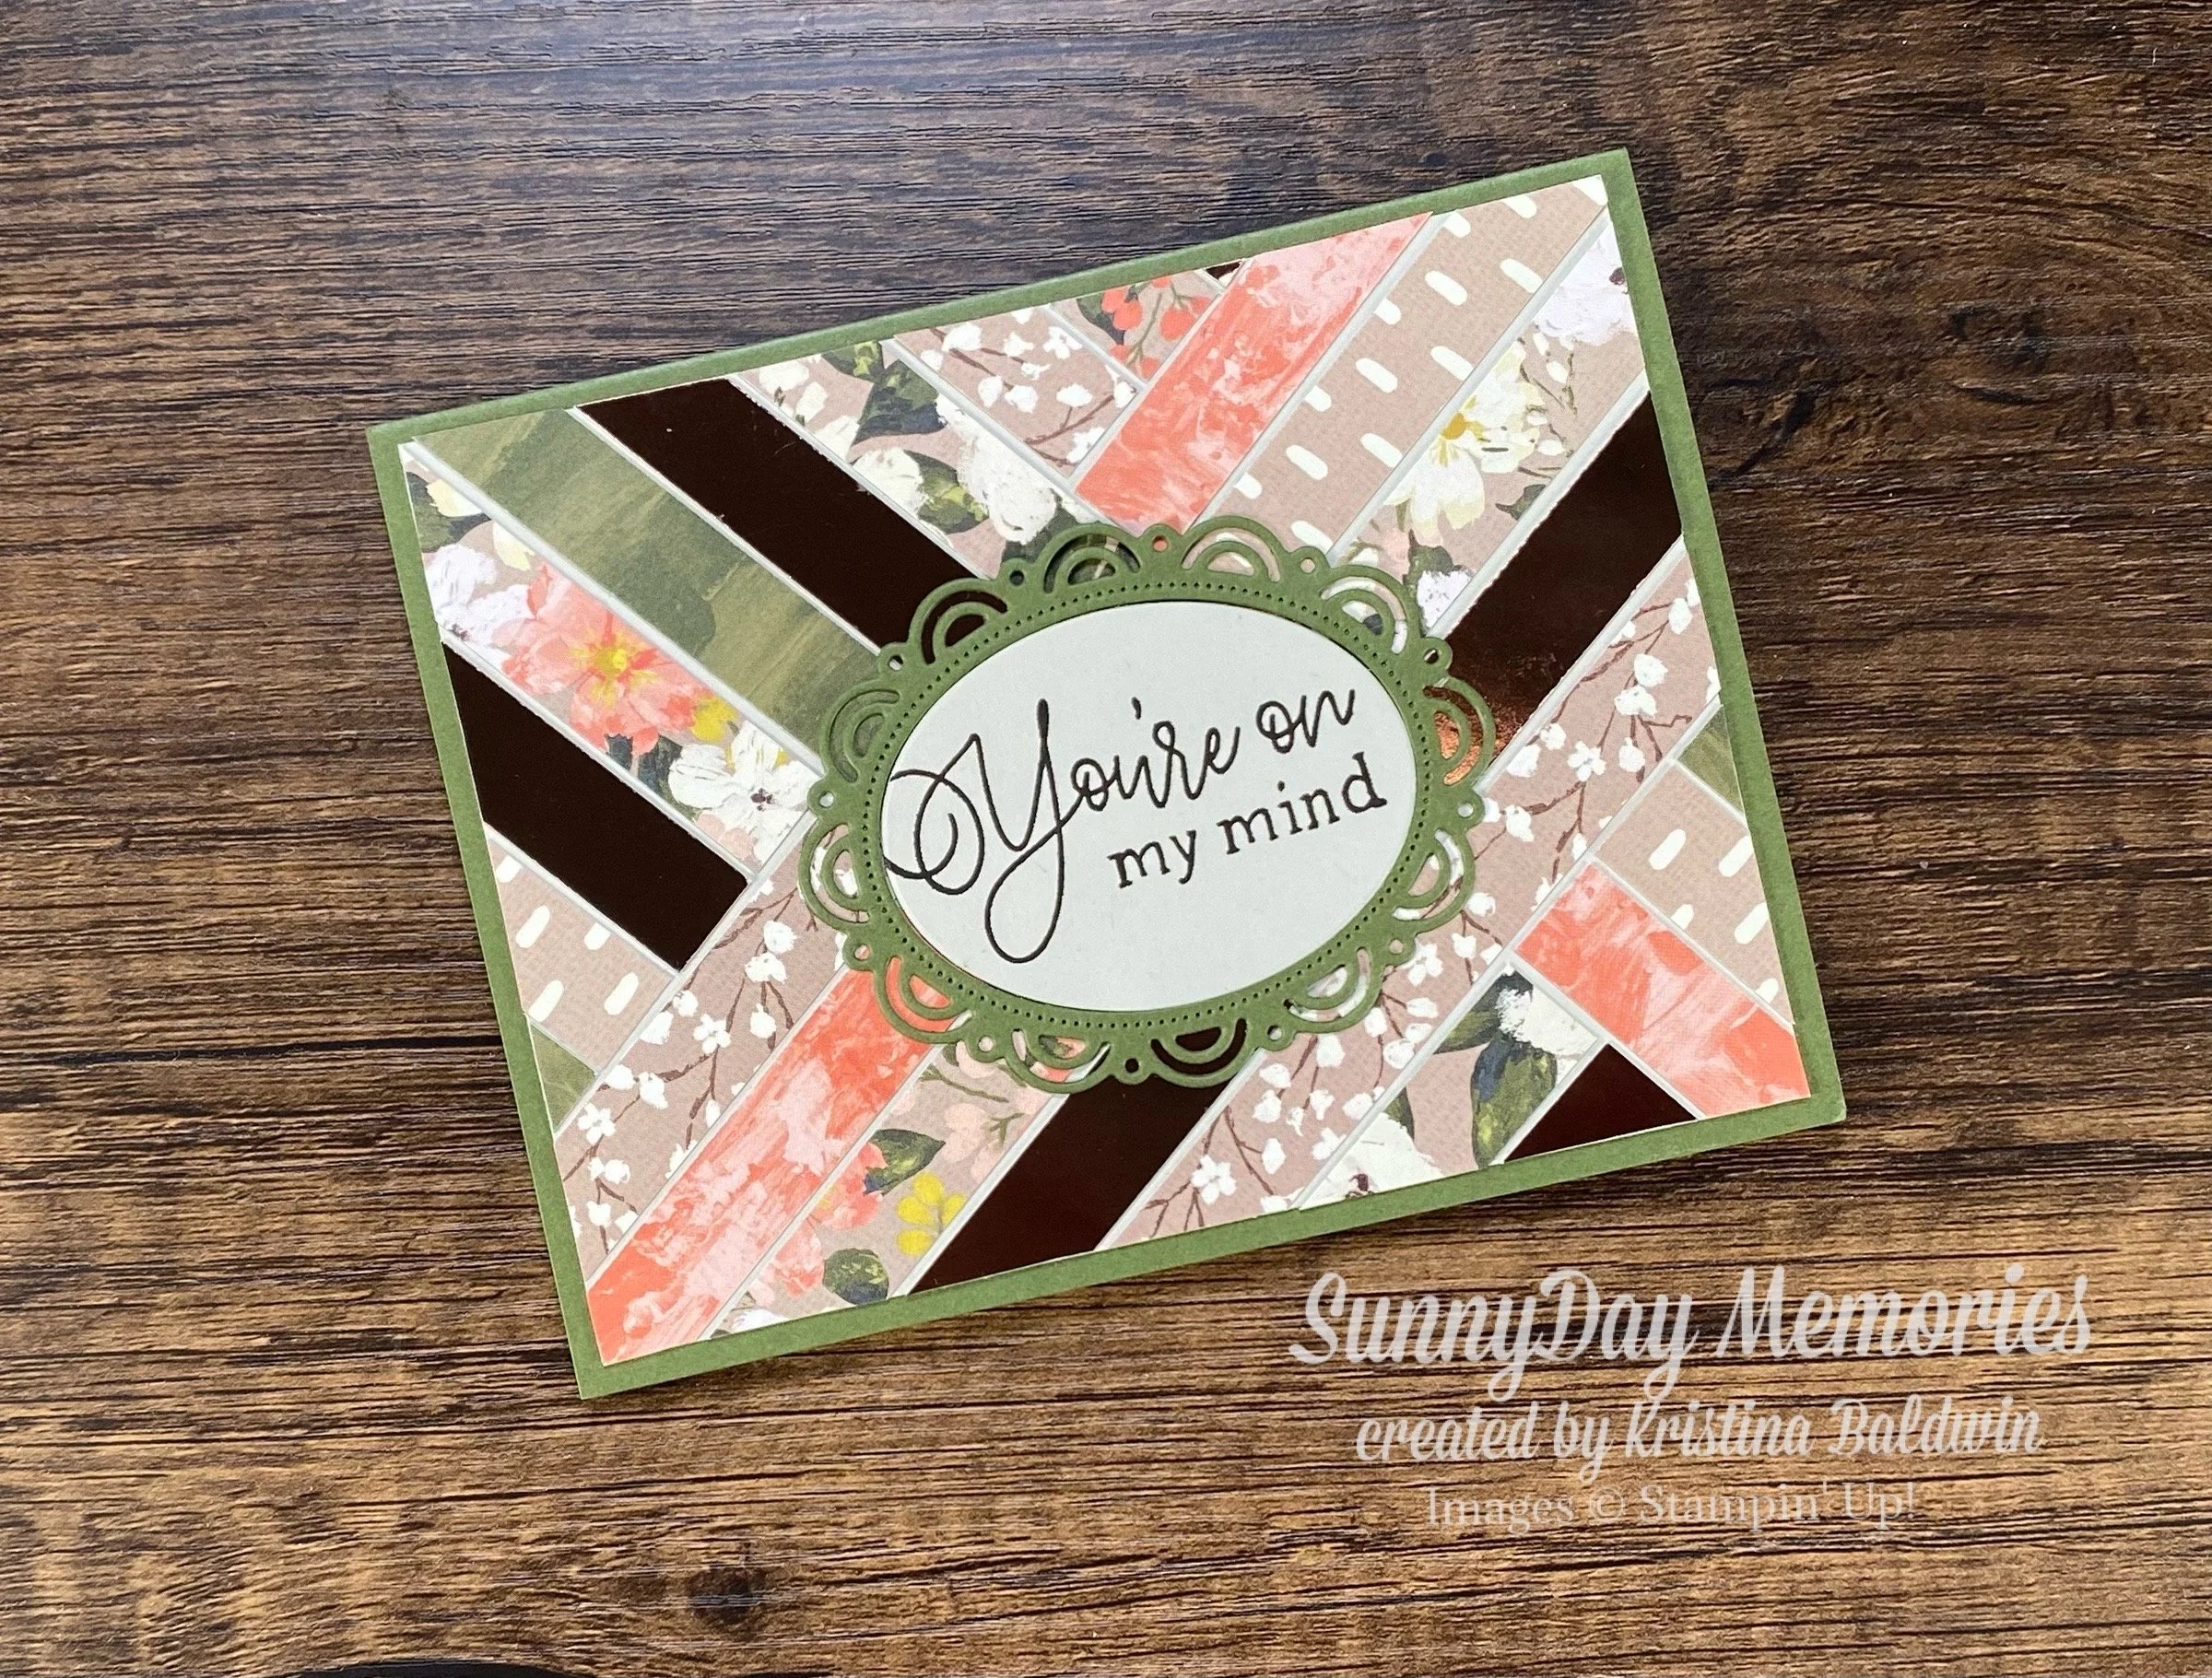
You’ll glue your cardstock piece with all the beautiful strips to your card base. Then stamp a sentiment—no need for any fancy images or embellishments because the star of these cards is really the technique. I used the Forever Florals Stamp Set and Early Espresso ink for mine. I also used the Scalloped Wishes dies to frame the sentiment.
As you can see, creating this style card in either the horizontal or vertical orientation turns out beautifully. They really turn out stunning and you have to use very little paper for each pattern. Can you see why this is perfect for your scraps? Now that you know how to create a Herringbone Technique Card you can put those scraps to good use!