
Learn an Easy Way to Use Up Your Paper Scraps
Who’s ready to learn an easy way to use up your paper scraps? You know those last little bits of your patterned paper that you just can’t toss in the garbage? This design uses very little paper but makes a big impact.
Here’s a quick snapshot of the steps involved:
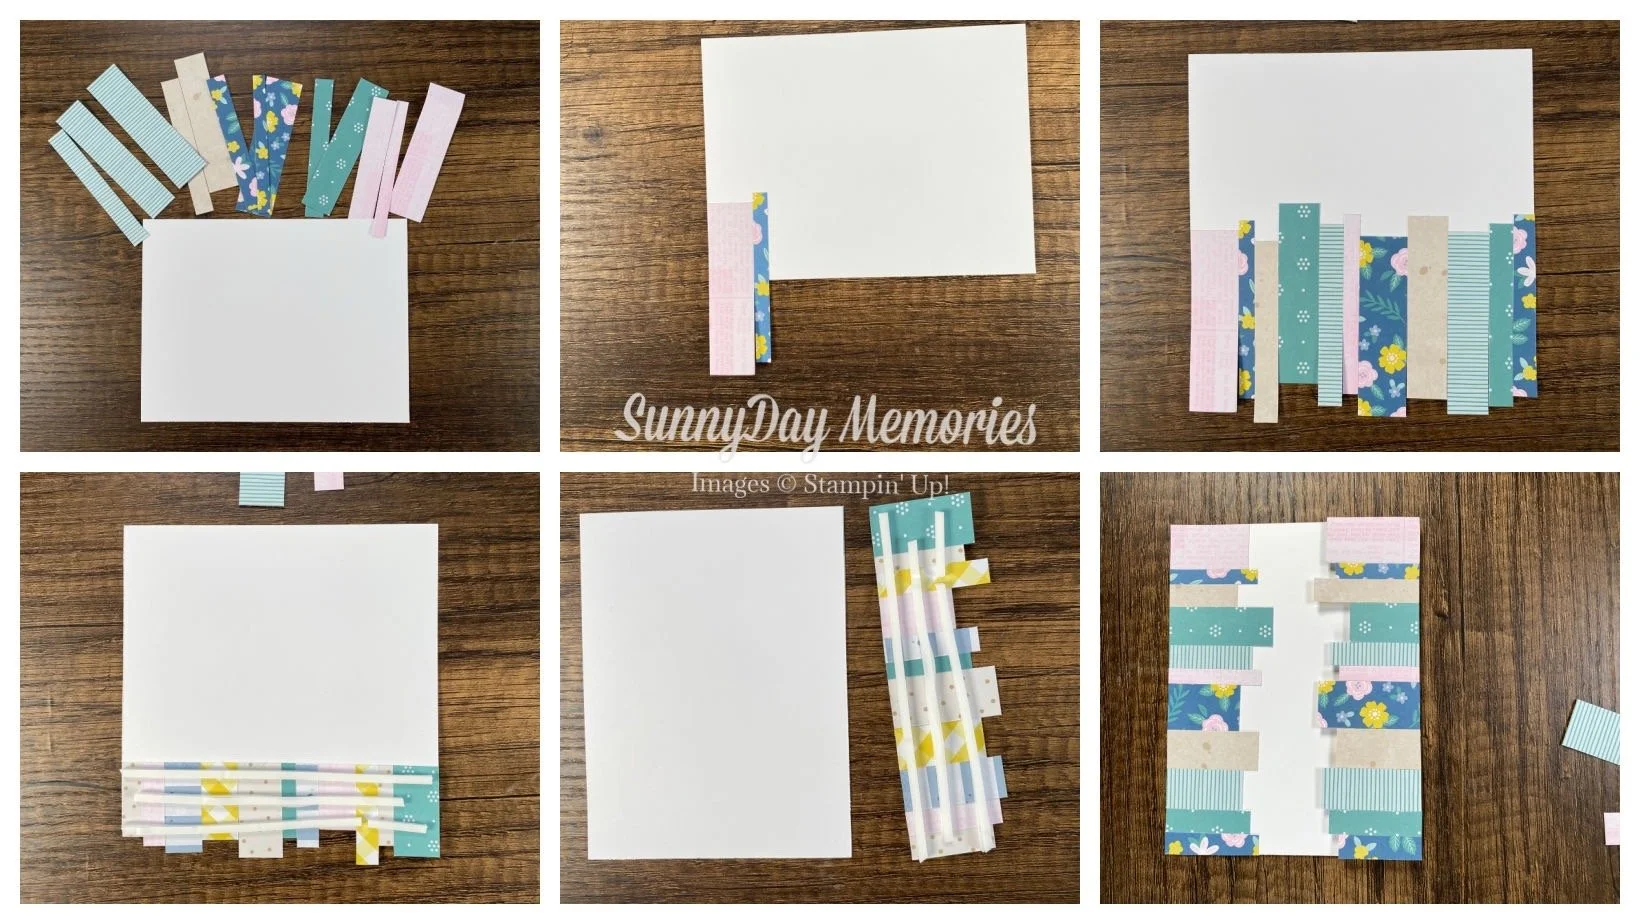
STEP 1:
Cut a piece of cardstock in the same color as your card base to 4” x 5-1/4”. I’m using Basic White since my card base (8-1/2” x 5-1/2”, scored at 4-1/4” is also Basic White.)
Cut paper strips in 4-5 coordinating patterns in varying widths (1/4”, 3/8”, 1/2”, 5/8” & 3/4”) by 2-3/4” long. Prepare 2-3 strips of each pattern—each a different width.
STEP 2:
Using your 4” x 5-1/4” cardstock as your base, start adhering your strips to it only adhering a portion (no more than half) of each strip. When you adhere your 2nd strip, ensure it is flush to the 1st and at a different height level. Continue adhering strips along the full length of the cardstock, alternating patterns and heights.
STEP 3:
Once you’ve adhered your paper strips along the full length of your cardstock, flip it over. Add Foam Adhesive Strips across the excess strips. Important: you’ll want these to go along the entire length to help hold the strips together for the next step.
STEP 4:
Trim away the excess paper strips with the Foam Adhesive Strips. Flip your cardstock back to right side up. Then adhere the raised paper strips flush to the other side of the cardstock so that the patterns line up with each other.
STEP 5:
Adhere cardstock piece with strips to the center of your card base and decorate as desired. You can use this design in a landscape orientation or a portrait one. It’s super versatile!
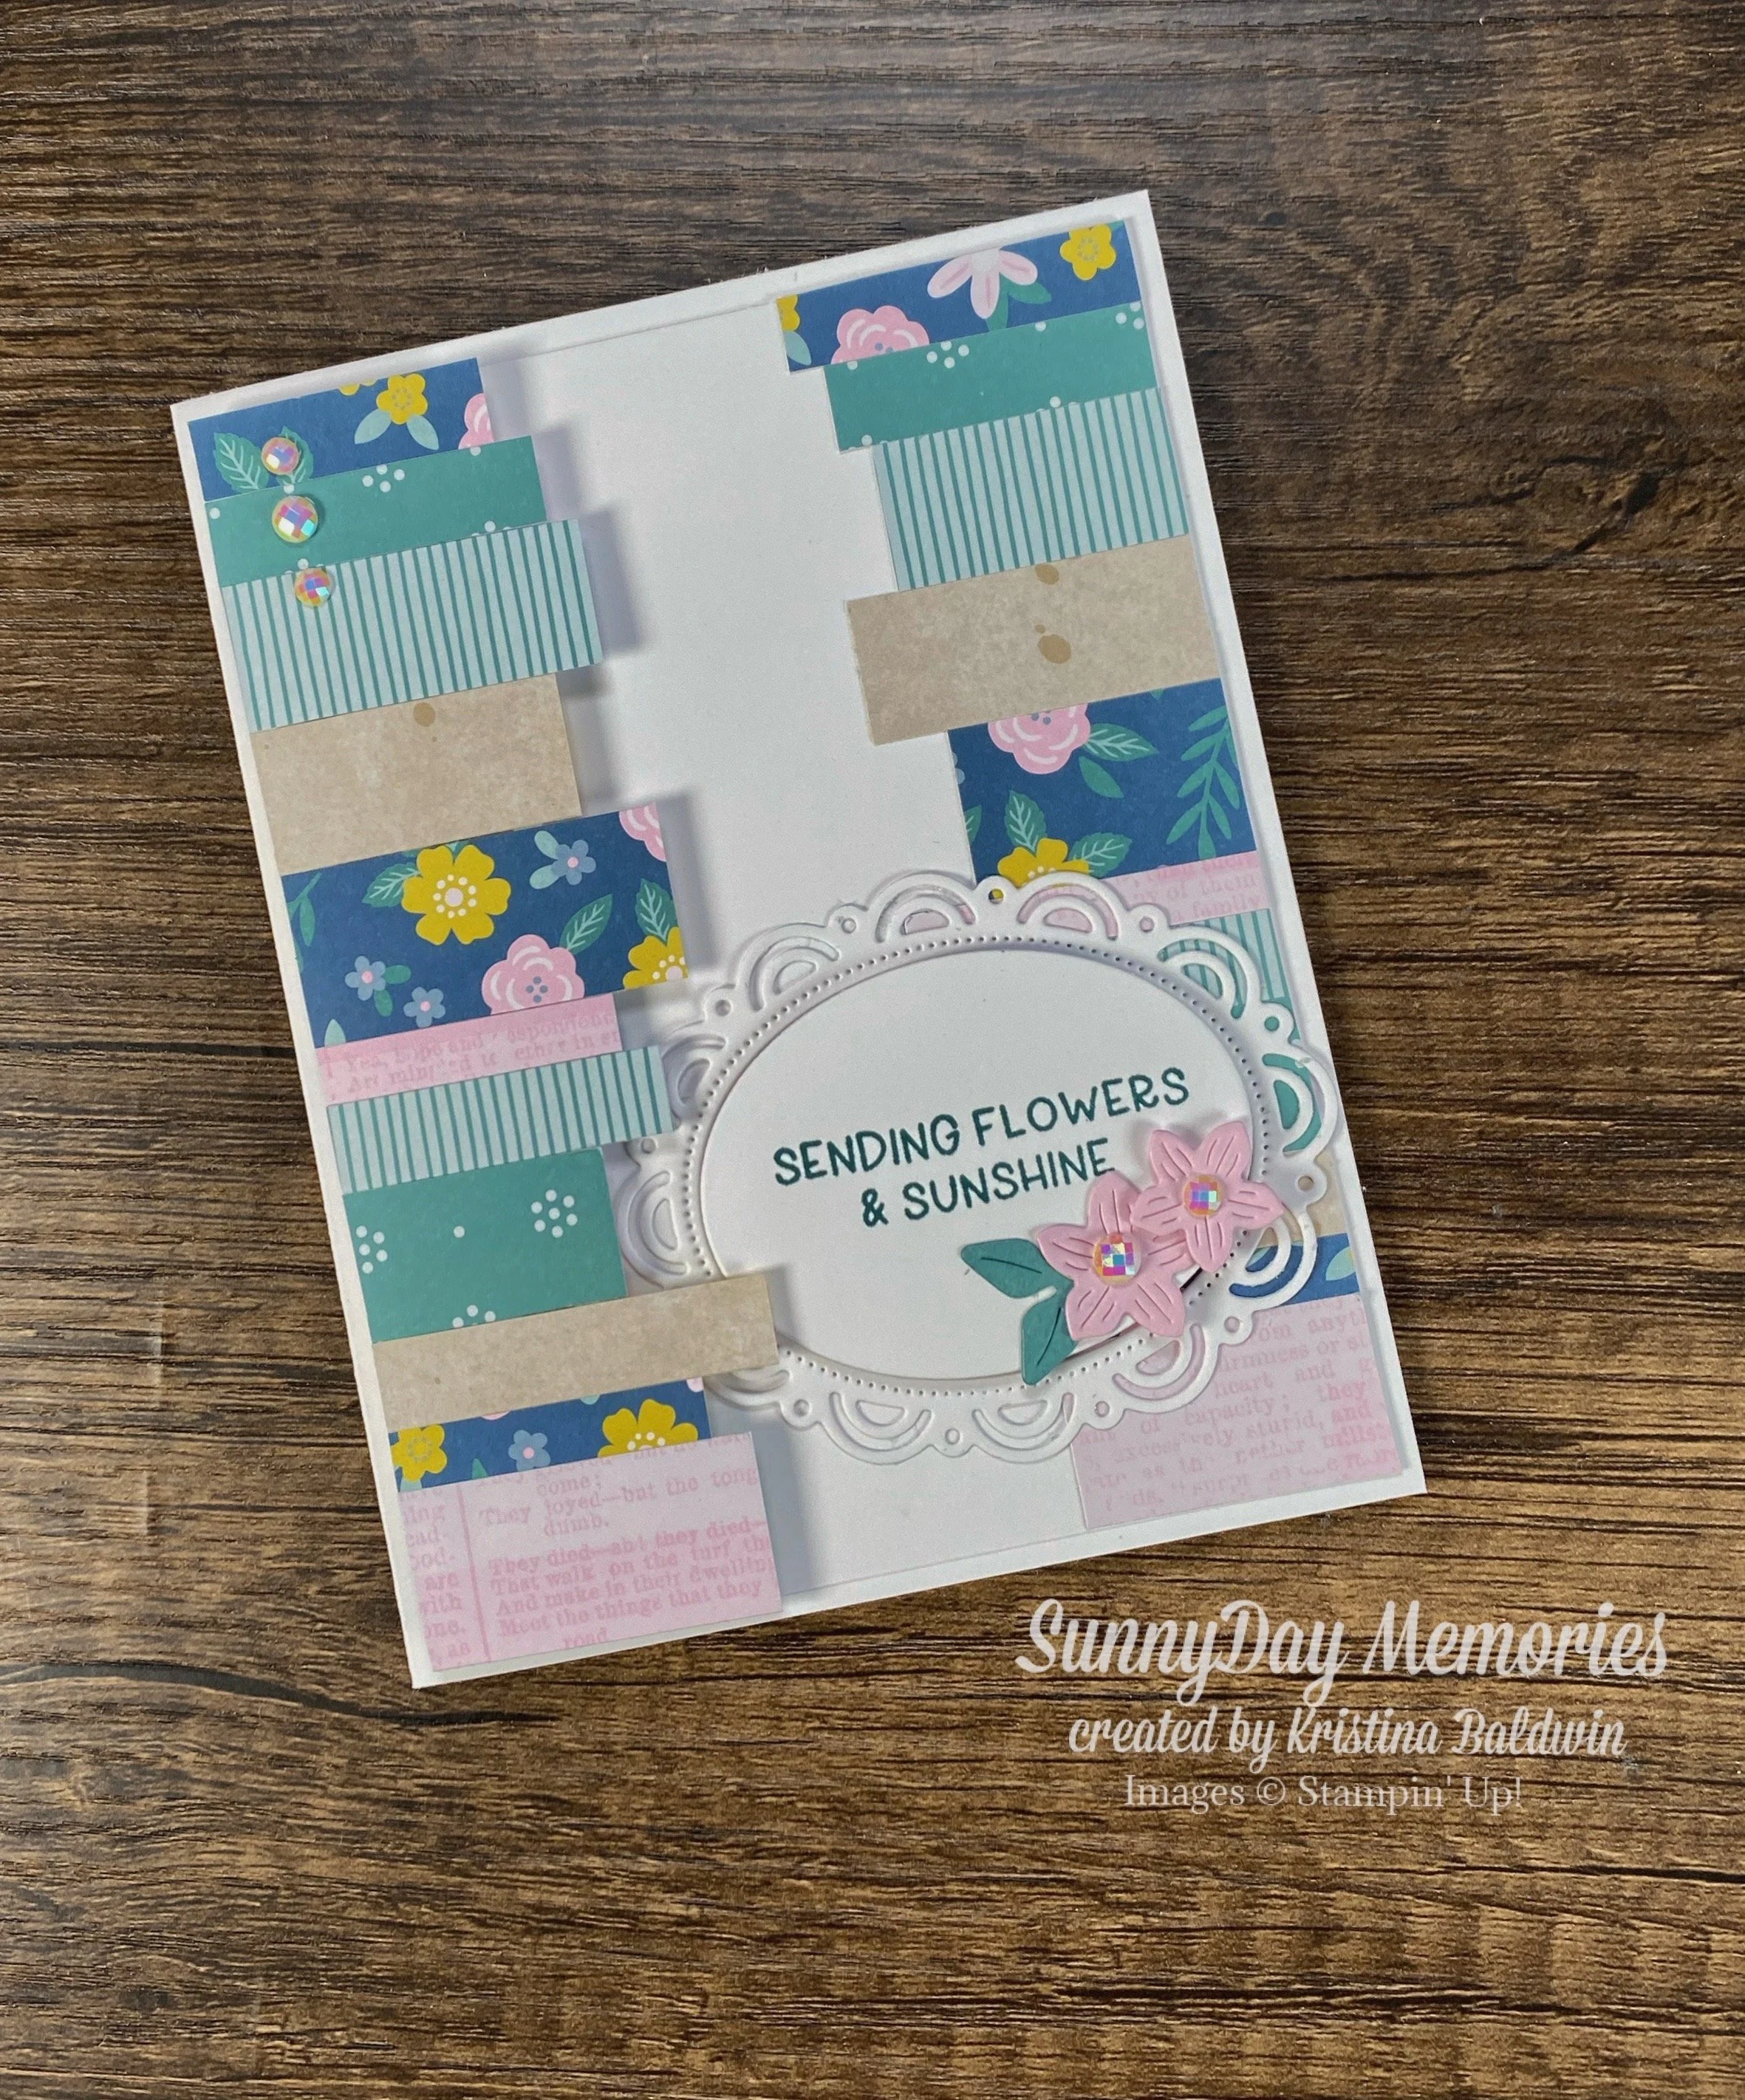
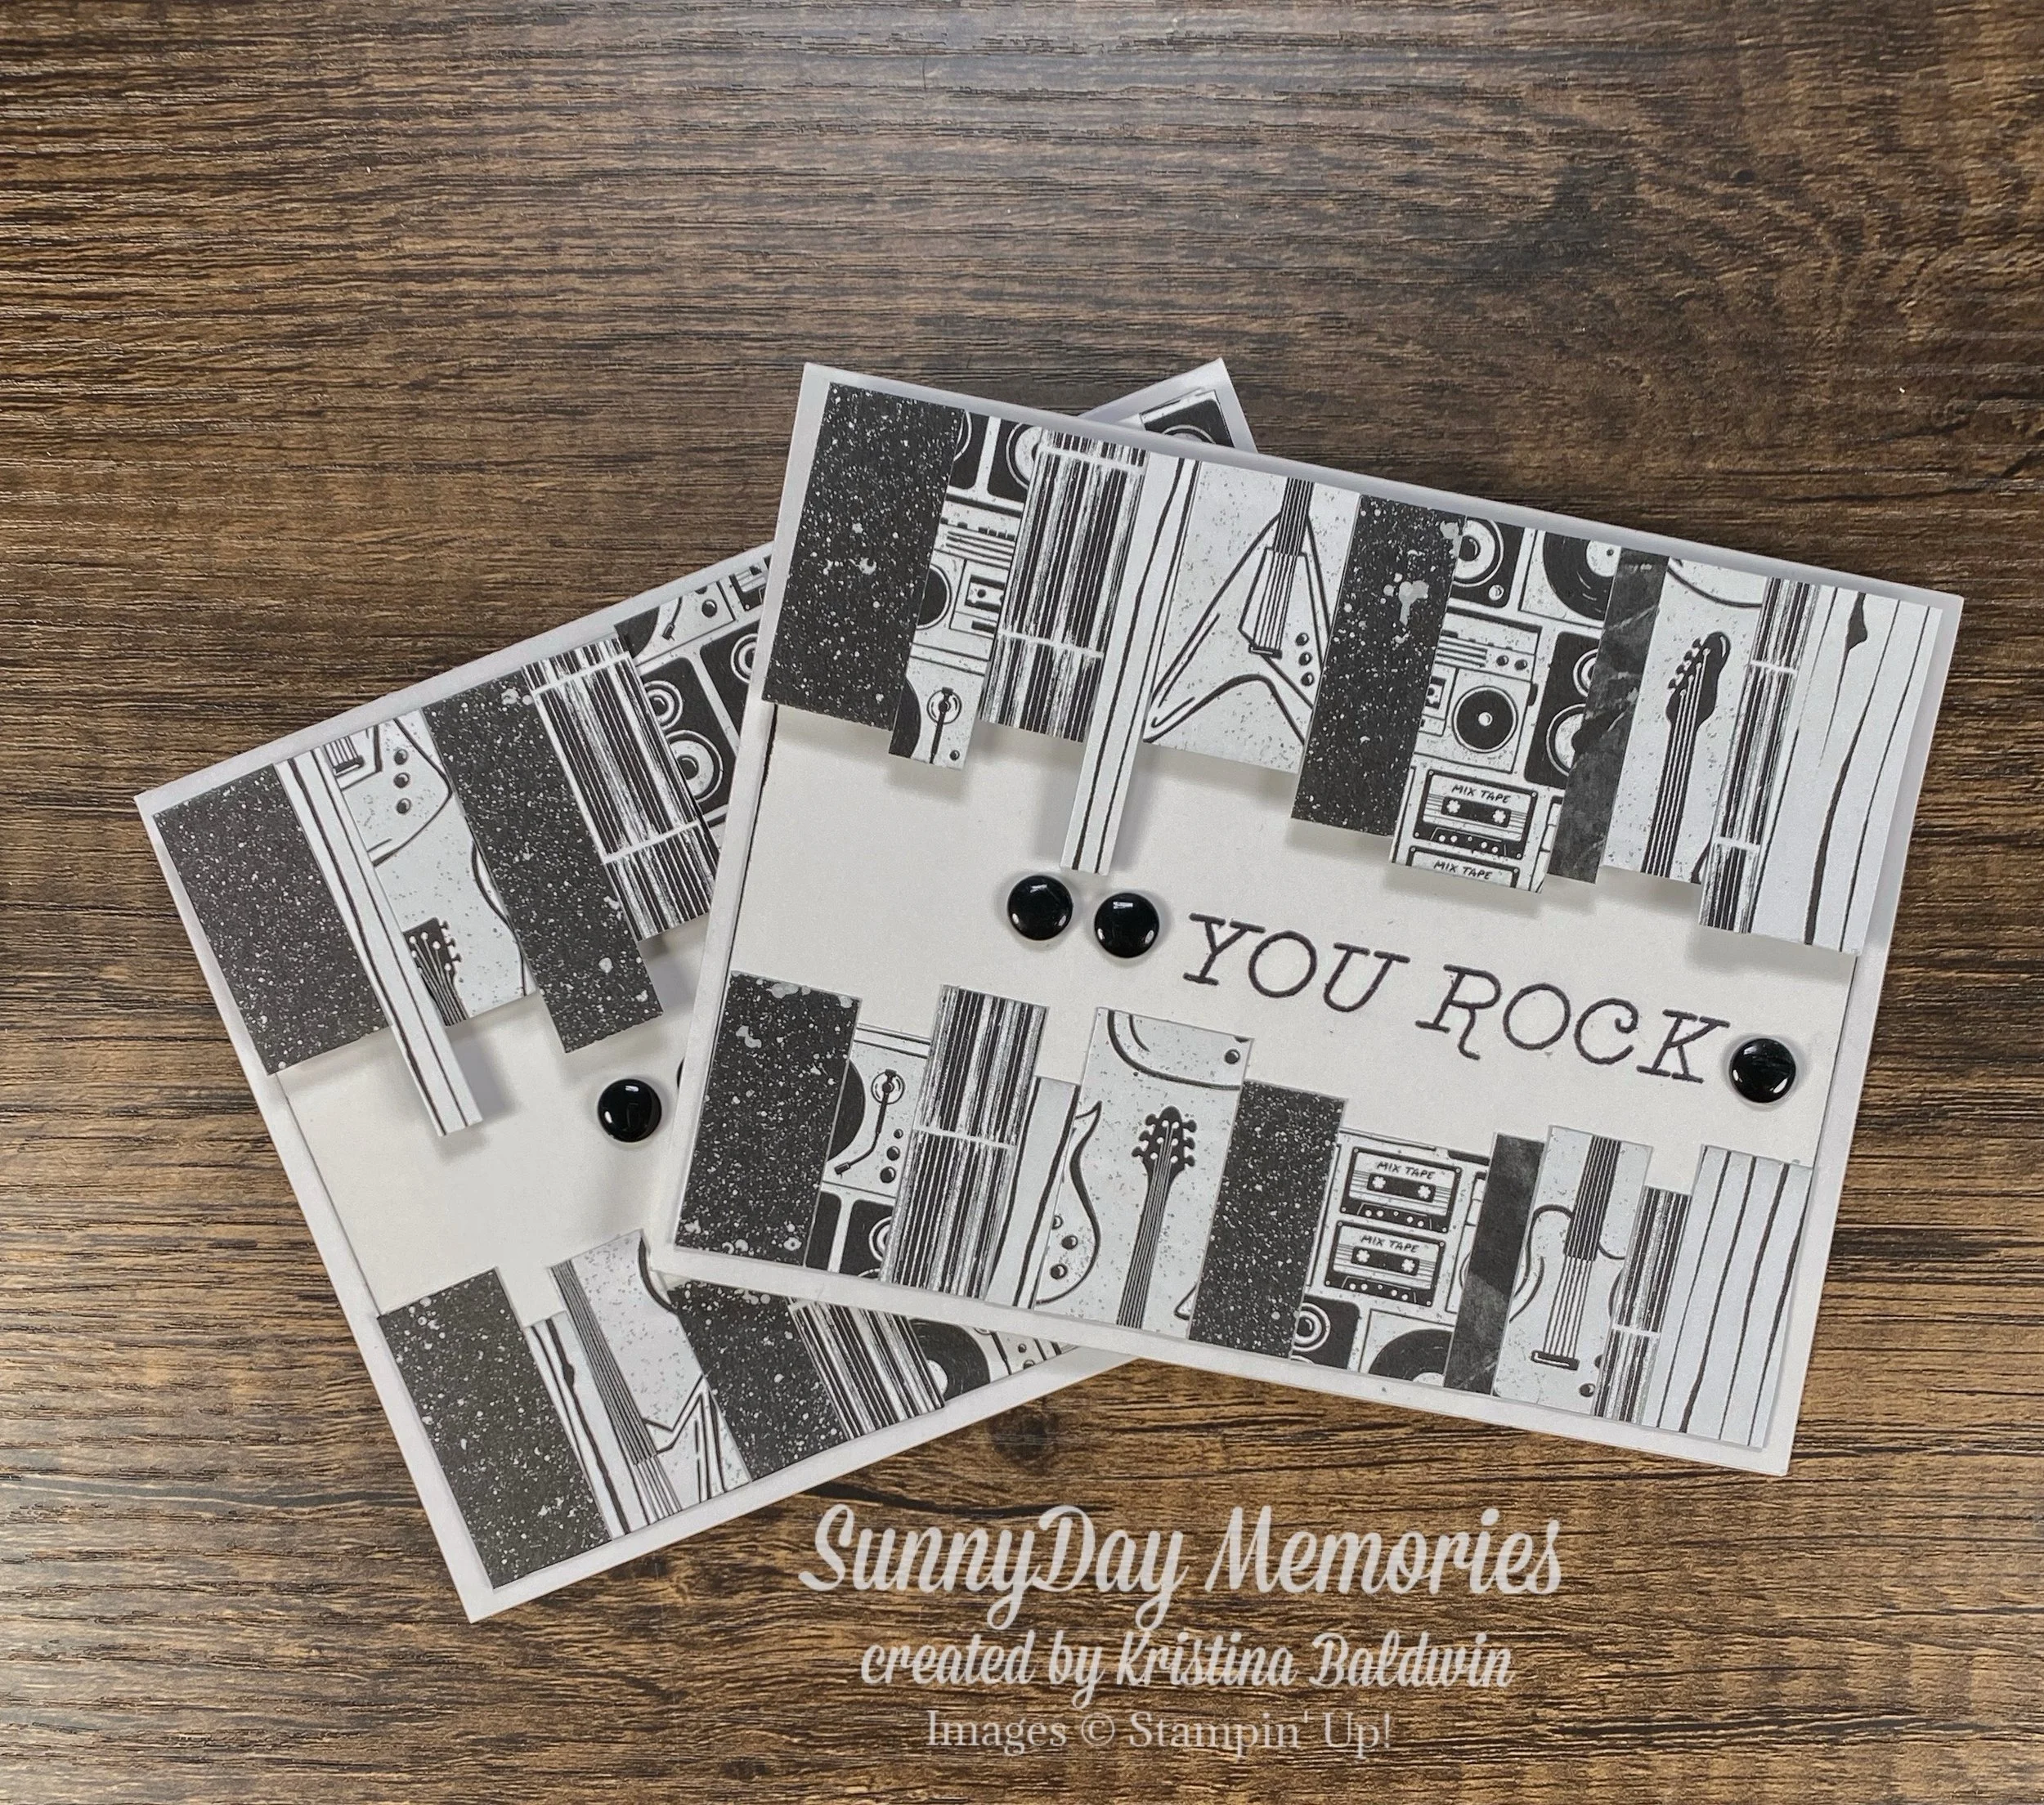
My first card was a little Throwback Thursday with now retired Rock & Roll Designer Series Paper. This card contains a sneak peek of a paper collection being released on May 5th. The paper collection is called Everyday Essentials Mix & Match Designer Series Paper. I also used:
It really is a fun design layout. And it uses so little patterned paper. What could be better? How about adding another small personal touch?
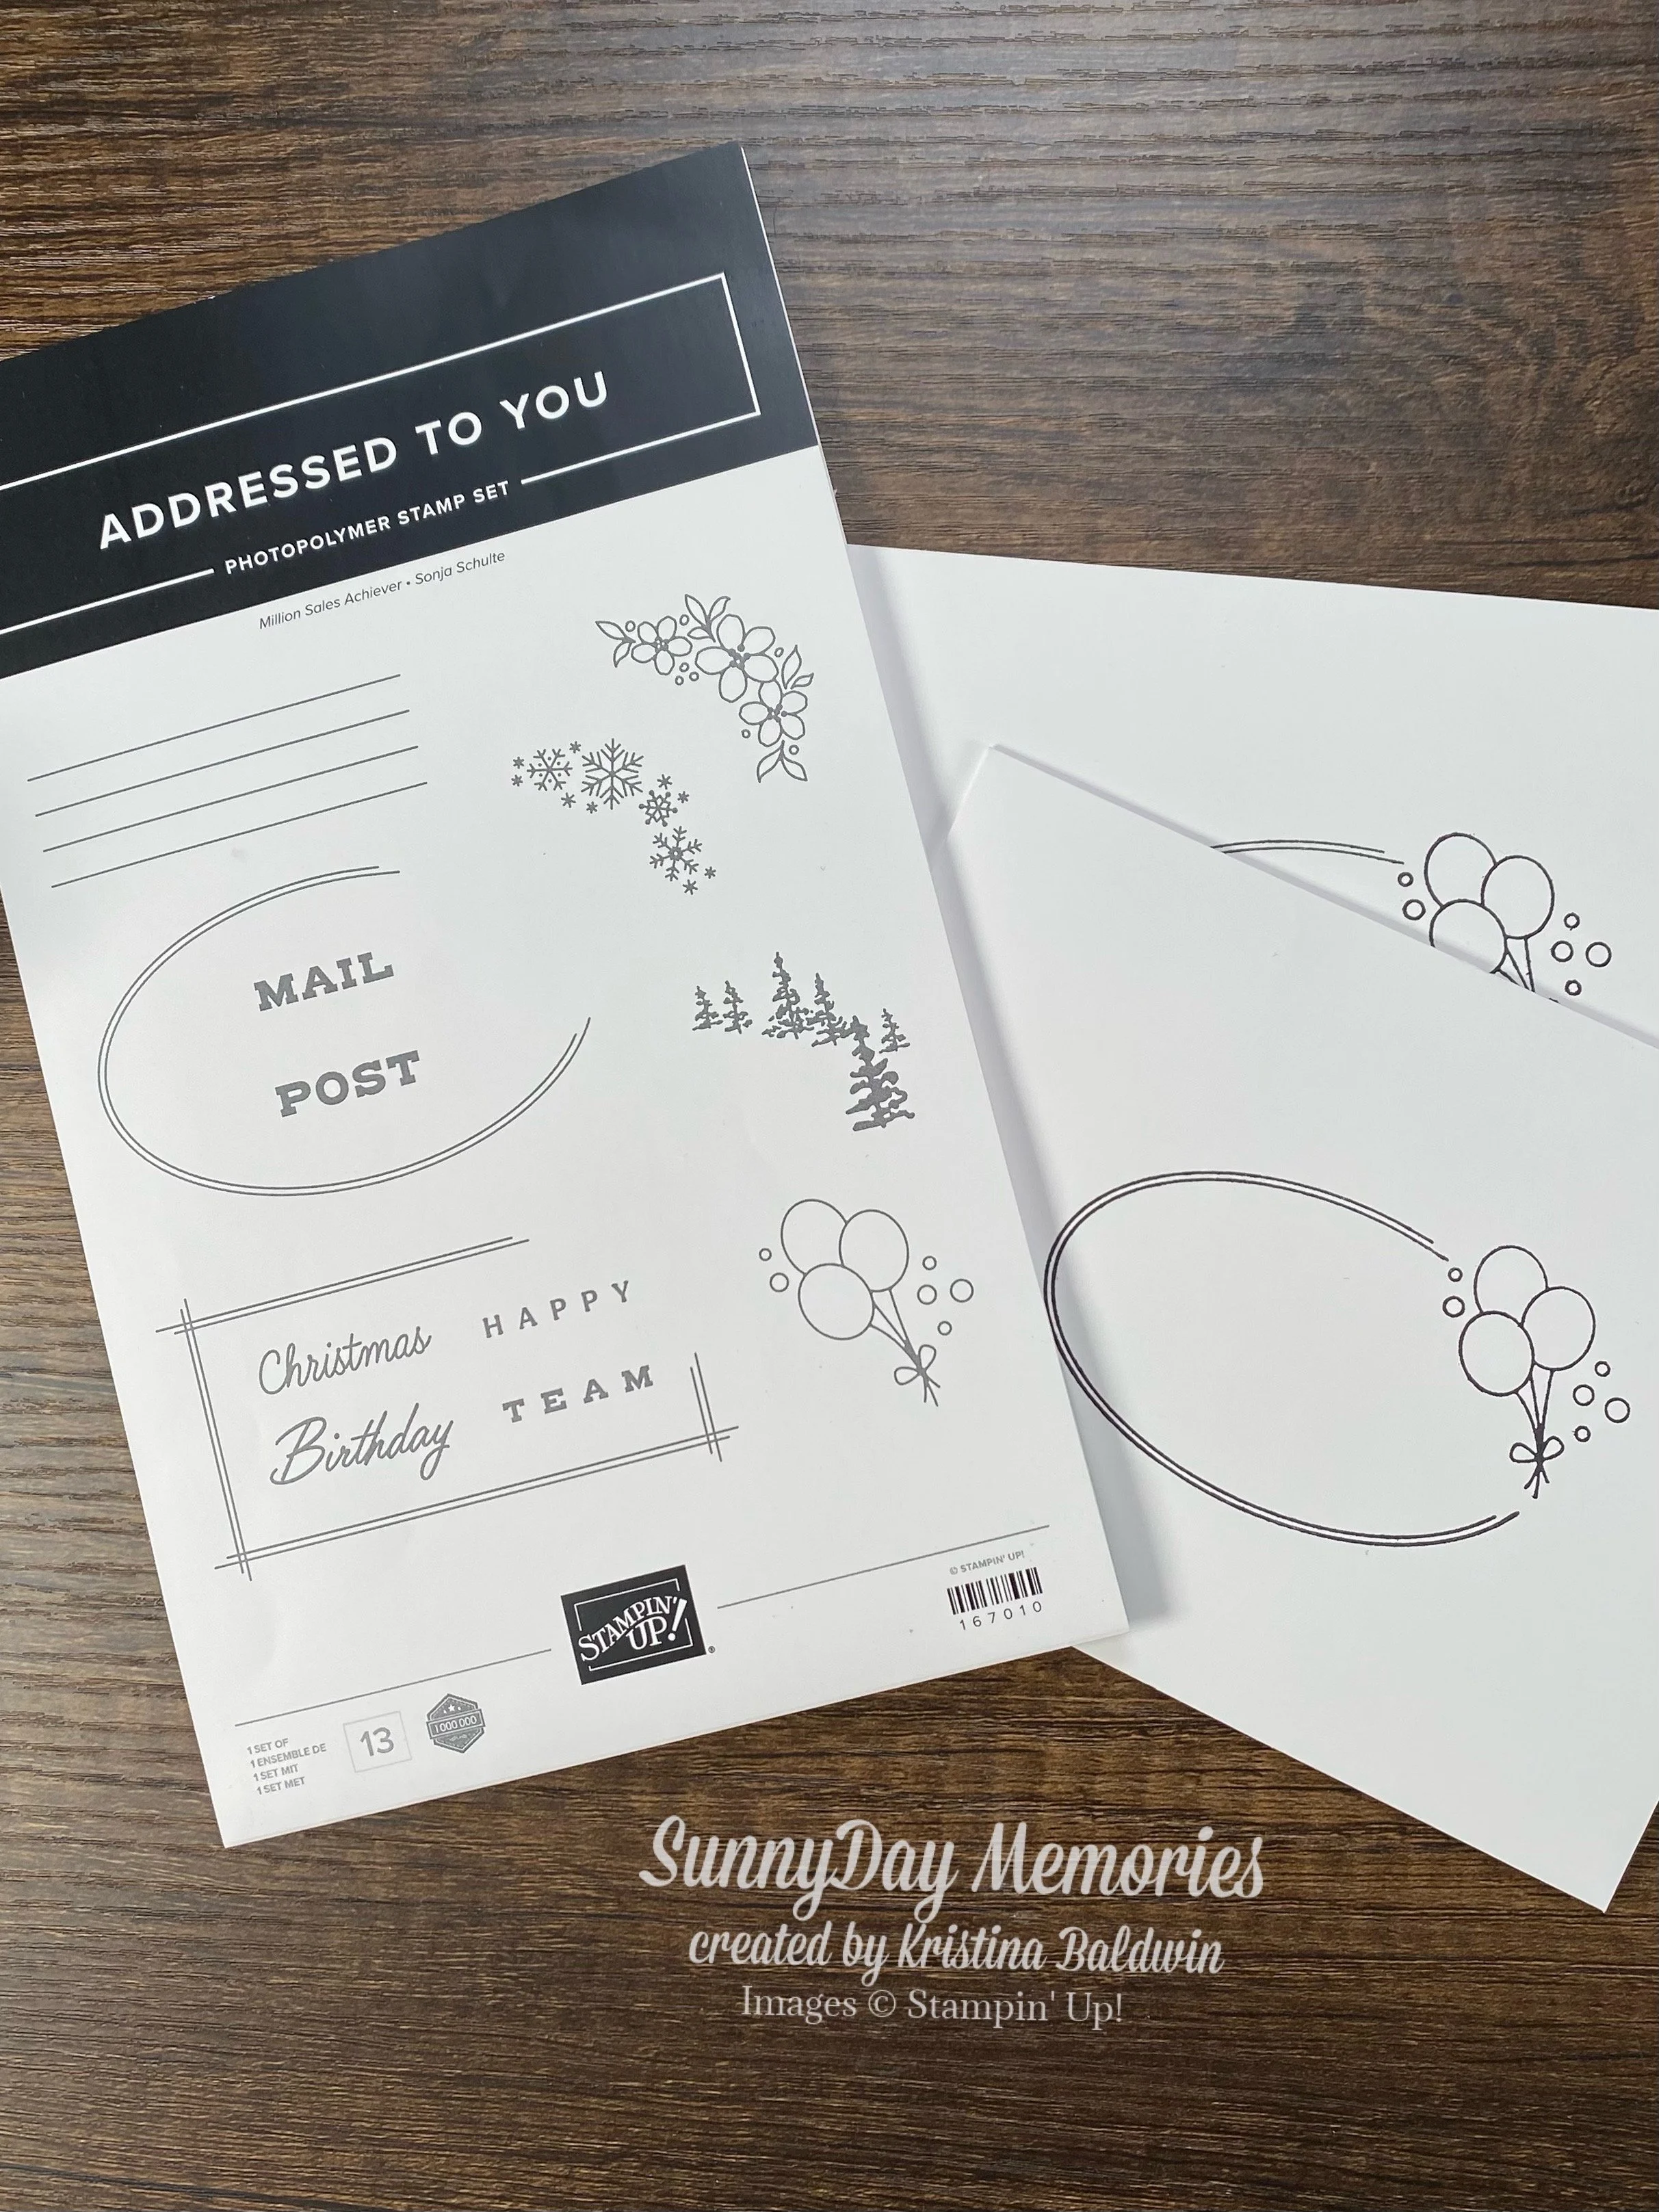
Now it’s so easy to make the envelope for your handmade card just as lovely as the card itself. Have you seen the Addressed To You Stamp Set? It’s a quick & easy way to add just a tiny bit more personalization to your creation. It’s all those little details that make it so special, right?
Now that you’ve learned how to use up your paper scraps (it’s so hard, right?!), I hope you have lots of fun creating some amazing cards.