
Learn How To Create a Beautiful, Textured Background
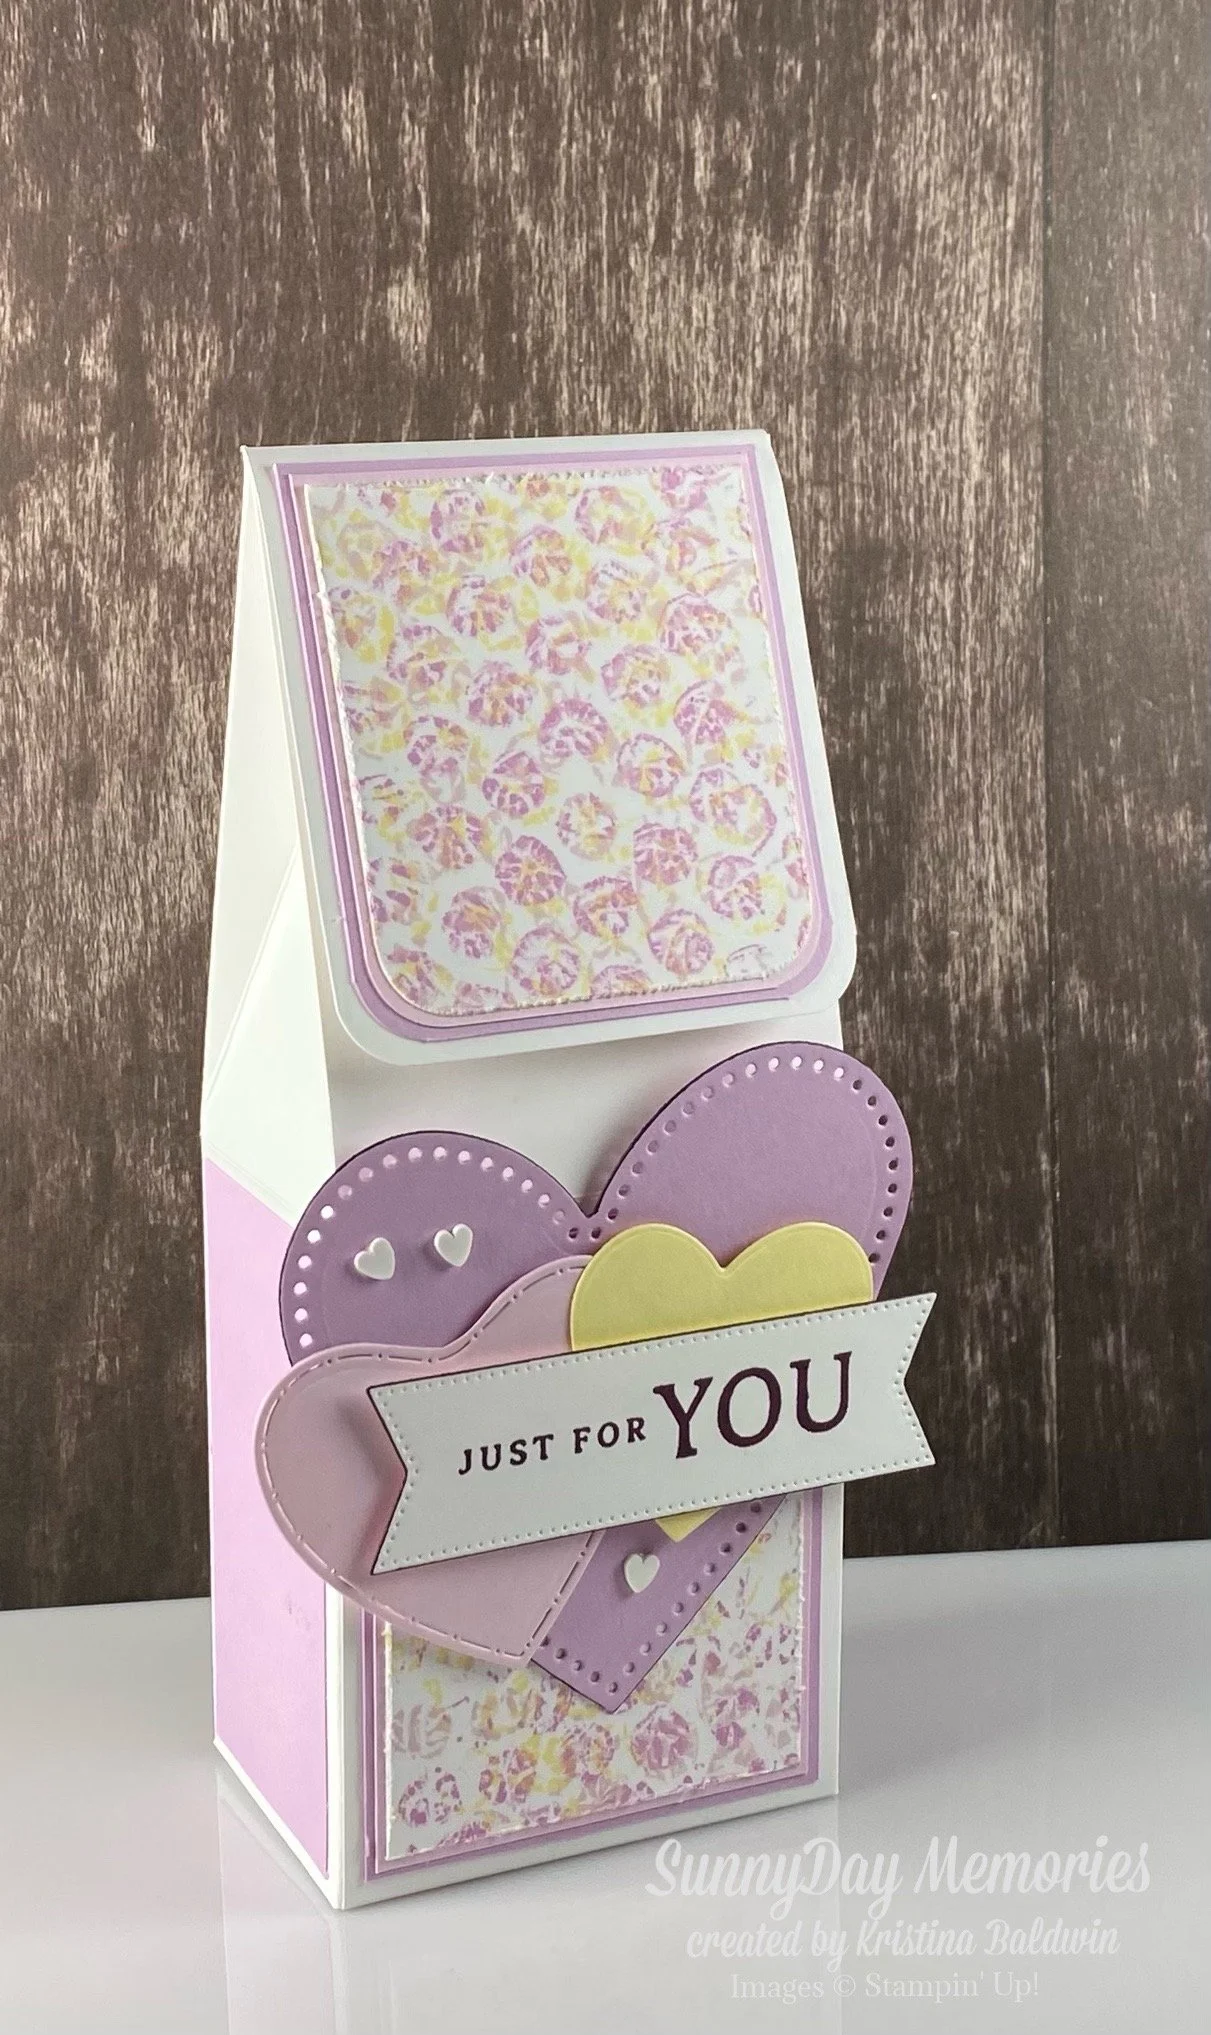
Want to learn how to create a beautiful, textured background just like the one on my Valentine’s Box? It’s so quick & easy. And you likely have the surprise tool needed in your home right now. I’m calling it Bubble Wrap Stamping. I was inspired to create this project when I found out that Monday was Bubble Wrap Appreciation Day. I always love creating projects around fun, unique holidays. And what could be more fun than stamping with bubble wrap?!
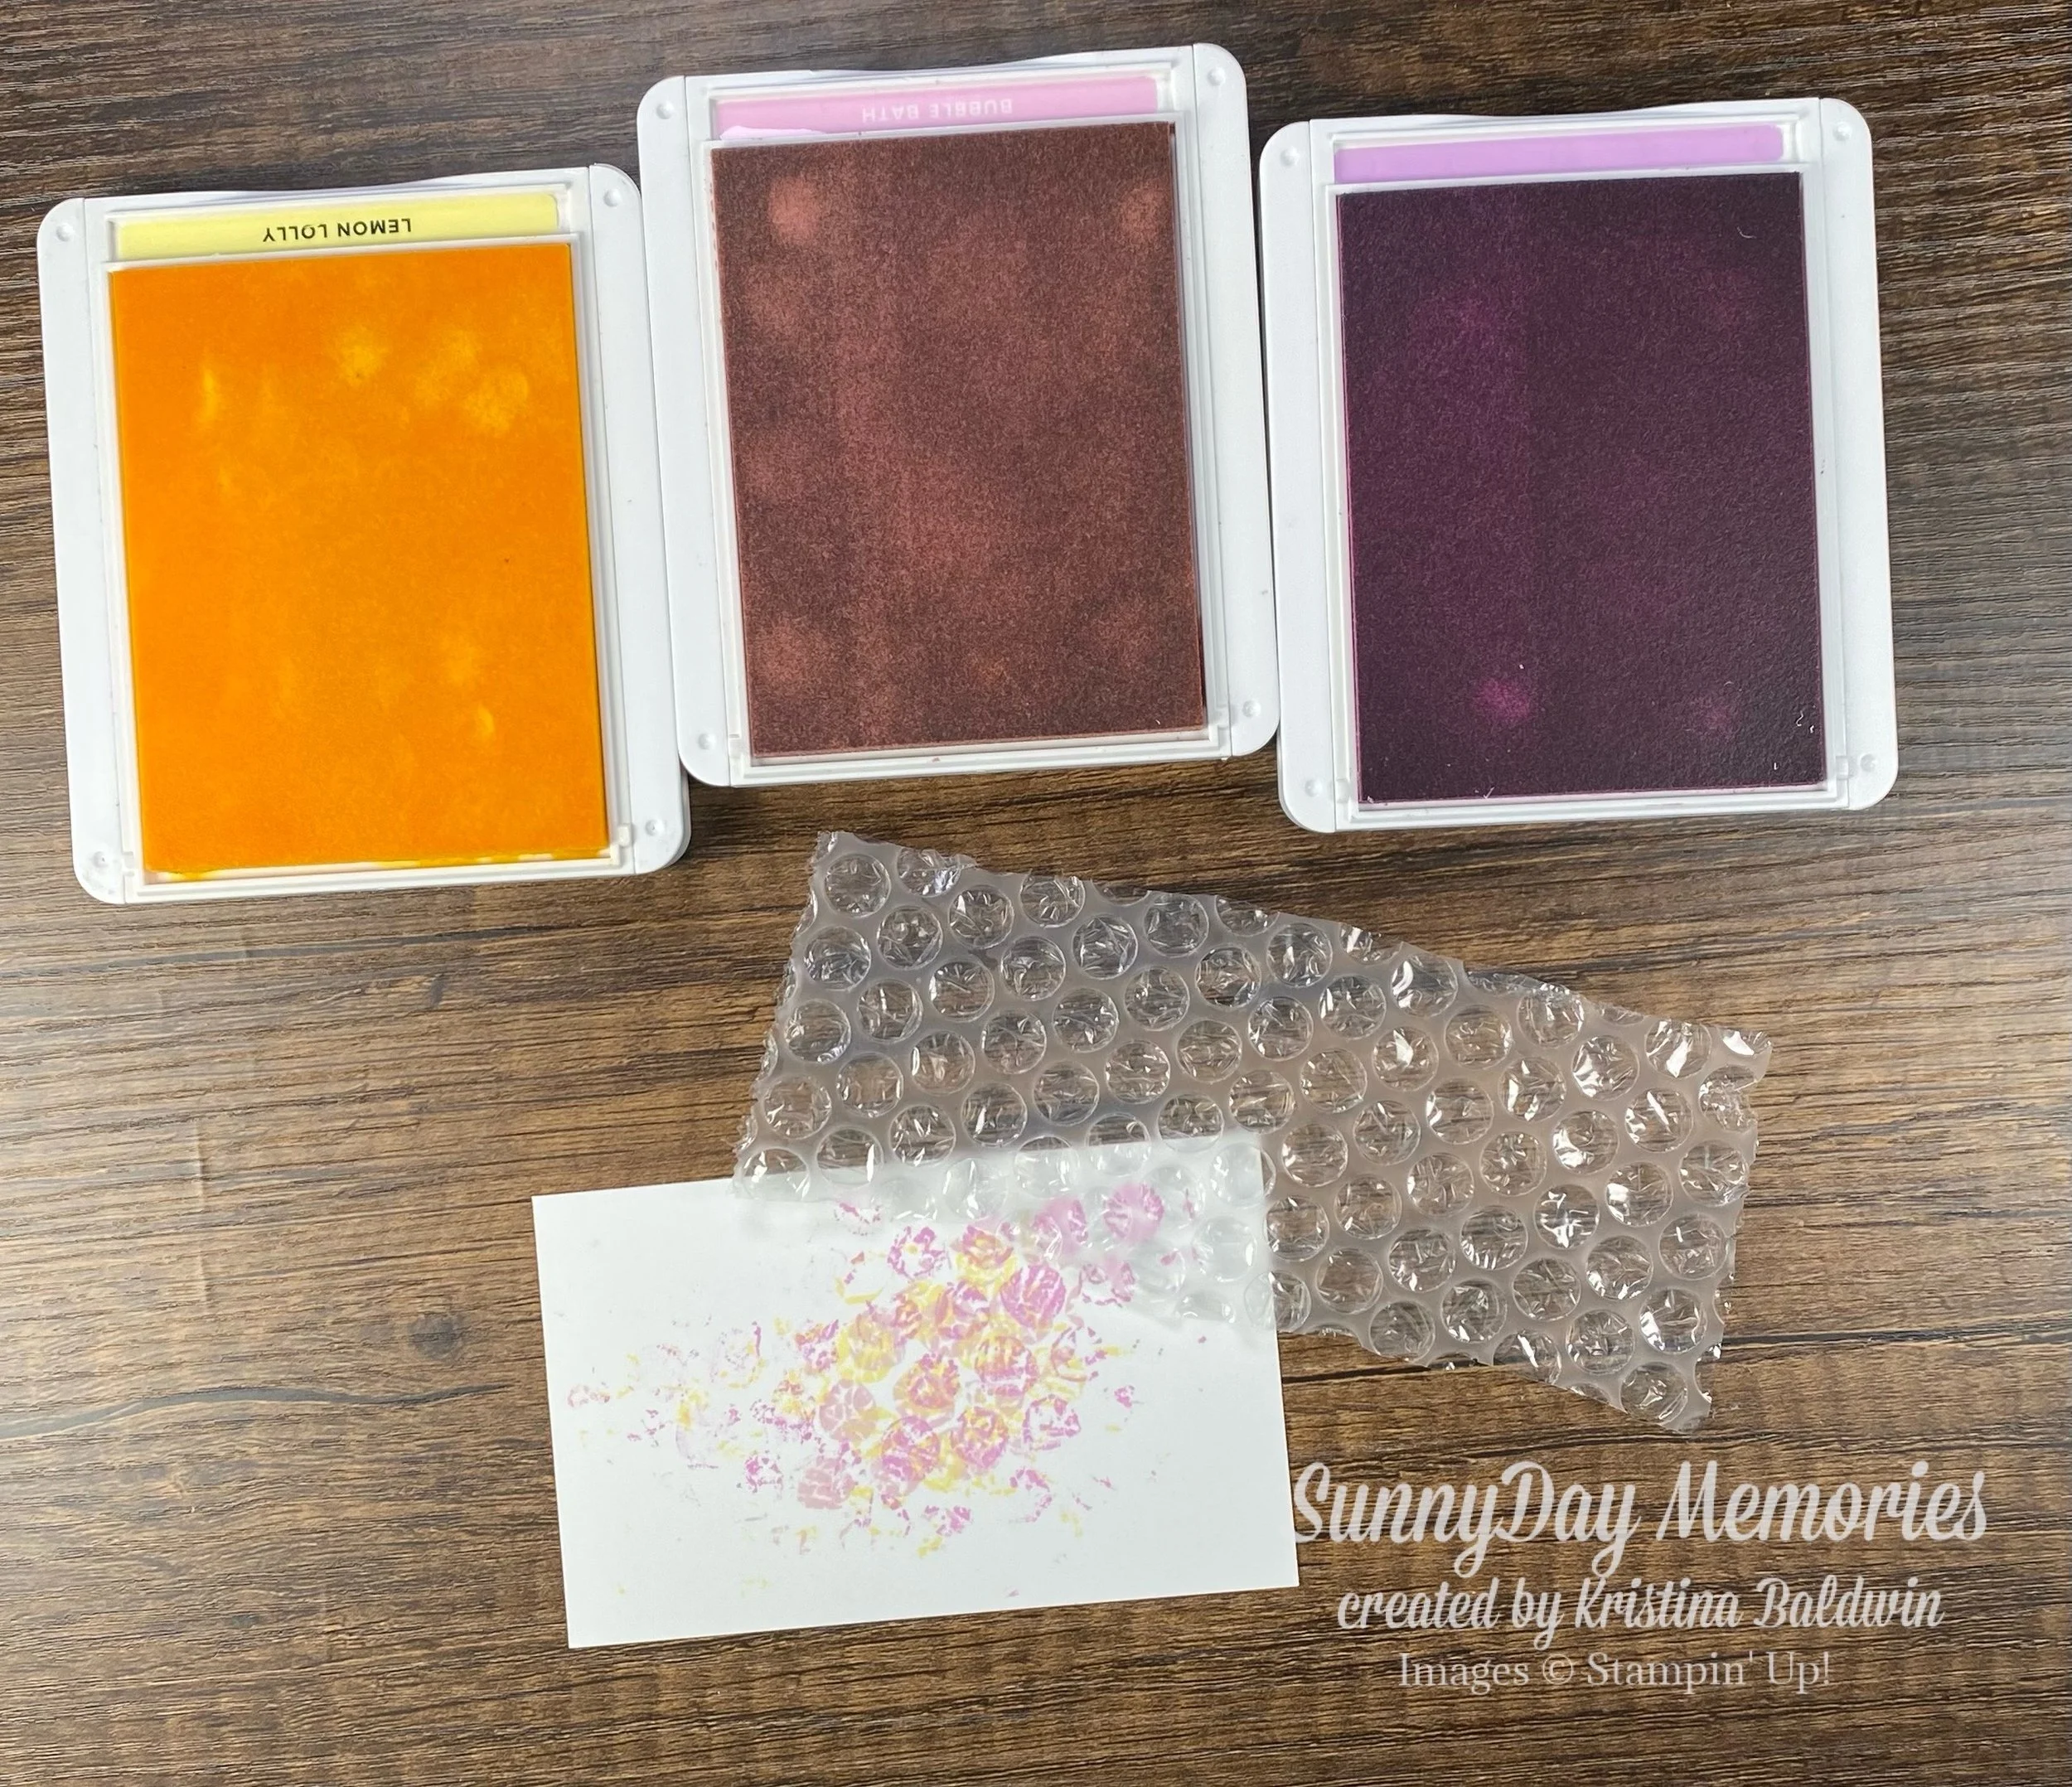
Bubble Wrap Stamping couldn’t be easier. Trim down some bubble wrap (so it’s more manageable to stamp with!) Grab one or more ink pads and some cardstock. Ink up the bubble wrap by placing it on top of an ink pad and gently rubbing the back of it to pick up the ink. Then place on top of your cardstock and gently rub the backside again to release the ink onto your cardstock. Repeat with the same color ink to achieve desired intensity. Or add additional colors for a more colorful, textured look. Want to see it in action?
Easy, right? Now that you’ve learned how to create a beautiful, textured background using Bubble Wrap Stamping, what will you create first?