
6 Must-Know Techniques for the New Stampin’ Positioner
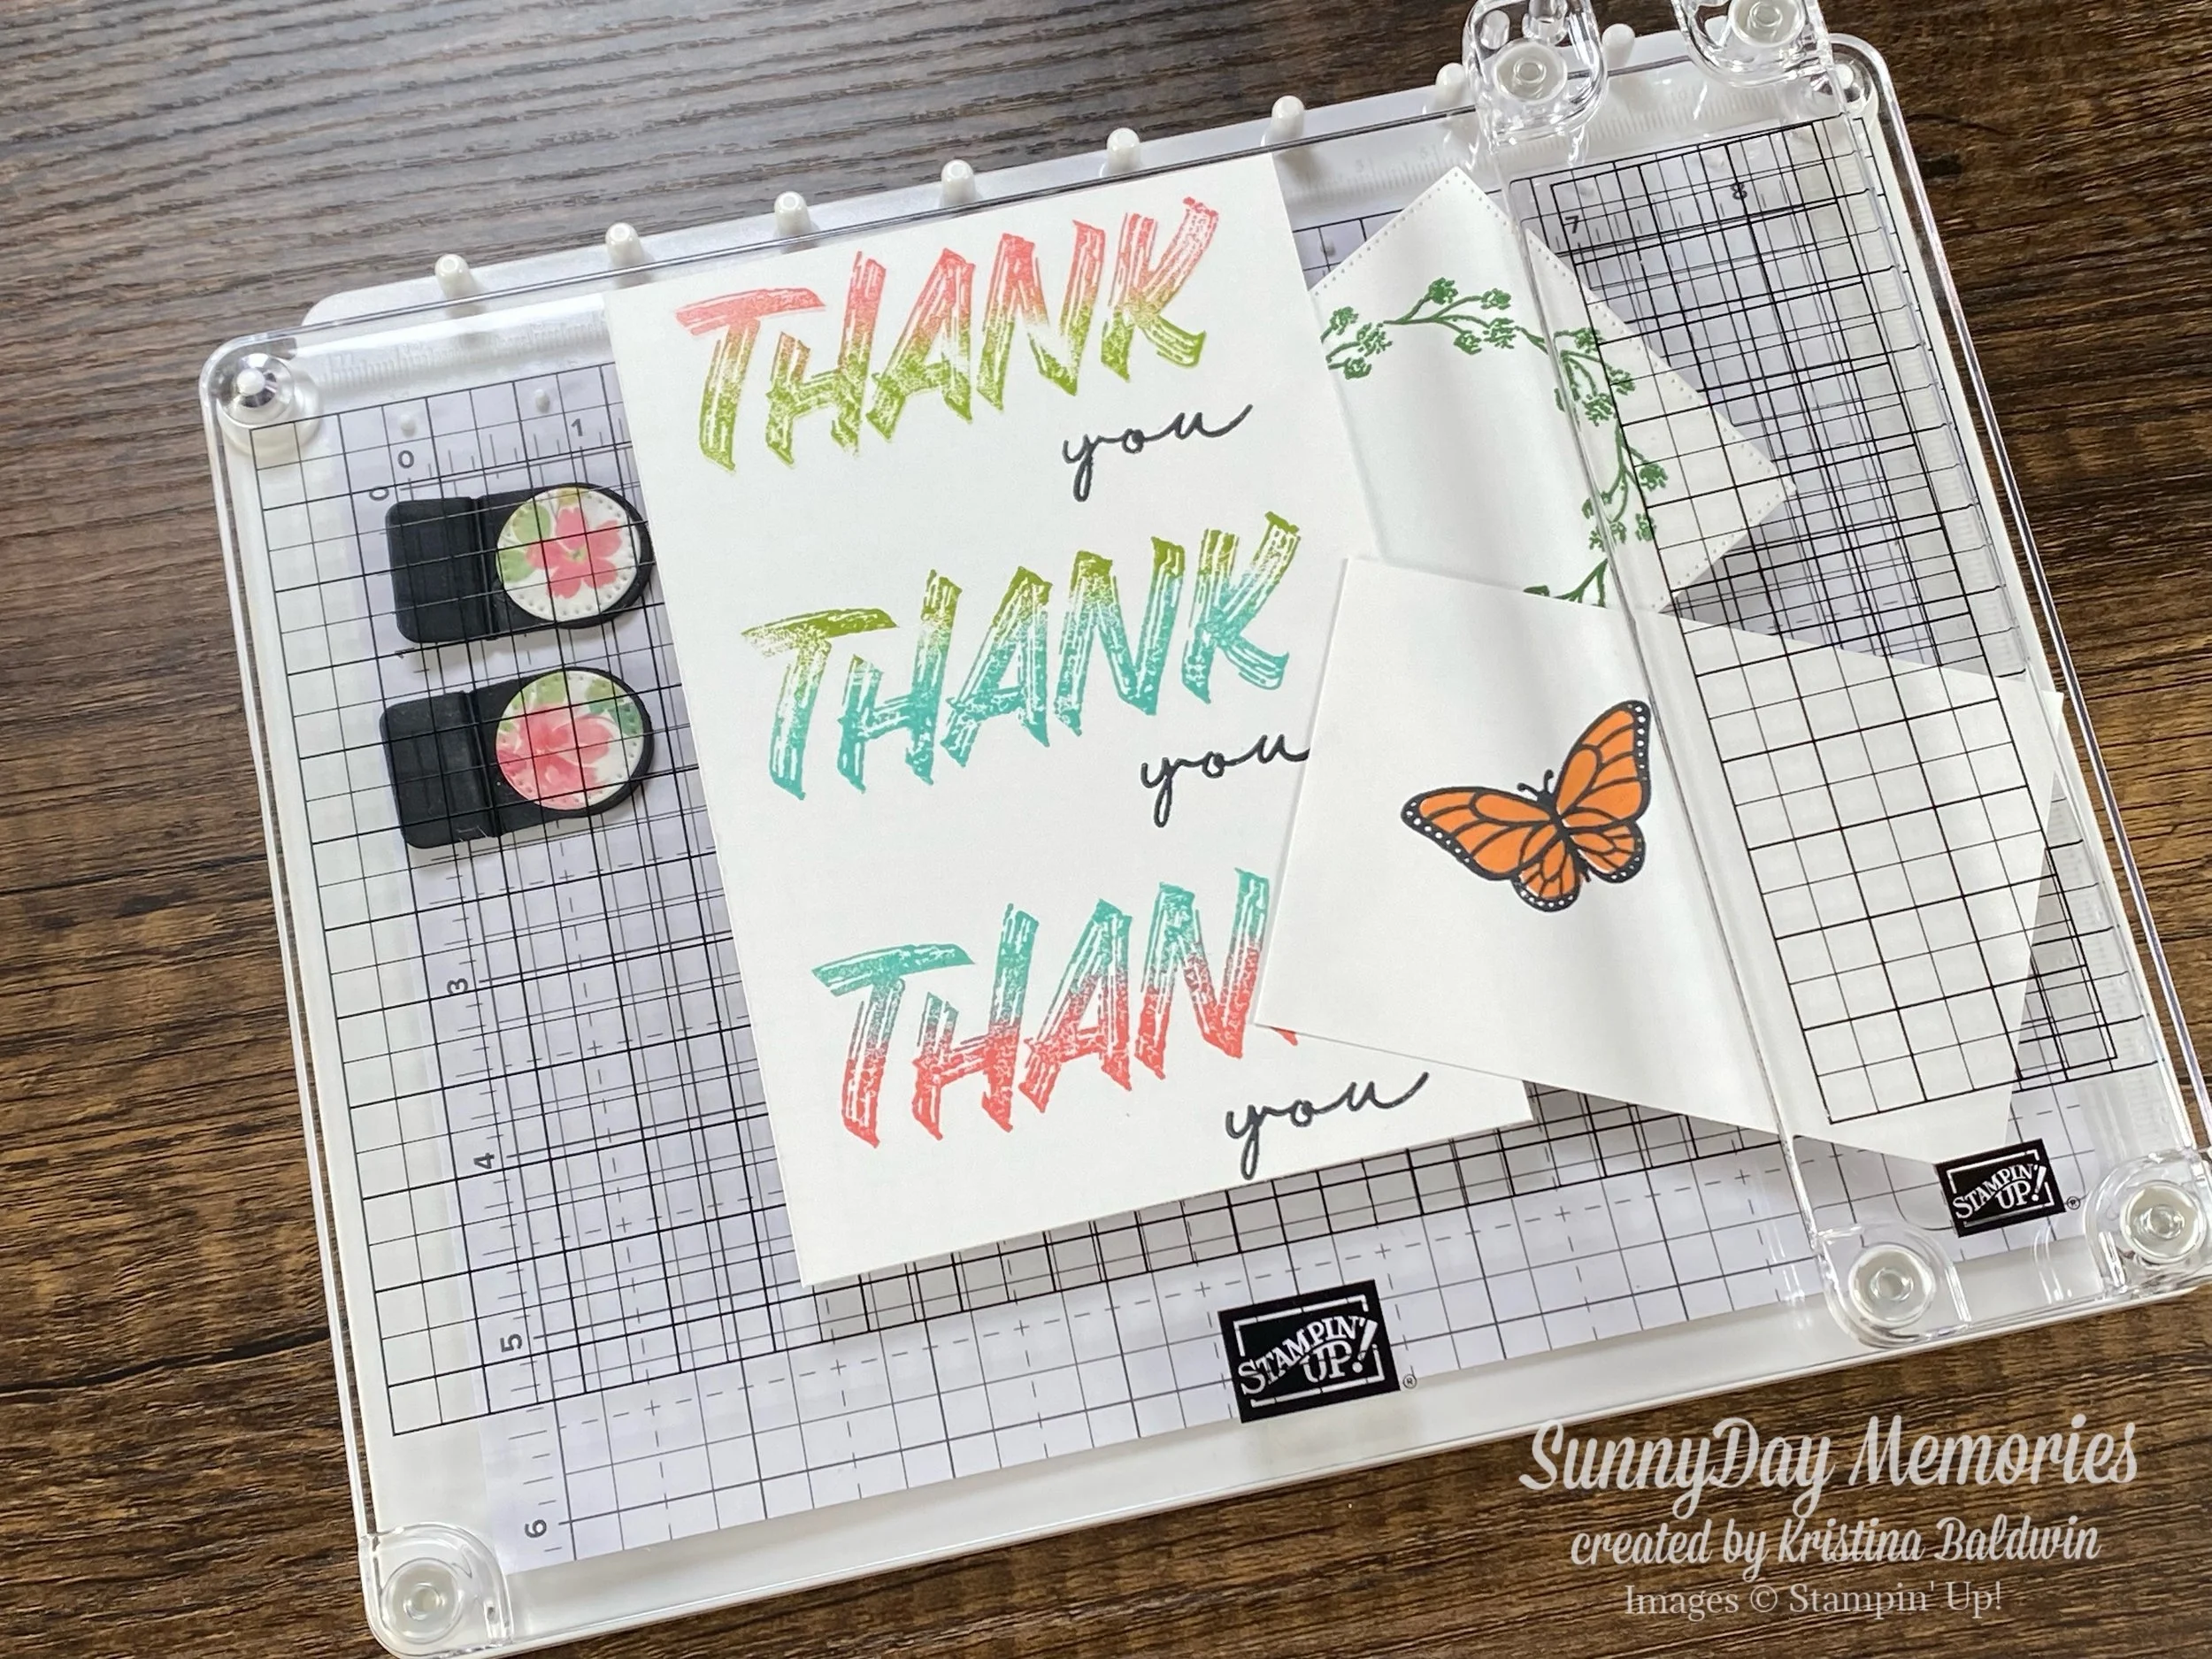
Today we’re going to talk about 6 must-know techniques for the NEW Stampin’ Positioner. While this awesome new tool is currently only available to new demonstrators who sign up from February 3 - March 2, soon it will be available to everyone. And whether you’re new to stamping alignment tools or just looking to learn more about these tools in general, I hope you’ll be inspired with all you can do with them!
After I created this video, I decided to put my samples to good use and create cards with them. Waste not, want not, right? Perhaps they’ll provide you some additional inspiration.
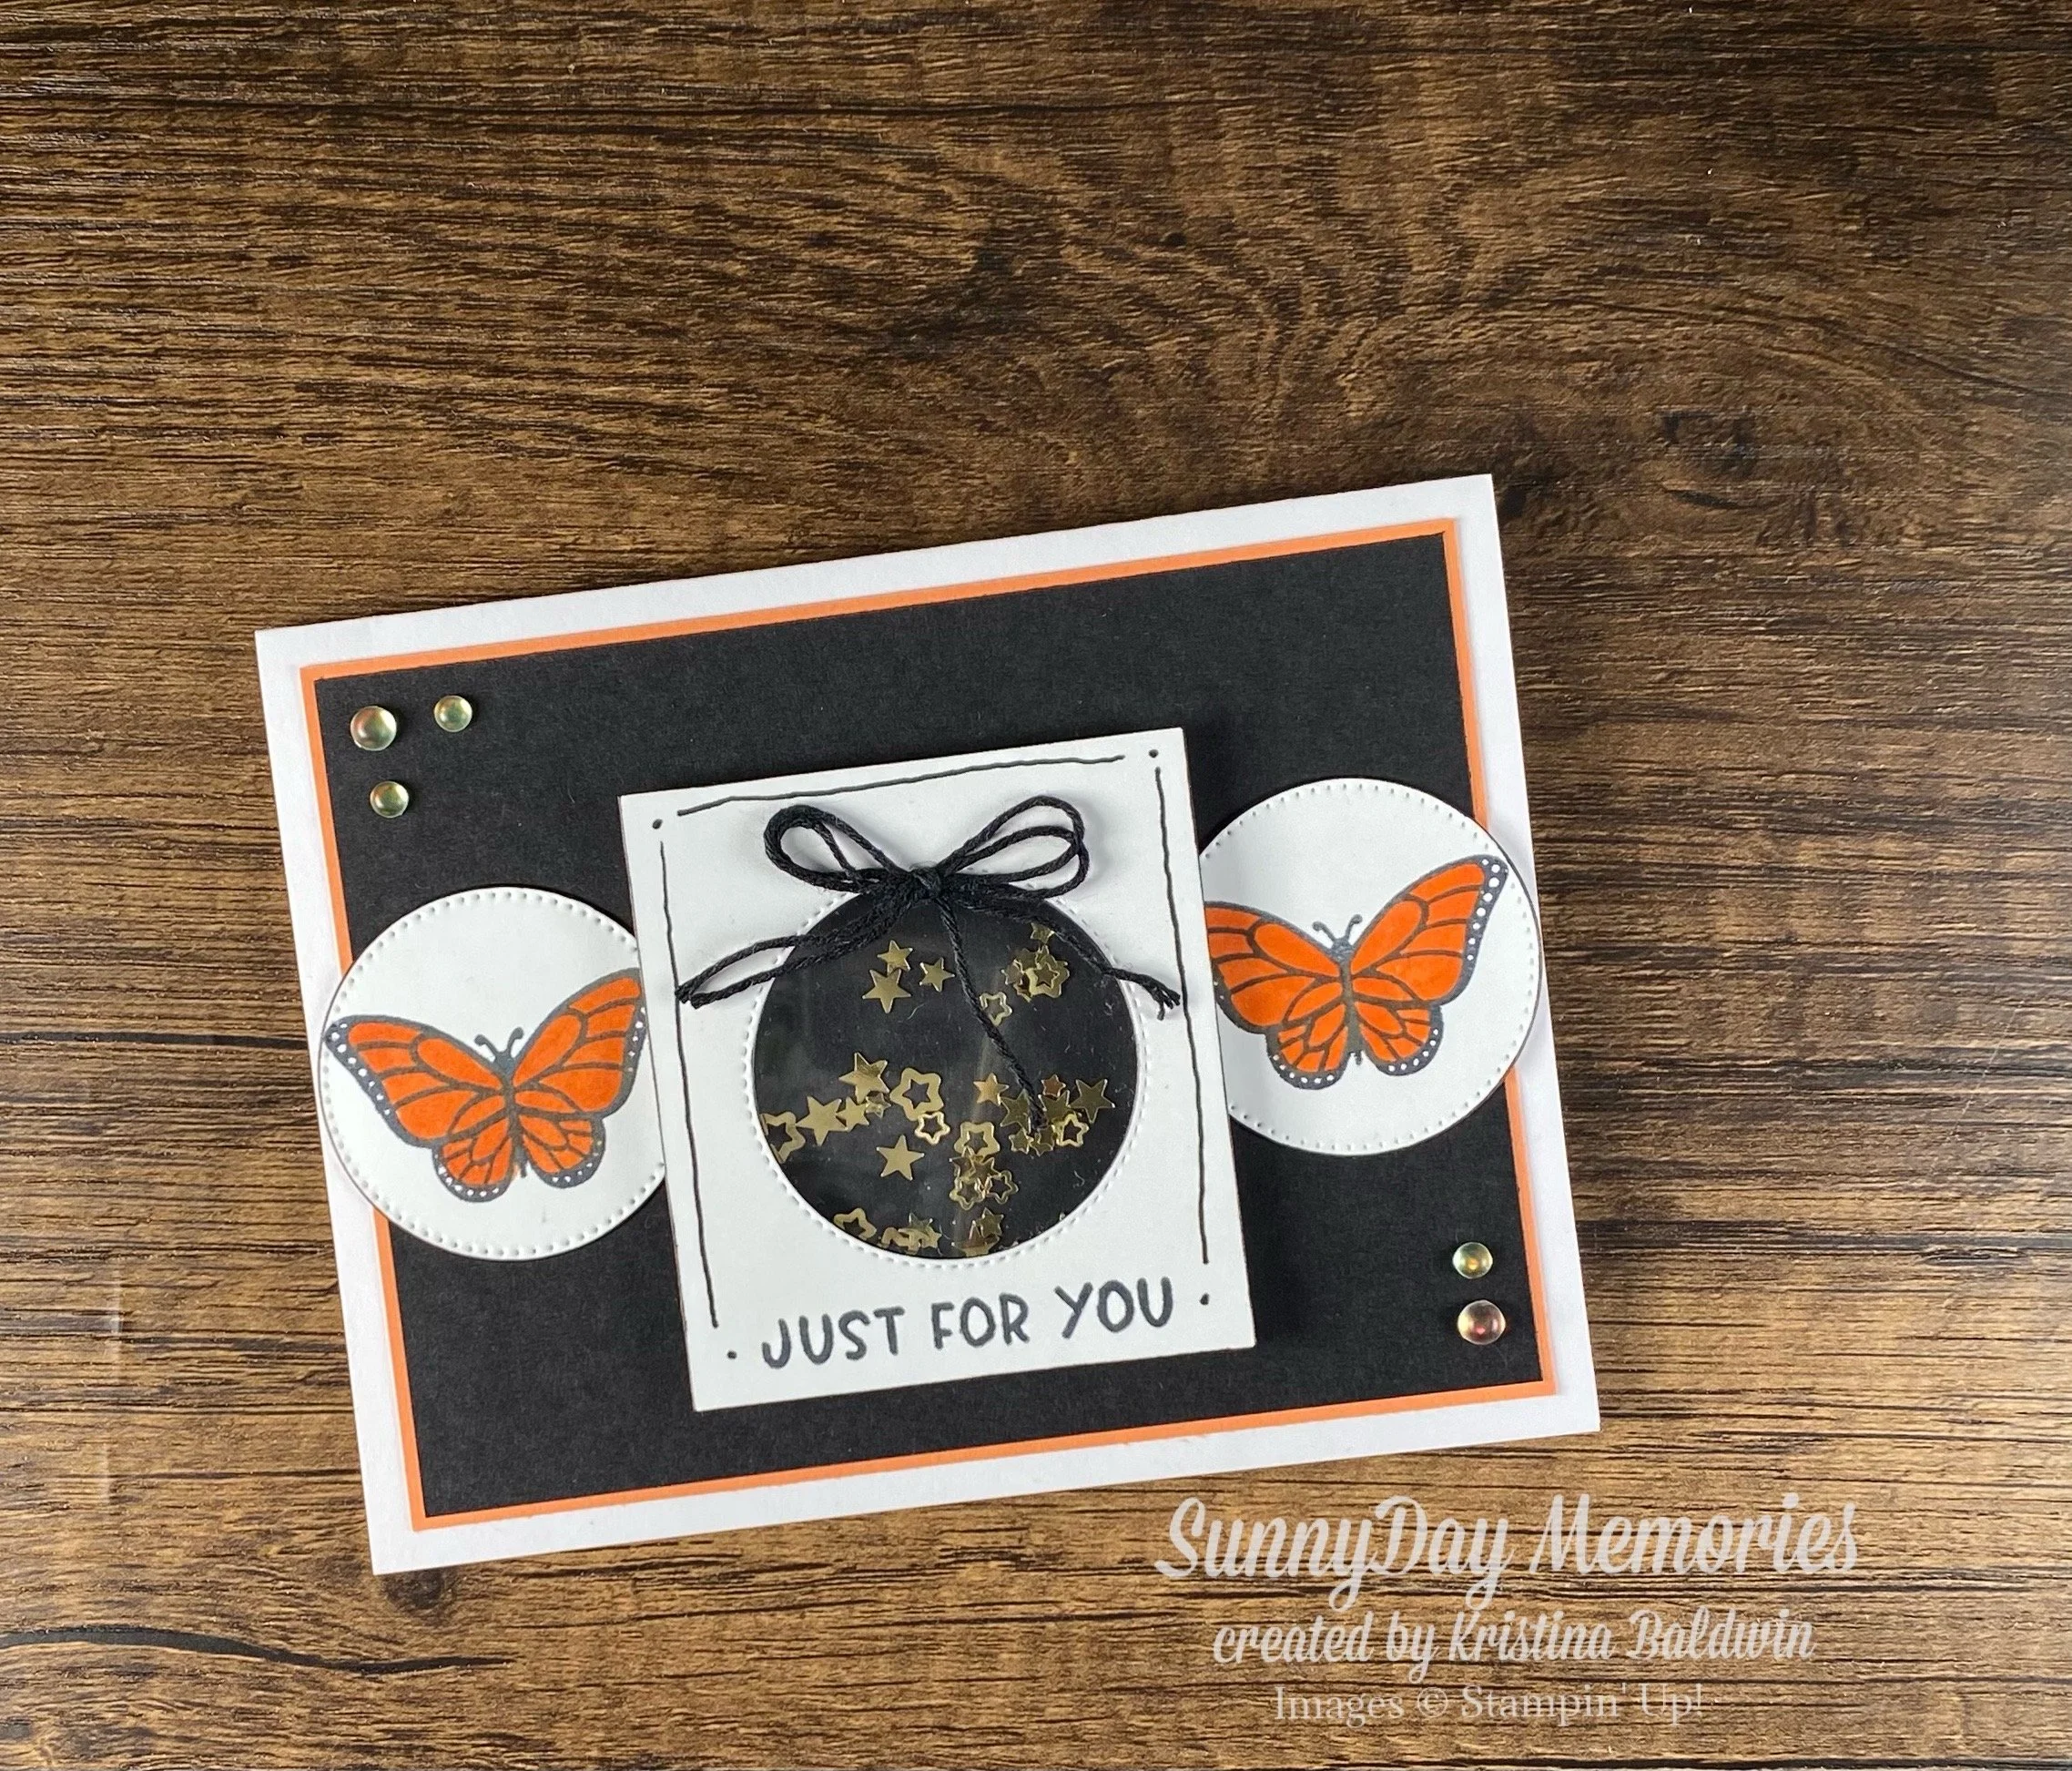
I created a Shaker Card using the Two-Step (aka Base & Shade) butterfly from the now retired Labeled with Love Stamp Set. I used Black and Timid Tiger for the colors of my card. I also used the Gold Shaker Stars that were just added to our Last Chance Section. They are discounted which makes them even more enticing, right?!
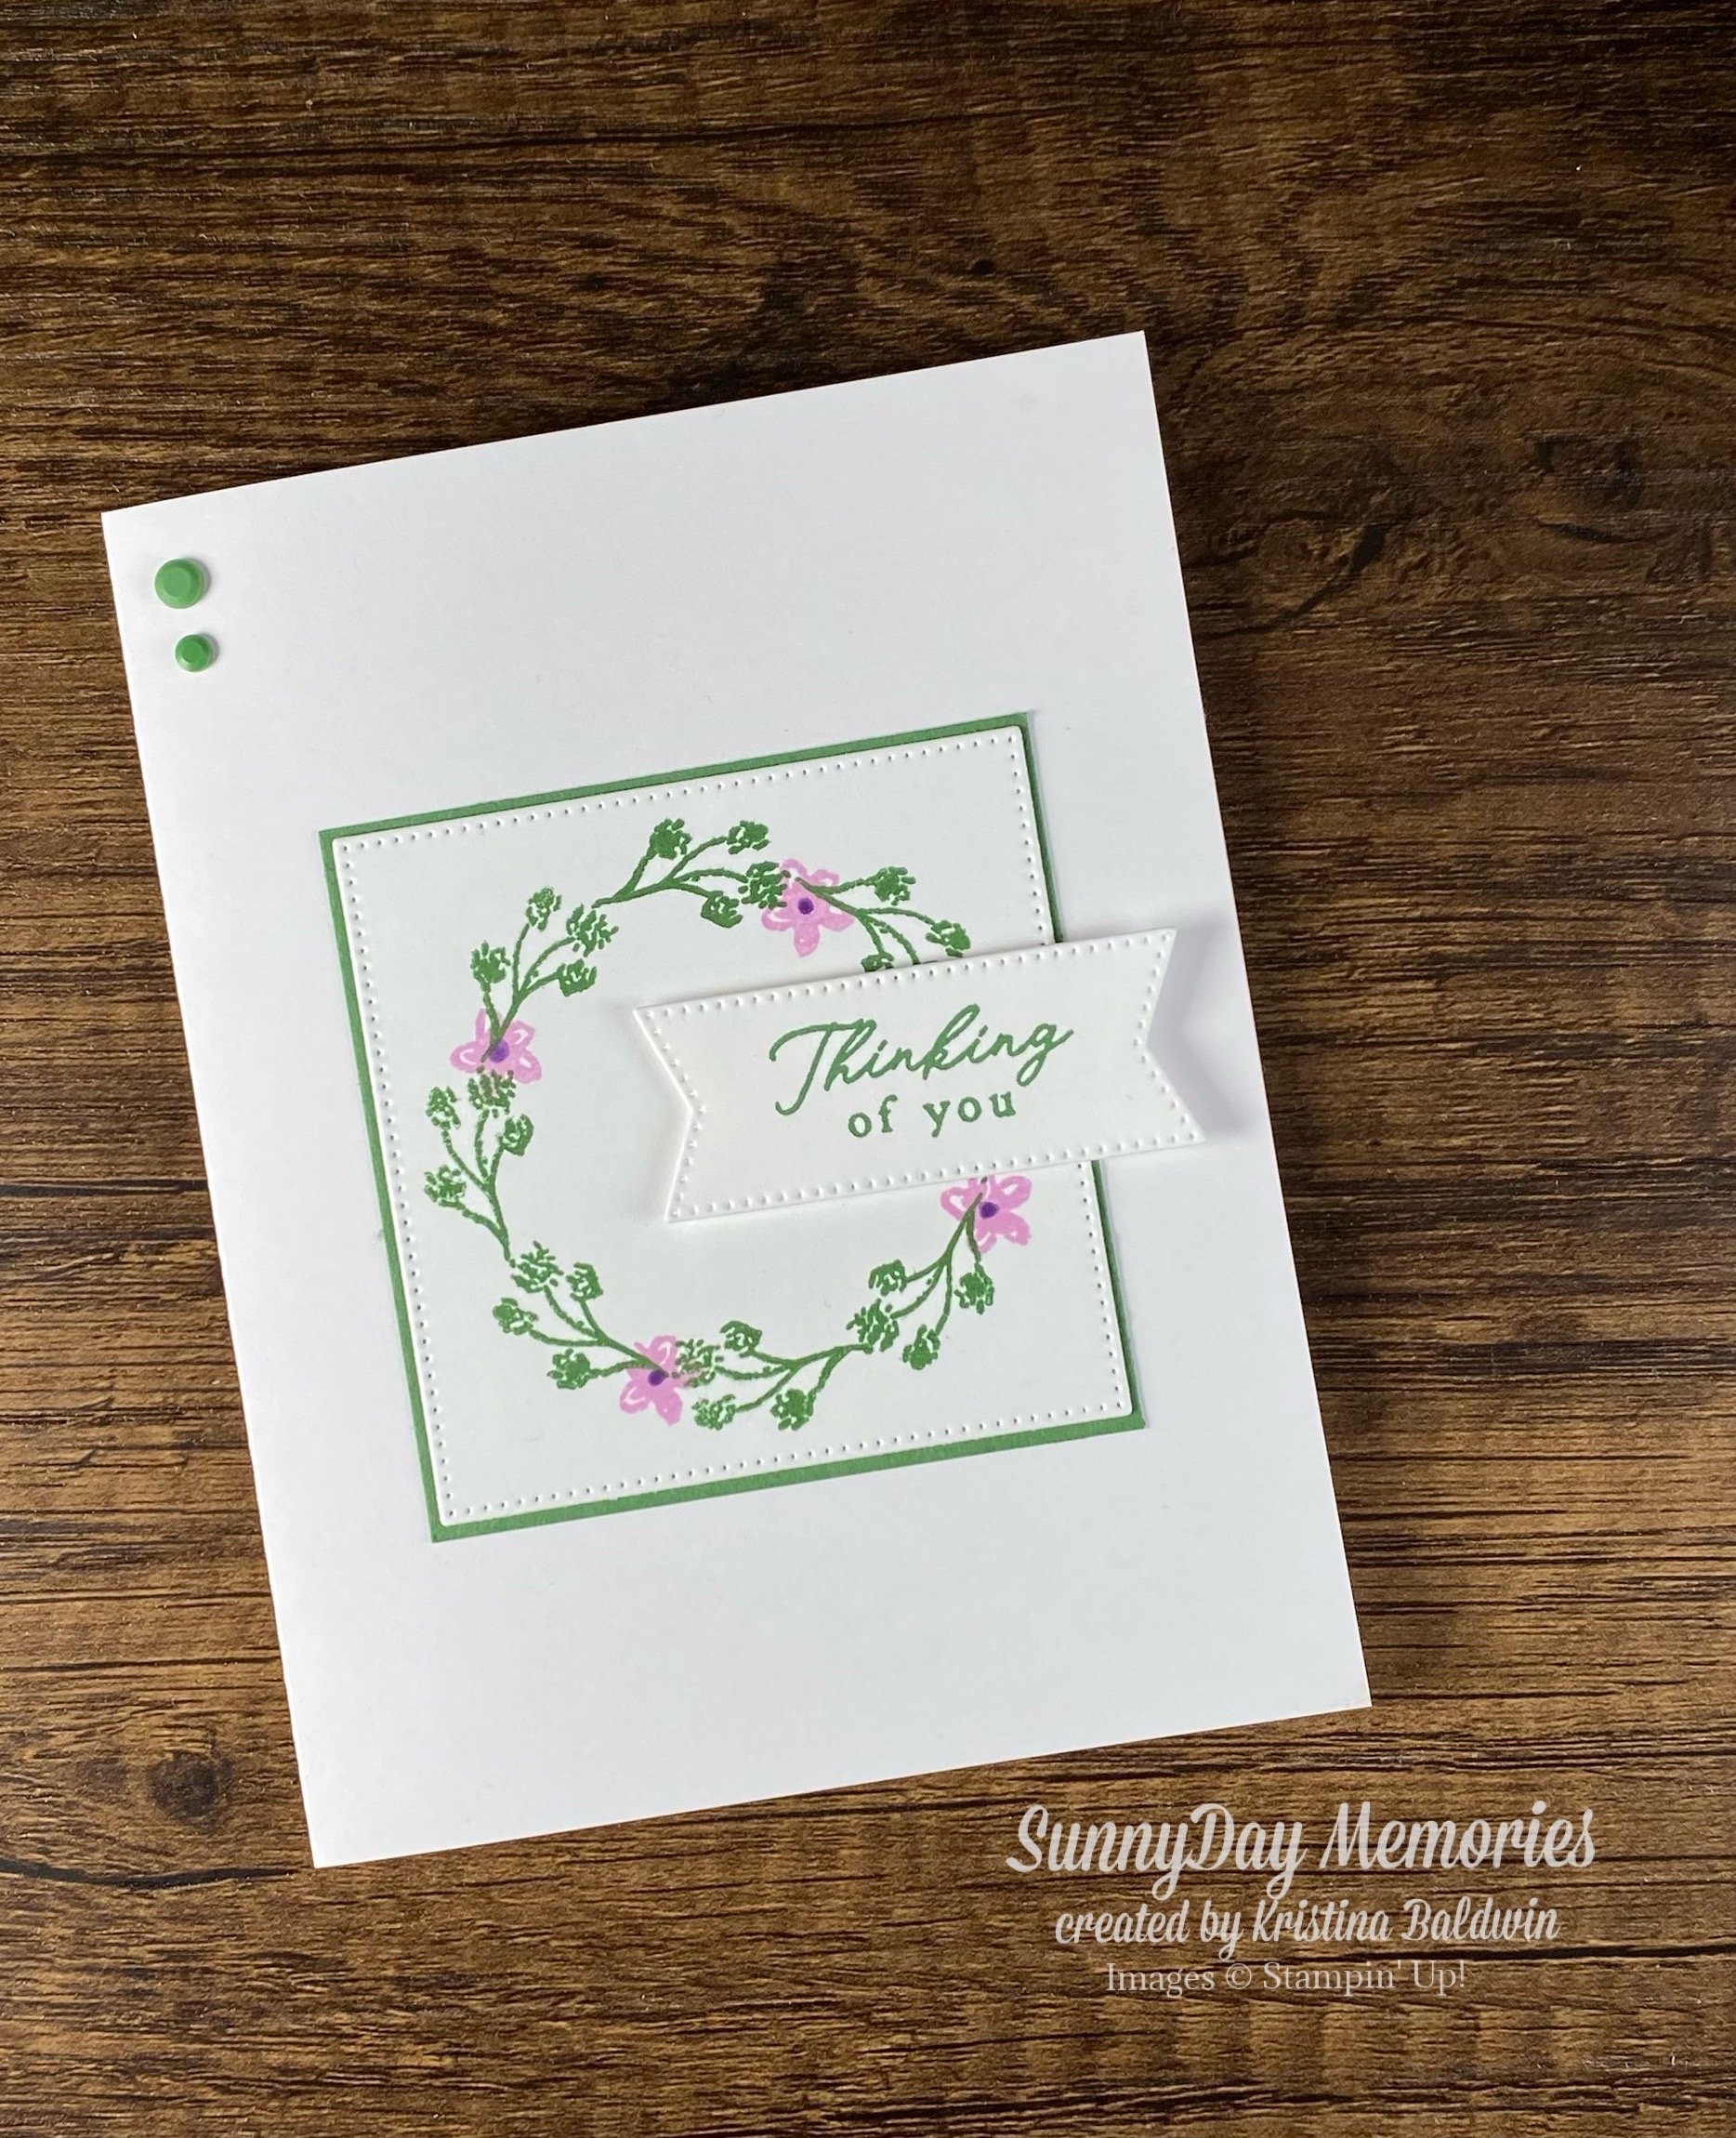
I took the wreath I built from the 12 Days of Crafting Advent Calendar Stamp Set and created this card with a clean and simple design. In the video I stamped the wreath in Garden Green ink. I then added the little flowers in Highland Heather ink. I dotted each flower center with the Gorgeous Grape Blends. And of course I couldn’t resist using my favorite die set—Stylish Shapes—for the card.
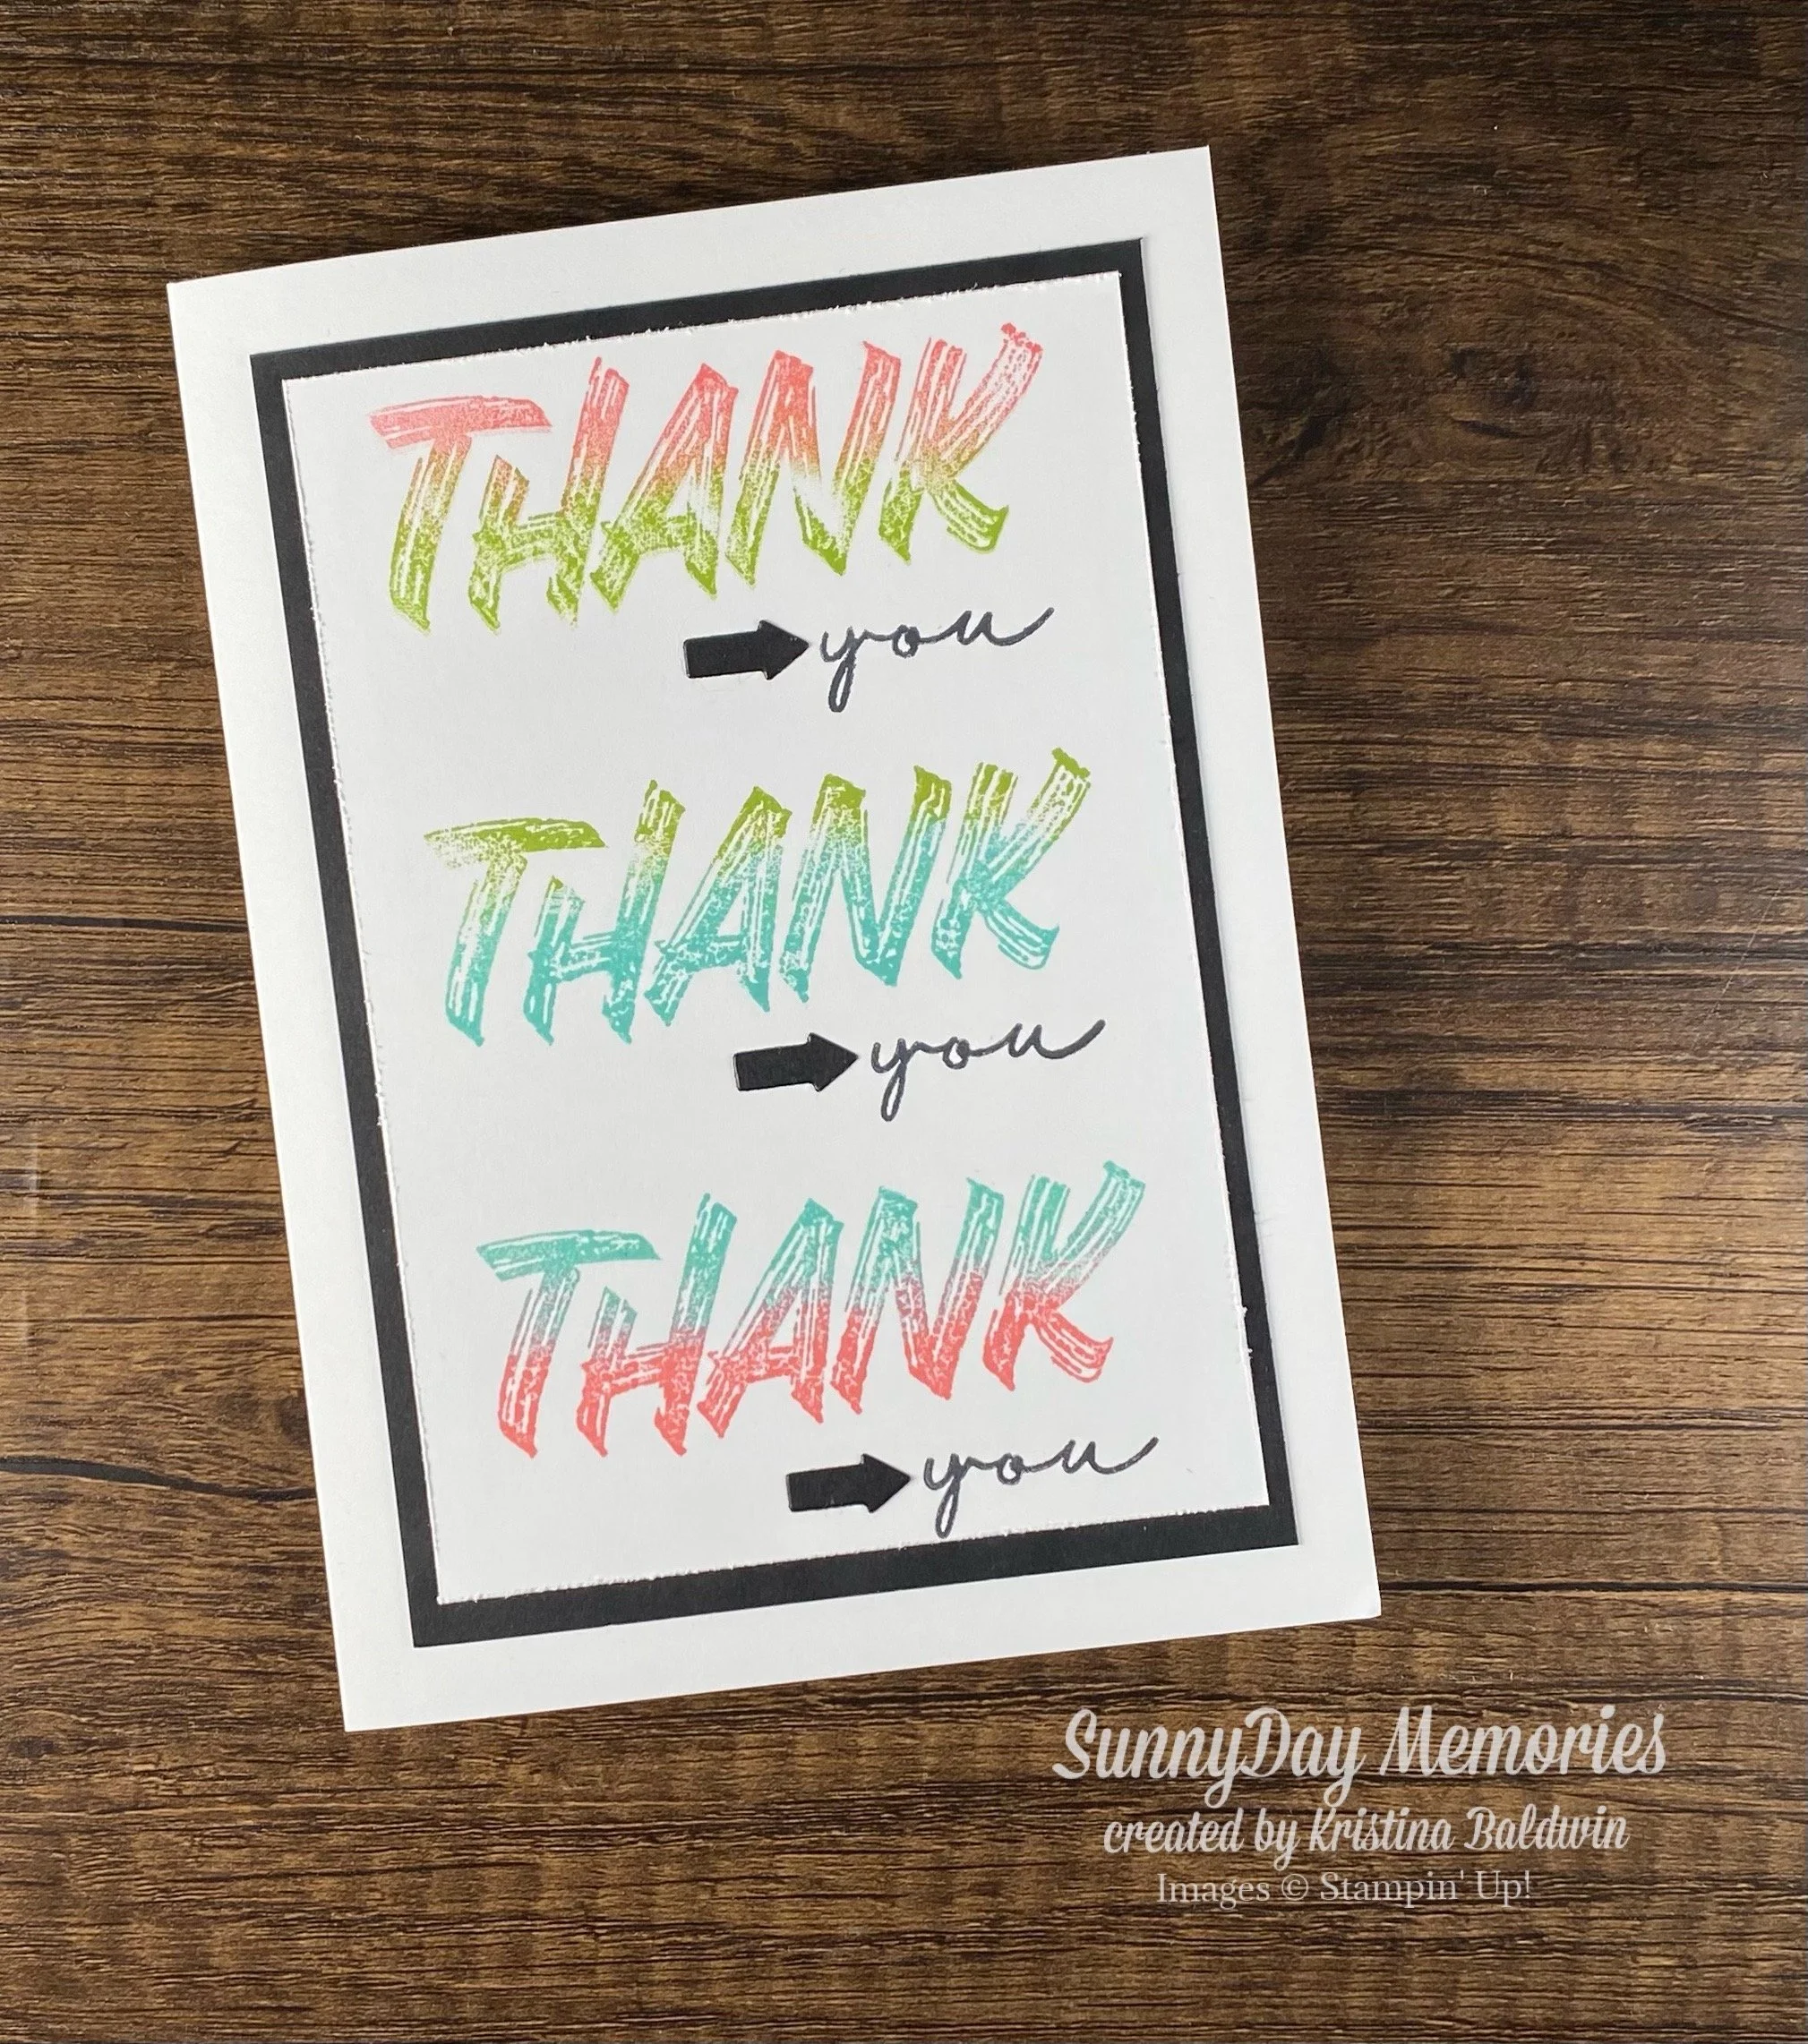
I made my Ombre Thank You Card into a 5” x 7” card so that I could keep all 3 stamped sections together. Similar to the wreath card, I kept the design clean and simple. I added a black mat behind the stamped piece. I also die-cut the arrows from Just a Note Dies. This die-set is also discounted in the Last Chance Section. Once it’s gone, it’s gone for good so be sure to grab it soon! The colors I used to stamp with were: Coastal Cabana, Granny Apple Green and Flirty Flamingo.
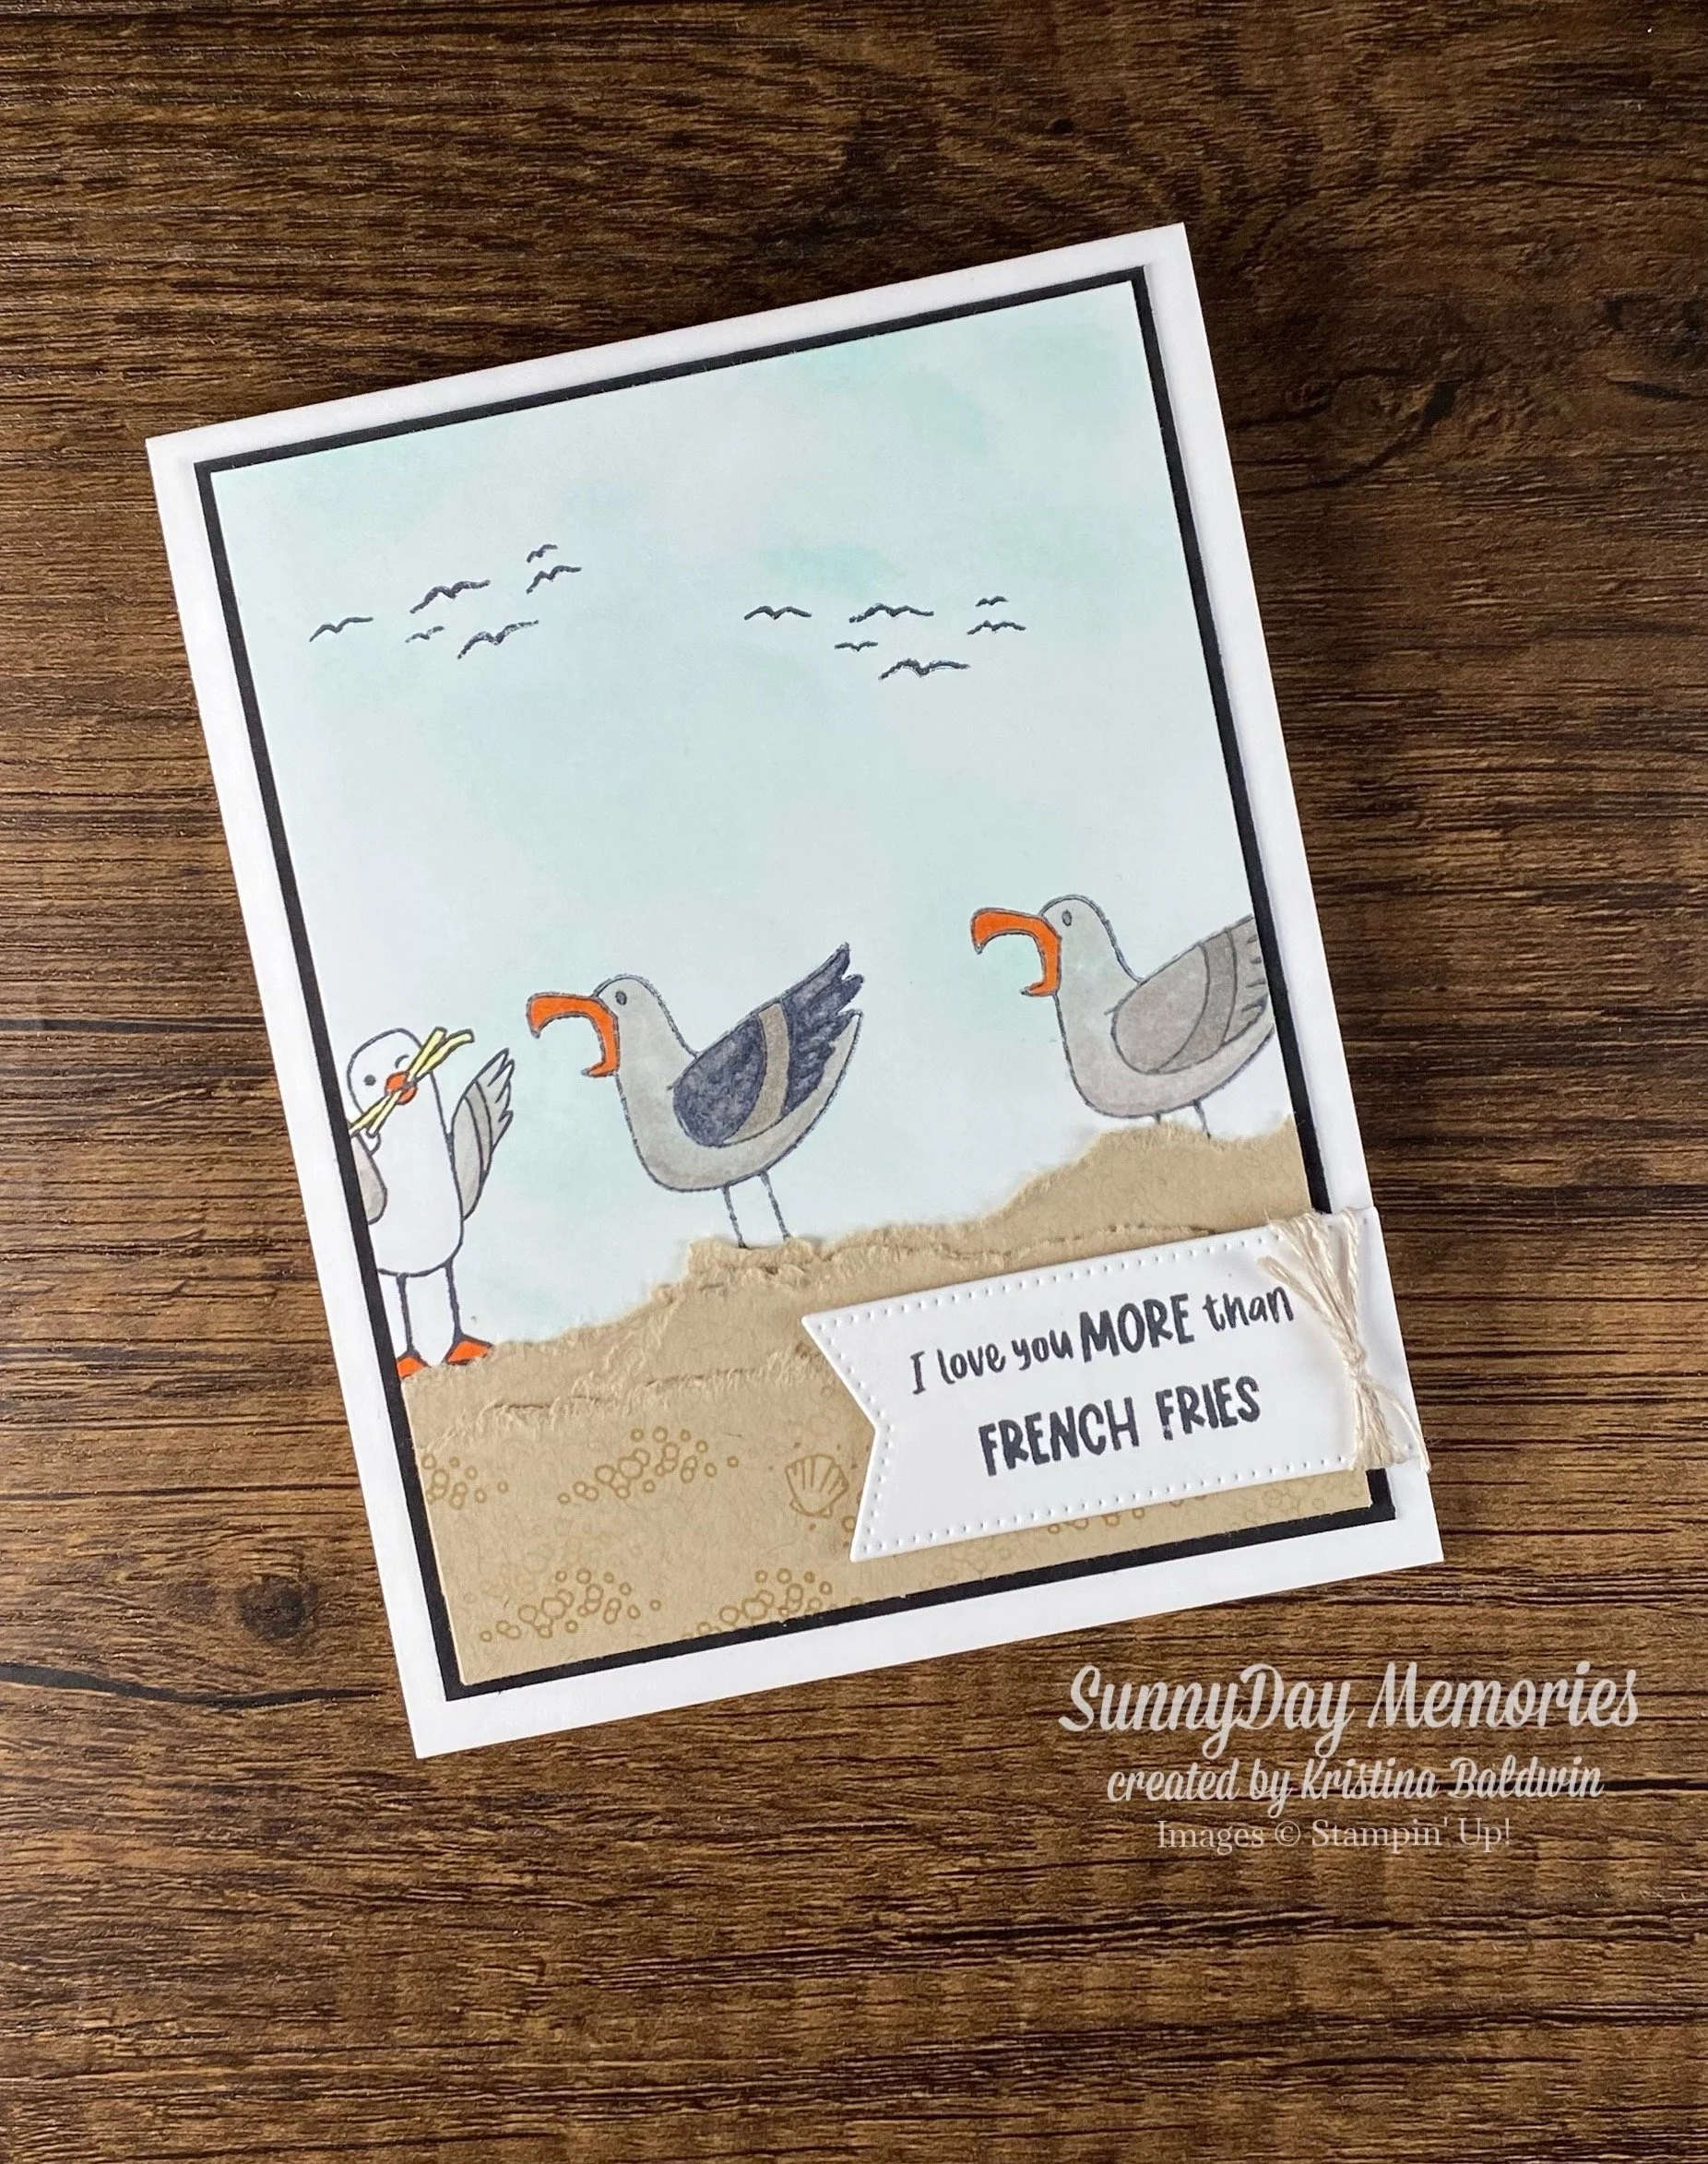
Finally for my Mirror Stamping card, I used one of last year’s Sale-a-Bration sets—Friendly Seagulls—to create my card. I used a Blending Brush and Pool Party ink to create my sky background. And then stamped tone-on-tone for the sand using Crumb Cake Cardstock and ink. Tearing the cardstock made for a more realistic look of sand for my card. If you’ve never tried that technique, I highly recommend it! Quick and easy. Plus, it adds some nice texture to your project. Again, I pulled in my favorite Stylish Shapes Dies to add the sentiment.
Feeling inspired to try out a stamping alignment tool? If you’d like to get Stampin’ Up!’s Stampin’ Positioner for FREE, I’d love to have you join my team. But if you’re just going to wait for it to be available for everyone, that’s great too. Either way I’d love to know which of the 6 must-know techniques for the New Stampin’ Positioner was your favorite!