Here is a fabulously quick and easy decoration and/or gift.
First, let’s meet our cast of characters:
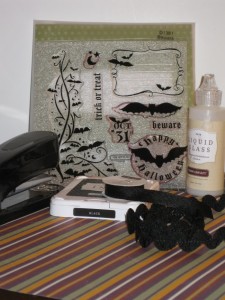
- Beware Stamp Set D1381
- Enchanted Level 2 Paper Packet X7087B
- Black Stamp Pad Z2105
- Liquid Glass Z679
- Pivot Point Stapler Z1009
- Colored Staples Z1010 (if you don’t have any)
- Black Ribbon Rounds Z1034 (note: black ricrac is not CTMH)
STEP 1: STAMPING
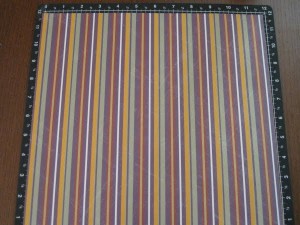
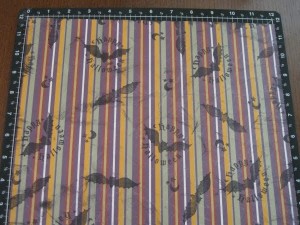
Start with a 12×12 sheet of paper. If you’d like to give it a little extra pizzazz, stamp it up like my example below. I also added some inking all over the paper to give it more of that Halloween feeling 🙂
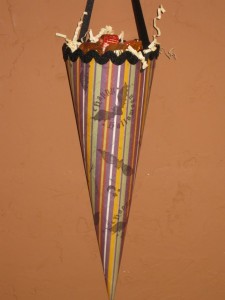
STEP 2: PREPARING THE CONE
Roll up your paper so that it forms a cone shape. Then staple it together at the top. You can continue to staple the cone together, but I chose to use some Liquid Glass along the remainder of the seam.
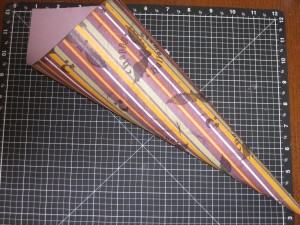
Trim the excess paper off of the top so that it looks pretty. Note: no need to be precise about it as we’ll fix that next 😉
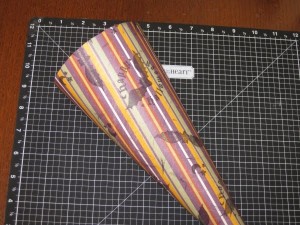
STEP 3: DECORATE THE CONE
Using Liquid Glass around the top of the cone, place a festive ribbon along edge to give it a more finished look. Punch 2 holes and tie another ribbon through the holes (I tied mine in knots on the inside so that they’d be hidden) to create a hanger for your cone. Fill it up with goodies of your choice and enjoy!