

These 3D paper pumpkins are really fun and quite easy to make. And you just gotta love that there are not a lot of supplies that are needed to complete them. Plus, these cuties can be used to decorate for Halloween and Thanksgiving!
So with that, let’s meet our Cast of Characters:
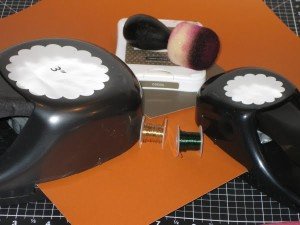
- Scallop Punch (circle or oval)
- Autumn Terracotta (1270) and Cocoa Cardstock (X5642)
- Foam Tool (optional) Z1090
- Cocoa Stamp Pad (optional) Z2114
- Decorative Wire
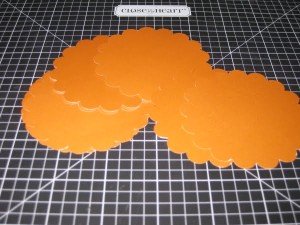
STEP 1: PUNCH OUT YOUR SUPPLIES
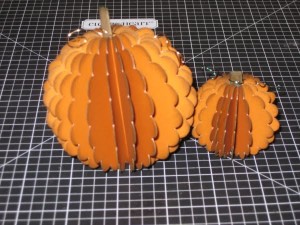
You’ll want to punch out several of your scallop circles or ovals. For your reference, with my large pumpkin (3″) I did 22 circles and with my small pumpkin (1″) I did 20. The number is fairly arbitrary because you can certainly get by with doing less and you can completely add more. It all depends on how full you wish for your pumpkin to look once completed.
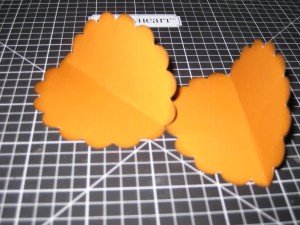
STEP 2: PREPARING YOUR PUNCH OUTS
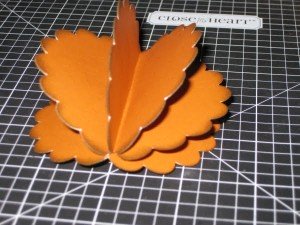
Next (if you desire) you can sponge ink around the edges of your punch outs to give your completed pumpkin more depth. Then you’ll want to fold each circle (or oval) in half. Note: aim to fold each the same way; for example if you end up folding in the middle of the scallop on your first one, do this on all of them. You’ll understand with the next step 😉
STEP 3: PUTTING THE PUMPKIN TOGETHER
Now you’ll want to adhere the halved circles (or ovals) back to back. Be sure to line up the scallops the best you can.
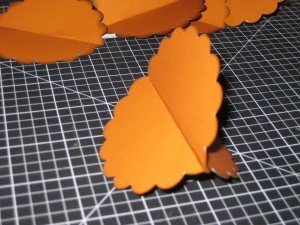
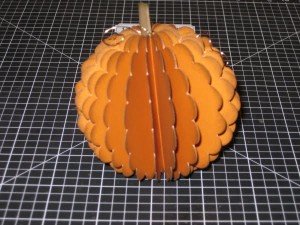
Continue adhering until you have your desired fullness. Then adhere the final backs to each other so you form a complete pumpkin.
STEP 4: FINISHING TOUCHES
Now for the stem. You’ll wish to measure the height of your pumpkin and then add about 1/2″ to the length you cut your paper. For my larger pumpkin I cut some Cocoa CS 1″ x 3-1/2″ and for the smaller one I did 1″ x 2″. You’ll then roll (or do tight folds) this paper and insert in the center of your pumpkin. For some extra pizzazz, you can add some decorative wire or even punch or stamp some leaves. It’s completely up to you!
The beauty of this project is you can make any size you want…you could make yourself a whole pumpkin patch if you so desired.
Agree!! Thanks for idea and tutorial! Happy Thanksgiving day 🙂
Excellent! I never would have thought of using my scallop circle for this – very cute.