

Last week Close to My Heart shared a blog post that I feel shows perfectly how intertwined techniques for scrapbooking & cardmaking can truly be. While they were sharing the techniques for scrapbooking, I have no doubt you’ll see just how great these are on a smaller scale–for cardmaking, too! That’s why I’m sharing it here with you today.
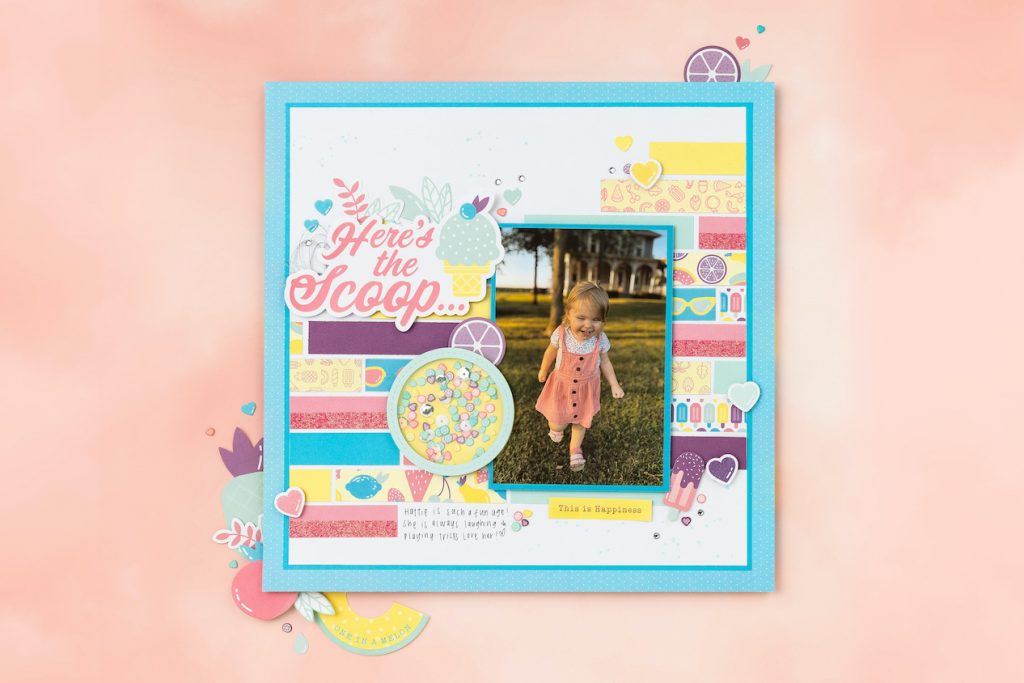
This bright and fun, summer themed page came together with scraps of paper, stickers, and a shaker window that is easier to assemble than it might look. Let’s start by talking about the base page and build our way up from there.
Our base page is a 12″ x 12″ patterned paper from the Tutti Frutti collection. Layered on top of that patterned paper, creating a framed canvas for us to work on, is an 11″ x 11″ piece of Capri cardstock and a 10¾” x 10¾” piece of White Daisy cardstock. Both of these sheets are included in the Tutti Frutti coordinating cardstock.
Choosing the right colors and designs for a scrapbook page couldn’t be simpler than when you are working with one of our paper collections, where all of that coordinating work has already been done for you. Our patterned papers, cardstock, and embellishments are designed and paired together so you can focus on the more important part of scrapbooking—telling and preserving your story.
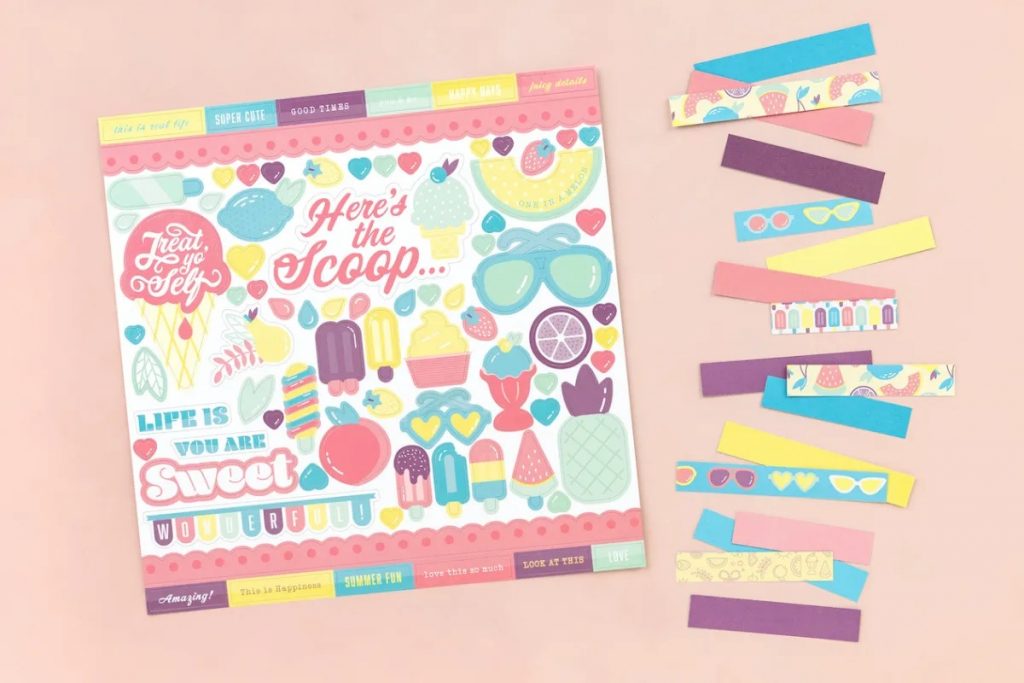
The paper pieced background we built for this scrapbook page is a great way to use a lot of different colors and patterns together. It’s a great idea for any project where you just have too many favorite designs to choose from or you have scraps left over from other projects. All of the strips we used are different lengths, but they’ve all been made the same width (ours are ½” wide). When attaching the strips, we made a point of not lining up the breaks, much like a brick or tiled wall. Working with ½” wide strips also opens the option of incorporating zip strips into the design. (Zip strips are the ½” additional accent paper along the top of each sheet of patterned paper.)
As you build a background like this one, add some visual movement by not completing all of the rows of paper strips along the top or bottom, and from opposite sides. Notice how we started the top rows along the right side of the page and the bottom rows along the left side of the page. As we scan the page from left to right (the way the eye naturally looks at these types of things), our eyes are drawn to the bottom left, guided to the journaling, and then to the photo.
Our eyes will naturally rest on the photo because it’s matted on a solid cardstock color, giving our brains a chance to take a break from the more active elements of the page.
The circle shaker window is one of those active elements on this page that helps draws attention to the photo. A shaker window was an easy way to include a layer of playfulness that our theme called for. And the truth is, with the right set of materials, shaker windows are not hard to make, at all!
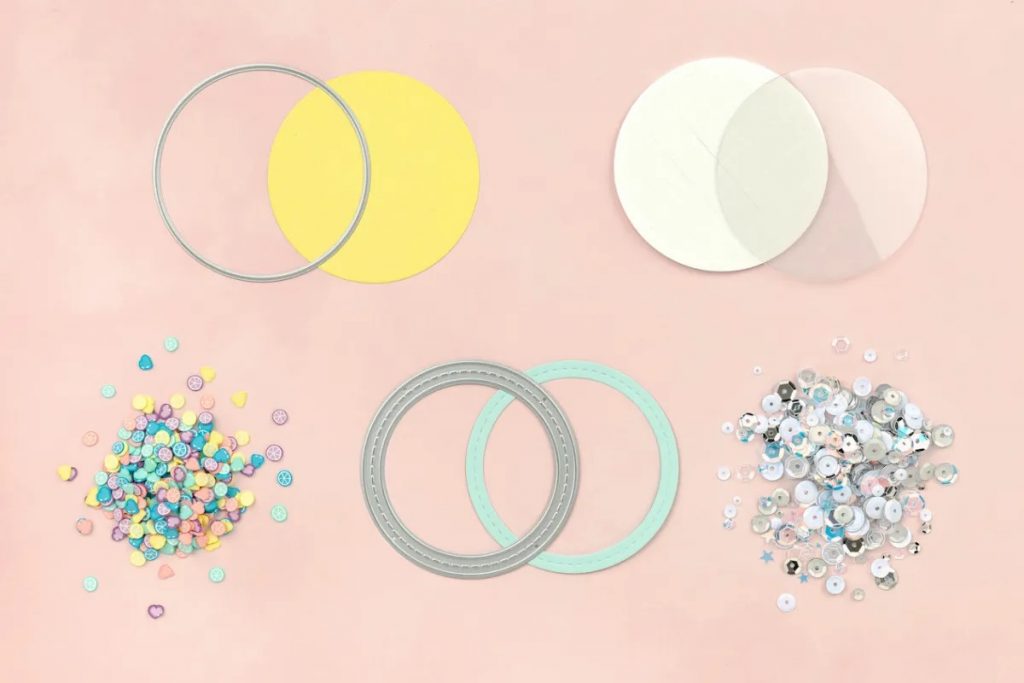
Here’s what you need:
Circle Shaker Window Thin Cuts
Circle Shaker Window Foam + Acetate
Patterned paper or cardstock for the base and frame (we used Lemonade and Mint cardstock)
Filling of your choice (we used Tutti Frutti mini shapes and Silver loose sequins)

Assembling a shaker window:
- Die cut a base and frame out of paper, using the shaker window dies.
- Carefully pull the circle foam tape off the backing sheet it comes on and attach it to the perimeter of your paper base.
- Add your choice of filling to the center of your base. Don’t add too much, so there is enough room for movement once the shaker is complete.
- Expose the adhesive on the top of the circle foam tape and attach the circle acetate.
- Complete the window by adding the die cut frame, covering the foam tape.
- Attach the shaker window to your project!
While you may be channeling your inner artist to create scrapbook pages, remember that it doesn’t have to be difficult! Just take one scoop of whimsy, one scoop of coordinating products, and you’ve got a recipe for enough creative fun to help you accomplish the most important part of all: preserving your memories!
But don’t forget these techniques aren’t exclusively for scrapbooking! While CTMH shows you how you can make some amazing scrapbook layouts utilizing these techniques, you could also use them for creating handmade cards. That’s the beauty of scrapbooking and cardmaking. They go hand in hand! So many of the techniques you enjoy are techniques for scrapbooking & cardmaking alike!